By: Josiah Huckins - 9/16/2024
minute read
Ok, this is one of my favorite projects. I'm on a quest to automate everything in the house. Home Assistant has been a huge help in that effort. Along with that, my friend put together an amazing theme.
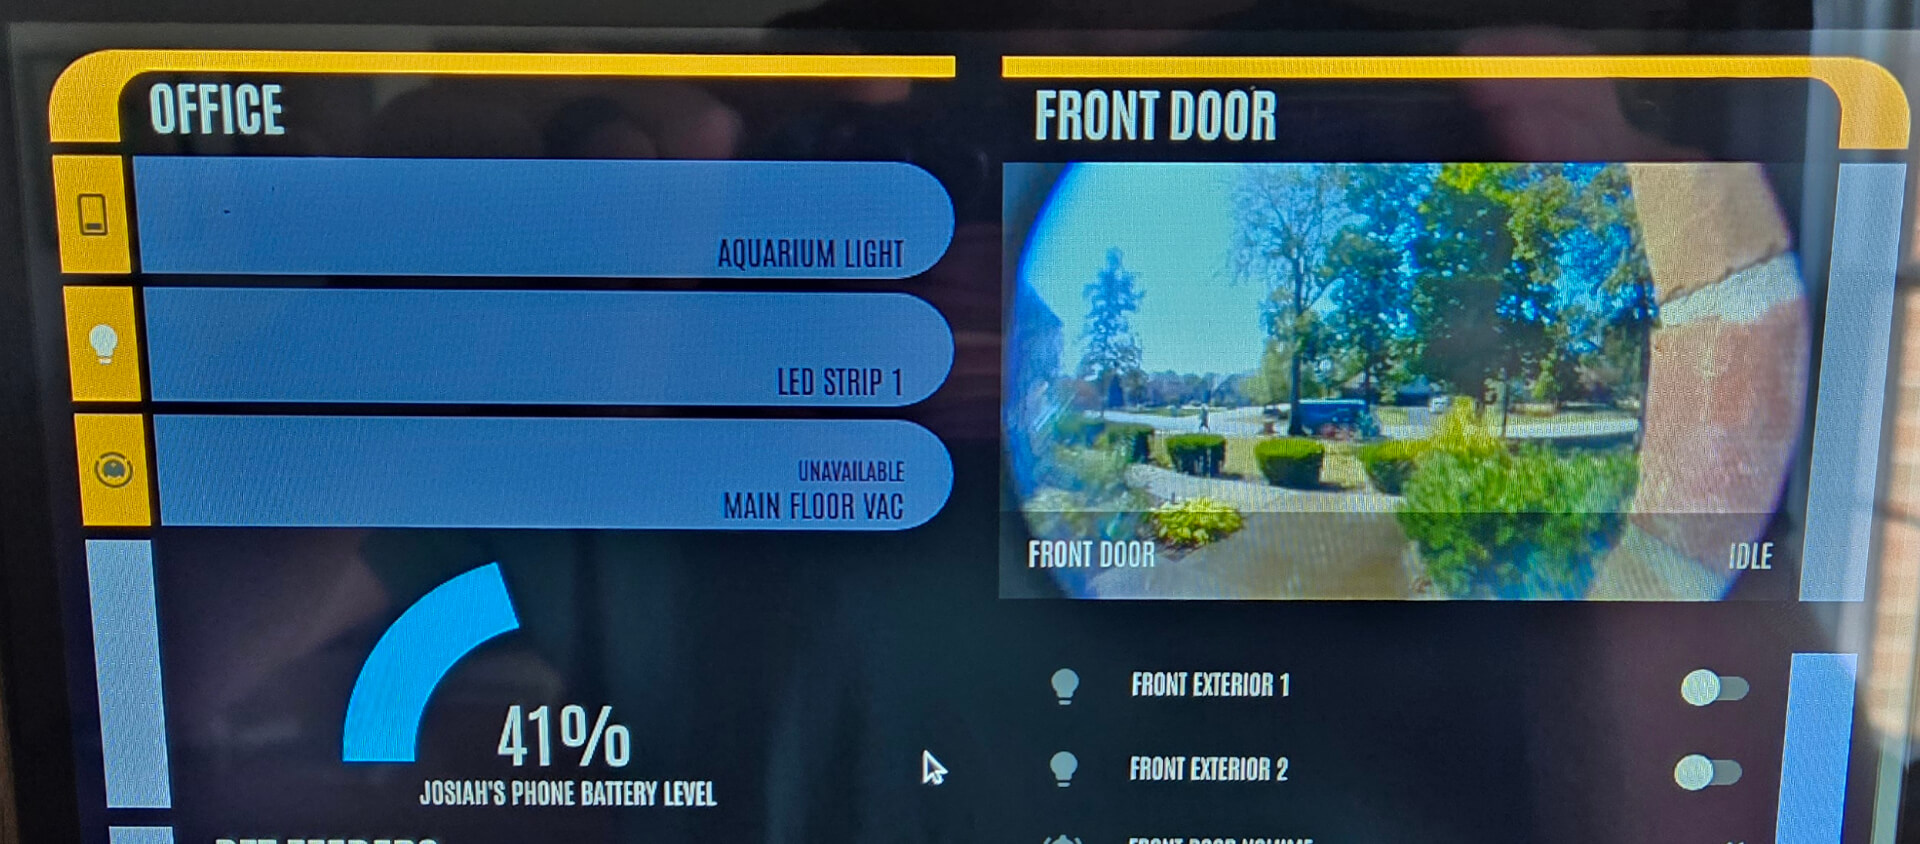
With these tools and some oak wood strips, I made a wall mounted control panel with a Star Trek LCARS themed UI: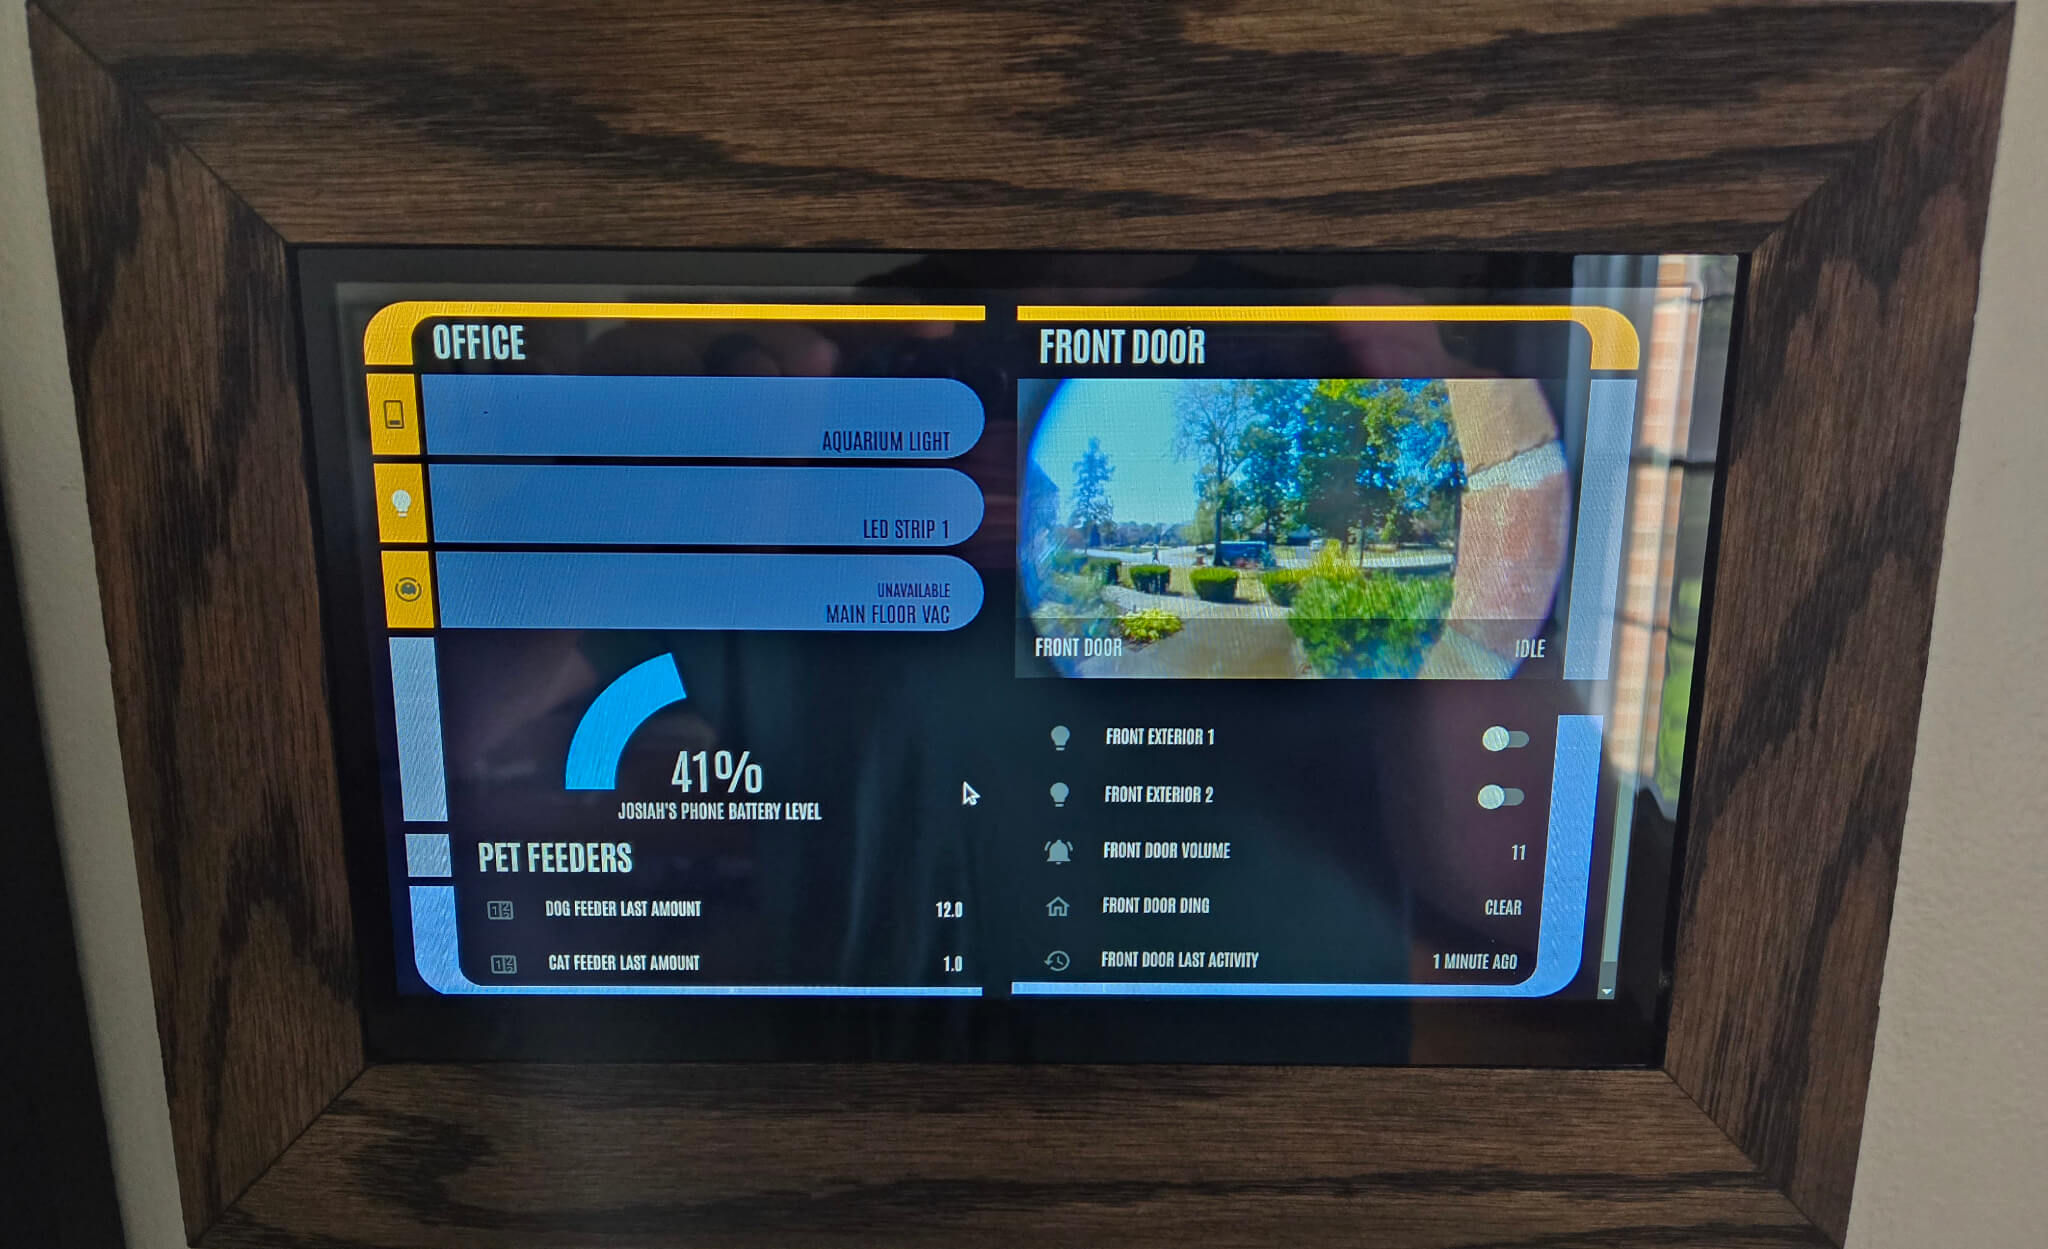
If you use Home Assistant, you can set this up too! Here's how to do it.
Disclaimer, this project involves electrical circuits that output high voltage. I will not be responsible for injury or death.
I hope this doesn't scare you away, if you act safely and turn off circuit breakers, you should be fine but you will be doing this at your own risk. I follow all safety precautions/procedures and have never been in danger doing these types of projects. I've rewired many receptables without issue, as I follow the right safety procedures and residential electrical code requirements. I encourage you to do likewise!
Supplies Needed
You're going to need the following items to build this:| Item | Amount Needed | Where to Buy |
|---|---|---|
| A strip of wood (1/4" x 1" x 4') | 1 | Menards |
| Rubio Monocoat | 1 | Amazon |
| Wood Glue | 1 | Amazon |
| Hand Drill | 1 | Amazon |
| Banana Pi BPI M4 Zero | 1 | Amazon |
| Pi Touch Screen | 1 | Amazon |
| Male USB-C to Female USB | 1 | Amazon |
| Mini HDMI Male to HDMI Female | 1 | Amazon |
| Micro SD Card (16GB) | 1 | Amazon |
| Dual USB 30W and 15A Outlet | 1 | Amazon |
| USB C Power Cable | 1 | Amazon |
| USB C Male to Dual USB Female | 1 | Amazon |
| D-Ring Picture Hangers | 2 | Amazon |
| #2 1/4" Wood Screws | 4 | Amazon |
| Drywall Saw | 1 | Amazon |
| Drywall Screws with Anchors | 2 | Amazon |
| (Optional) Foil Tape | 1 | Amazon |
| (Optional) Wide Electrical Tape | 1 | Amazon |
| (Optional) Miter Box with Saw | 1 | Amazon |
This project assumes you already have a computer, with an available monitor, including a spare HDMI input port. You should also have a keyboard and mouse that connects to a computer via USB.
Section 1: Frame Assembly
To start, we'll build a wood frame. I will try to be as precise as possible. When in doubt, cross check your design with the images below.I listed a miter box with saw in the supplies list above, but a powered miter saw would be ideal for this. Regarding the wood, I recommend getting it from a local store or supplier. Ordering online means you cannot verify if the piece is warped or damaged in some way. Also, it's nice to be able to see the grain patterns before you buy. Some are more beautiful than others and stain will bring out their features.
The dimensions on the product page for the touchscreen are 5.6 x 9.2 x 0.3 inches. We therefore need a frame with the inner dimensions of at least 9 and 3/8 inches wide by 5 and 11/16 inches tall, giving just under a 1/16 inch clearance around inner part of the frame.
We want the touchscreen to fit as tightly as possible in the frame. Cut miters into the wood piece at 45 degree angles, to create 4 sides. If you use a 1" wide piece of wood like the one I provided in the supplies list, two pieces should have an outside edge of 12 and 3/8 inches (and an inner edge of 9 and 3/8 inches). The other two pieces should have an outside edge of 8 and 3/4 inches (and an inner edge of 5 and 11/16 inches).
With that, you can glue the frame together using wood glue. However before you do that, I recommend fitting the pieces around the touchscreen (maybe keep the plastic on the front glass of the screen until full assembly is complete). This will allow you to ensure it fits nicely. If it looks good, apply a light coat of wood glue to the inside miter cut edges of your wood pieces (1/4" thick edge). I prefer a cotton swab or small artists brush for this. On a smooth, level surface, attach the glued edges together to build your frame. It may help to (temporarily) apply some Scotch tape to the front sides of the connected pieces while the glue dries, to keep the edges flush. At this step, I advise you wait 24 hours so the glue can bond and fully dry.
Once the frame is dry, its time to pre-drill the holes for the d-ring hangers and the mounting screws for the touchscreen.
For the d-ring's screw holes, make pencil marks on the shorter sides of the back of the frame, at about halfway between the top and bottom, and 1/2 inch in from the outer edge.
For the touchscreen mount holes, carefully place the screen into the frame (again keeping the plastic on the screen for this section), then mark inside the holes with a pencil. Then remove the screen.
Once you have the markings in place, use the hand drill from the supplies list above and be careful not to drill too deep. It's very easy to drill through 1/4 thick wood. I recommend a depth of 1/8".
With that all done, its time for the best part, staining! You don't have to use Rubio Monocoat of course.
Rubio is great as its a one coat solution and its fumes are safe to breathe. If you use another stain product, be sure to wear a respirator mask rated for the job. Seriously, stain and clear coat products release vapors that can cause nervous system damage if inhaled, so be smart and wear a mask. Allow the piece to dry with good ventilation. Once it dries, apply your clear coat (lacquer or polyurethan) and allow to dry with good ventilation. You may need to sand the piece after applying clear coat with 220 grit sandpaper and apply another coat. Doing this sanding and coating a few times usually results in a nice smooth finish.
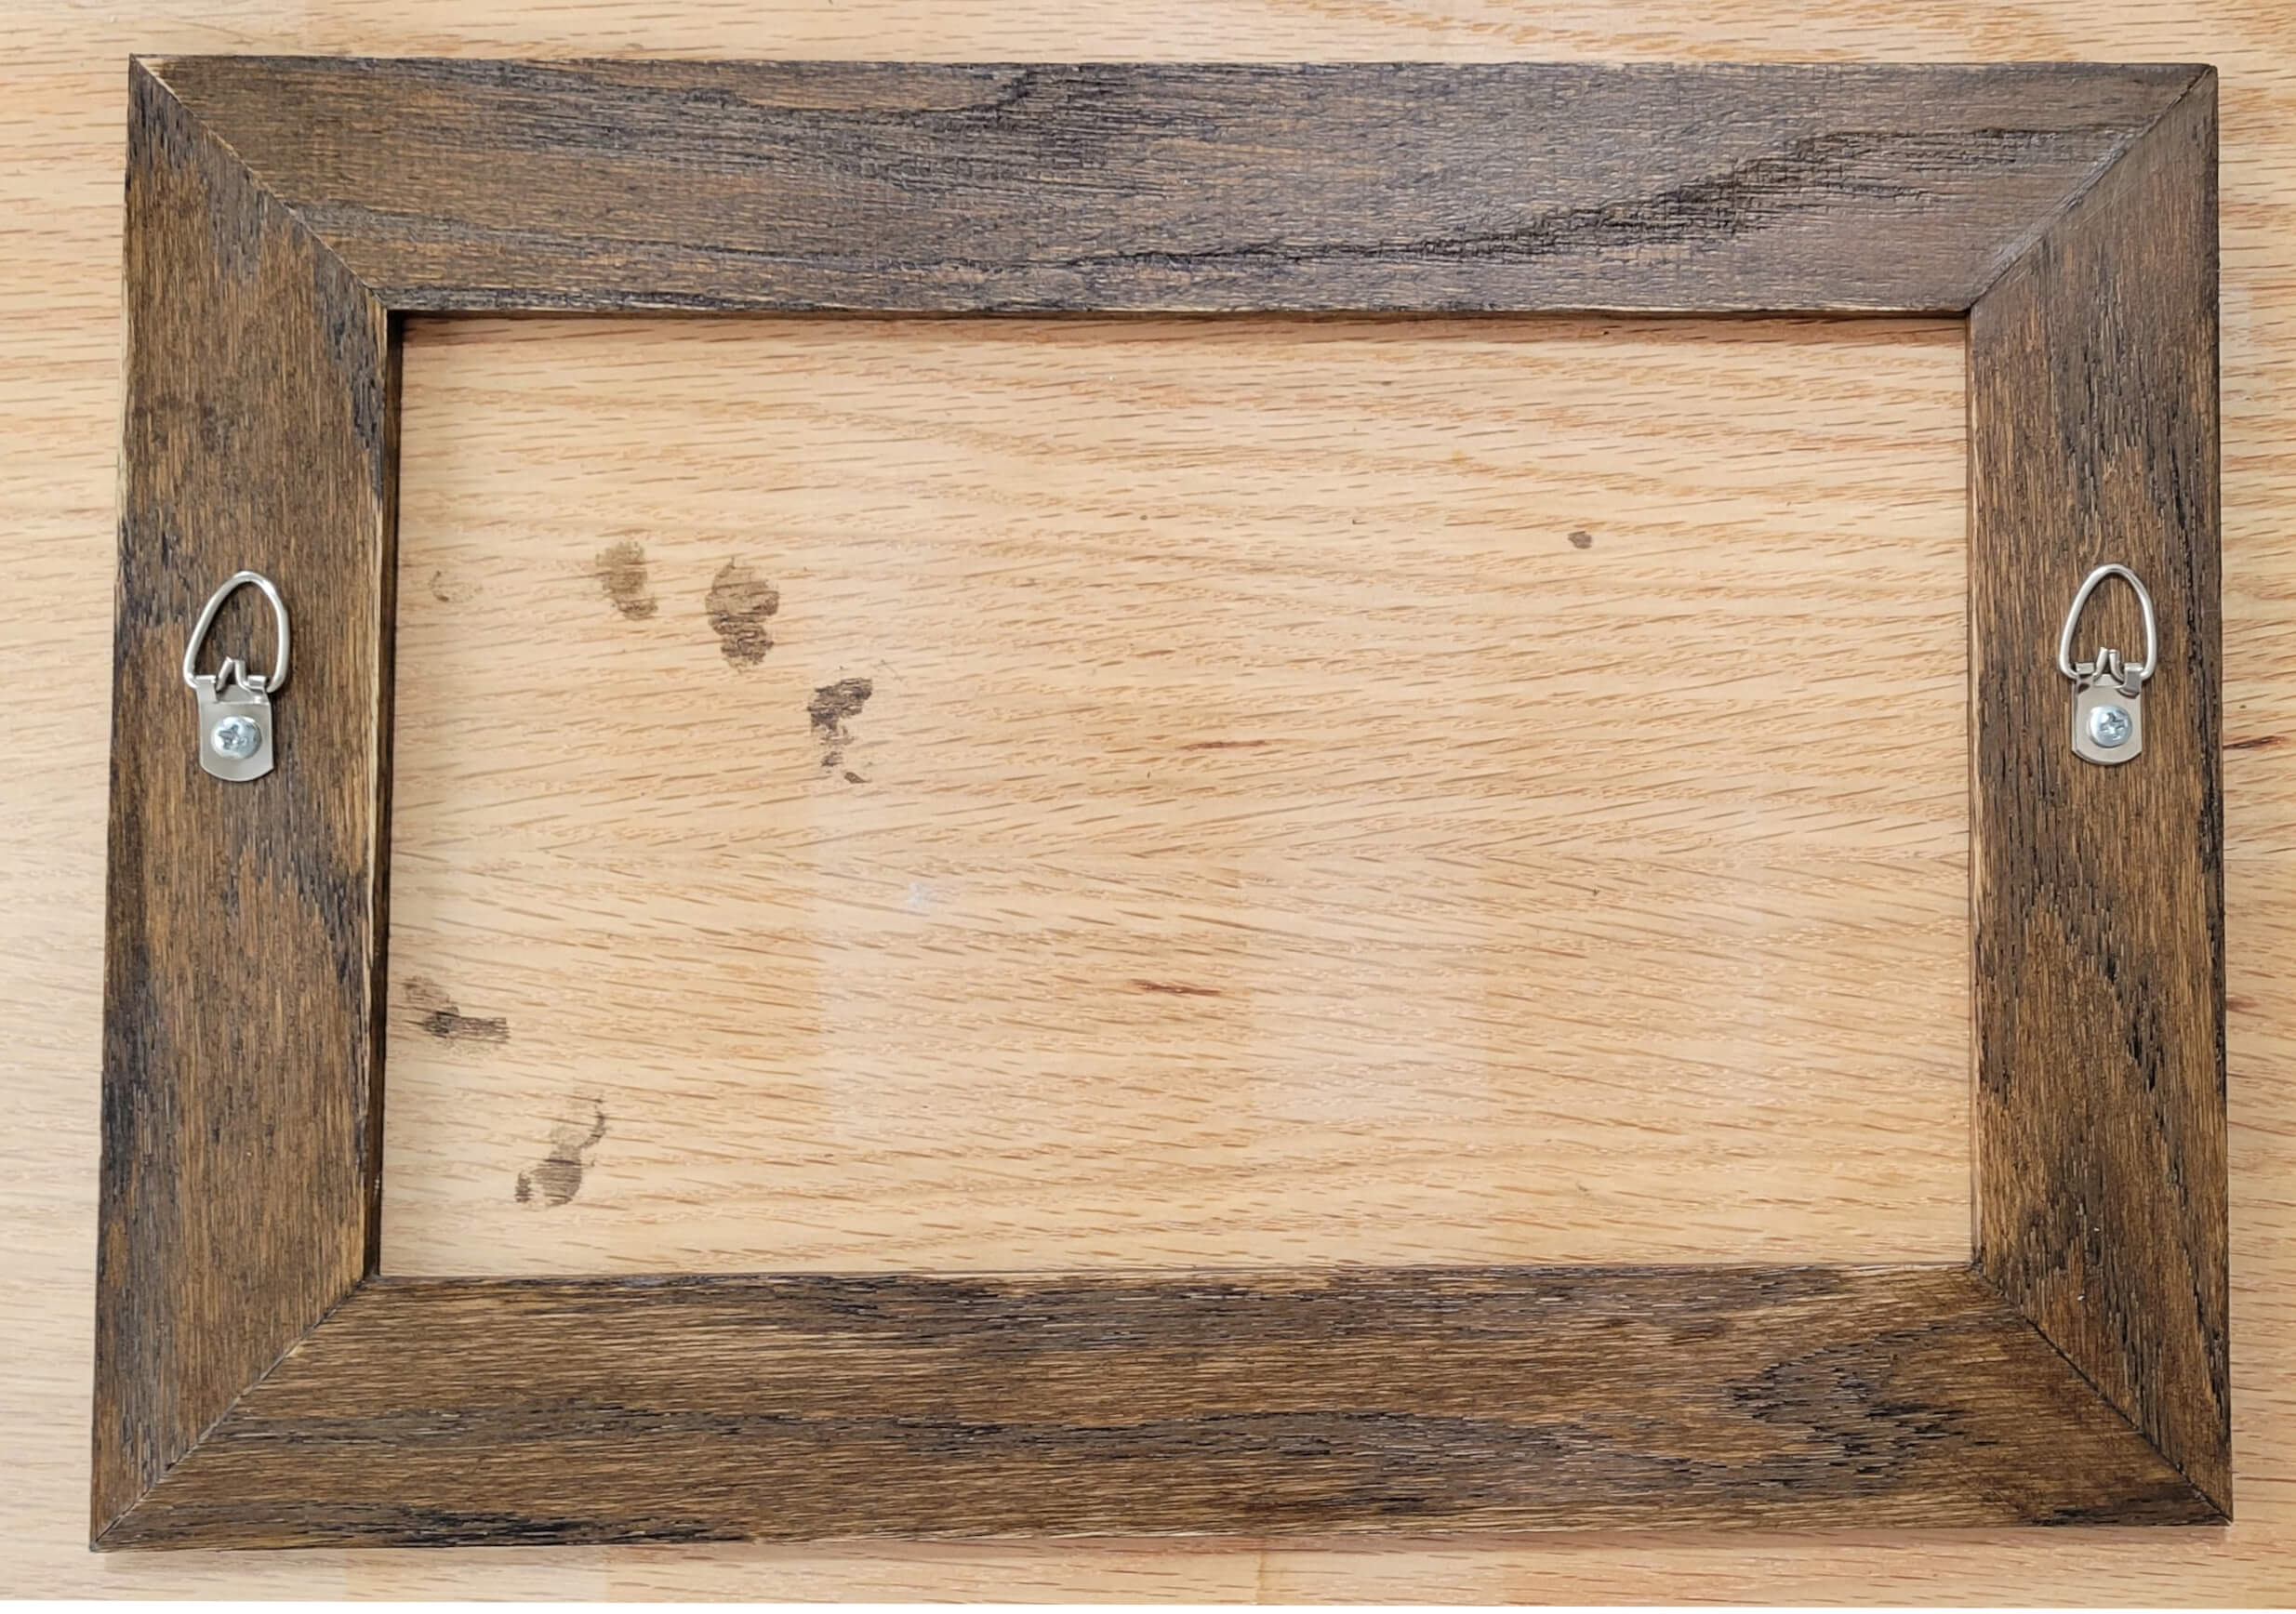
Once the final coat is dry, go ahead and screw in the d-ring hangers. After this step you should have a frame that looks something like this:
Section 2: Screen Installation
Go ahead now and install the screen in the frame. Attach it to the frame using the #2 wood screws.Section 3: Banana Pi Setup
At this part, we configure the Banana Pi operating system. Refer to this diagram for the connections.First we need to prepare the operating system. I highly recommend you follow the instructions for Debian Linux installation here and use one of the images provided here. You'll want to use the latest Debian with the default XFCE desktop environment to follow along with some of the steps below.
Their wiki walks you through installing and booting the OS from the onboard eMMC storage, which is what I did. Though you can boot from the SD card if preferred.
Note, if you use the eMMC storage, be expected to clean out a number of packages to cut down on storage space. More on that below.
Once you have a Linux image on the SD card, insert it into the slot on the pi, then proceed with the following connections.
1. Taking the Mini HDMI Male to HDMI Female cable from the supplies list above, connect it to the HDMI port on the pi and the other end to a computer monitor.
2. Connect the USB C Male to Dual USB Female cable to the USB-C 2.0 port and connect the other ends to a keyboard and mouse.
3. The Banana Pi M4 zero includes 2 heat sinks and a wifi antenna, install them on the pi.
4. Connect the pi to a power source through the USB-C OTG port. Per the documentation, it requires a 5V/3A input. The device will boot via the SD card once it has power supplied, you'll need to go through the steps mentioned above if you want to boot from eMMC.
5. Since the purpose of this is as a Home Assistant wall panel, you'll want to reduce the OS footprint to the bare minimum. You only need SSH, the chromium browser, bananapi-config, the desktop environment and an optional onscreen keyboard. Everything else can be uninstalled via the Software tool found in XFCE under System in the Applications menu, or via the terminal command sudo apt remove <name of package>. You don't have to uninstall everything, but leaving unused default software will consume space. If using the 8GB eMMC storage, you'll want to reclaim as many megabytes as you can. I was able to reduce consumption to just under 6GB.
I will admit, this part of the project may get a bit tedious. I know there are use restricted to browser, kiosk targeted Linux flavors out there. If you get one working with the Banana Pi M4 zero, I would love to hear about it as it would make this part of the project much more efficient.
Section 4: Home Assistant LCARS
This is the fun part! You'll want to install the LCARS theme to your Home Assistant (HA) environment. The ha-lcars project README will walk you through all the details of installation and is the best source for customizing the theme to your taste. Take your time exploring different combinations of cards and layouts.I recommend creating a dedicated dashboard in HA. Your main dashboard might have controls and data views for the entire house, but the wall panel could be specialized with room specific items. You could of course serve your main dashboard from the wall panel, if preferred. Just be aware of who will use it. I created a dashboard named "Wall Panel" which generated the URL path part wall-panel. To access it in HA you would use this path /wall-panel/default_view. I set up the framed panel in the home office, so relevant cards are included in the dashboard.
You should also create a dashboard user. You can do this in HA under /config/users, via the Add User option in the lower right. Leave the administrator option disabled when creating this user. The credentials you create will be used to authenticate to HA from the Banana Pi M4 Zero.
Optionally and to add to the pseudo authenticity of the LCARS wall panel, you may also want to install this kiosk-mode plugin. It "hides the header and/or sidebar drawer in Home Assistant". This will enable your LCARs dashboard to be the only view shown on screen and maximize screen real estate.
Section 5: Wall Panel Final Prep
Going back to the touchscreen, we need to setup the chromium browser to auto start on boot and automatically open the HA dashboard.To have the browser auto start:
1. Open a terminal and enter command xfce4-session-settings, which will open the Session and Startup settings window.
Alternatively, you can open the Applications menu and go to Settings and then open Session and Startup.
2. In the Session and Startup window, go to the Application Autostart tab and click the +Add button.
3. In the window that appears, you should see four fields.
Put Web Browser in the Name field.
Put Launches the web browser in the Description field.
Put chromium --start-fullscreen in the Command field. (This will launch chromium in full screen mode, so the top navigation bar is not visible.)
Finally select on login for the Trigger field. (This will ensure chromium starts upon login to the system.)
5. Next, open chromium, navigate to your HA URL and login via the dashboard user credentials you created above.
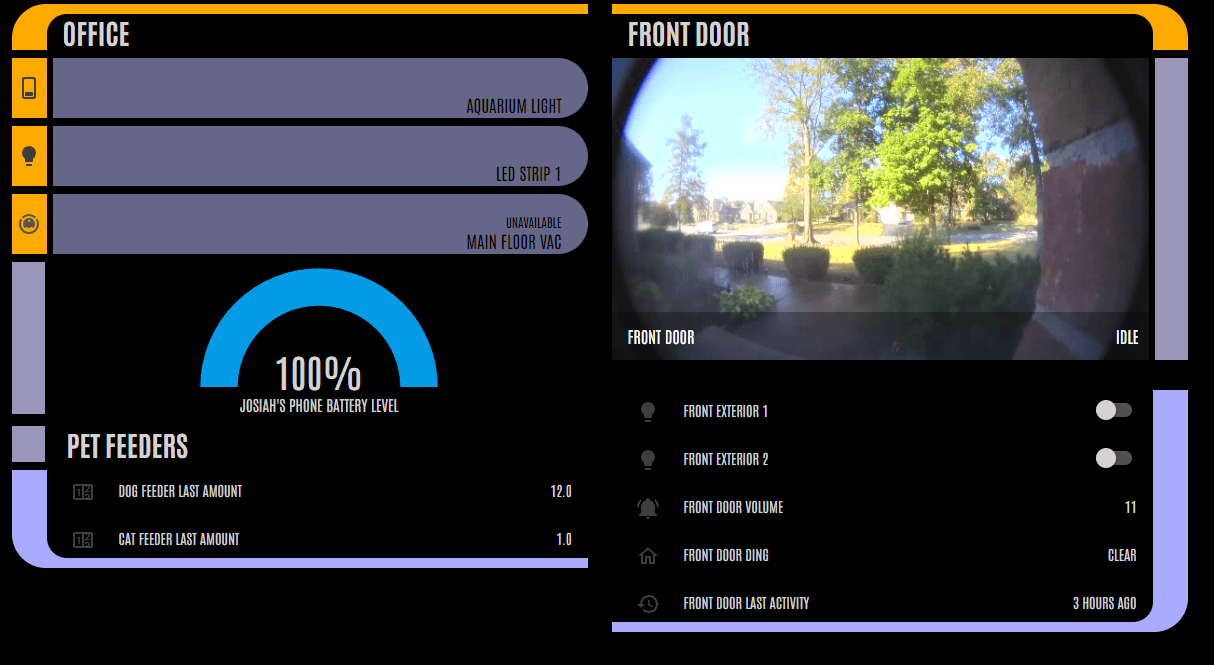
Assuming you created a "Wall Panel" dashboard like I did, change your URL path to /wall-panel/default_view and you should be presented with the custom dashboard. If you installed the kiosk-mode plugin, add the ?kiosk query parameter to just see the custom dashboard. The full URL path and parameter would be: /wall-panel/default_view?kiosk. In my setup, this renders as:
Since HA dashboards are unique to each implementation, you may find that things don't quite line up properly. The good thing is, you can make adjustments later after the wall panel is installed, and without having to make them directly on the panel. Everytime you change the dashboard, HA will display a toast notification to refresh the view with the new changes. I spent some time making adjustments on another computer nearby, and then would just tap the refresh button on the touchscreen to see the updates.
Once you've confirmed that you can render your dashboard, you should set the dashboard URL as the page opened when chromium starts.
1. In chromium go to Settings and then in the search bar type "on startup". The On Startup settings should appear.
2. Select the "Open a specific page or set of pages option".
3. Click the "Add a new page" option and in the Site URL field, provide the full URL to your wall panel dashboard.
With that done, its time to get out the drywall saw for some light home renovation.
Section 6: Preparing Your Wall
We need to supply power to the wall control panel, in a discreet fashion if possible. I advise installing the wall control panel near a light switch or above a power outlet, but be extremely careful! Unless you know where the electrical lines are going, I would install it about 6 inches to the right or left of where your switch/outlet is. You don't want to cut into live electrical lines!In my home office, there was a switch near the entrance. I had replaced this switch during remodeling and knew that the 3-wire power cable ran up from the floor. I decided to install my wall panel above the switch receptacle, giving about a 6" clearance.
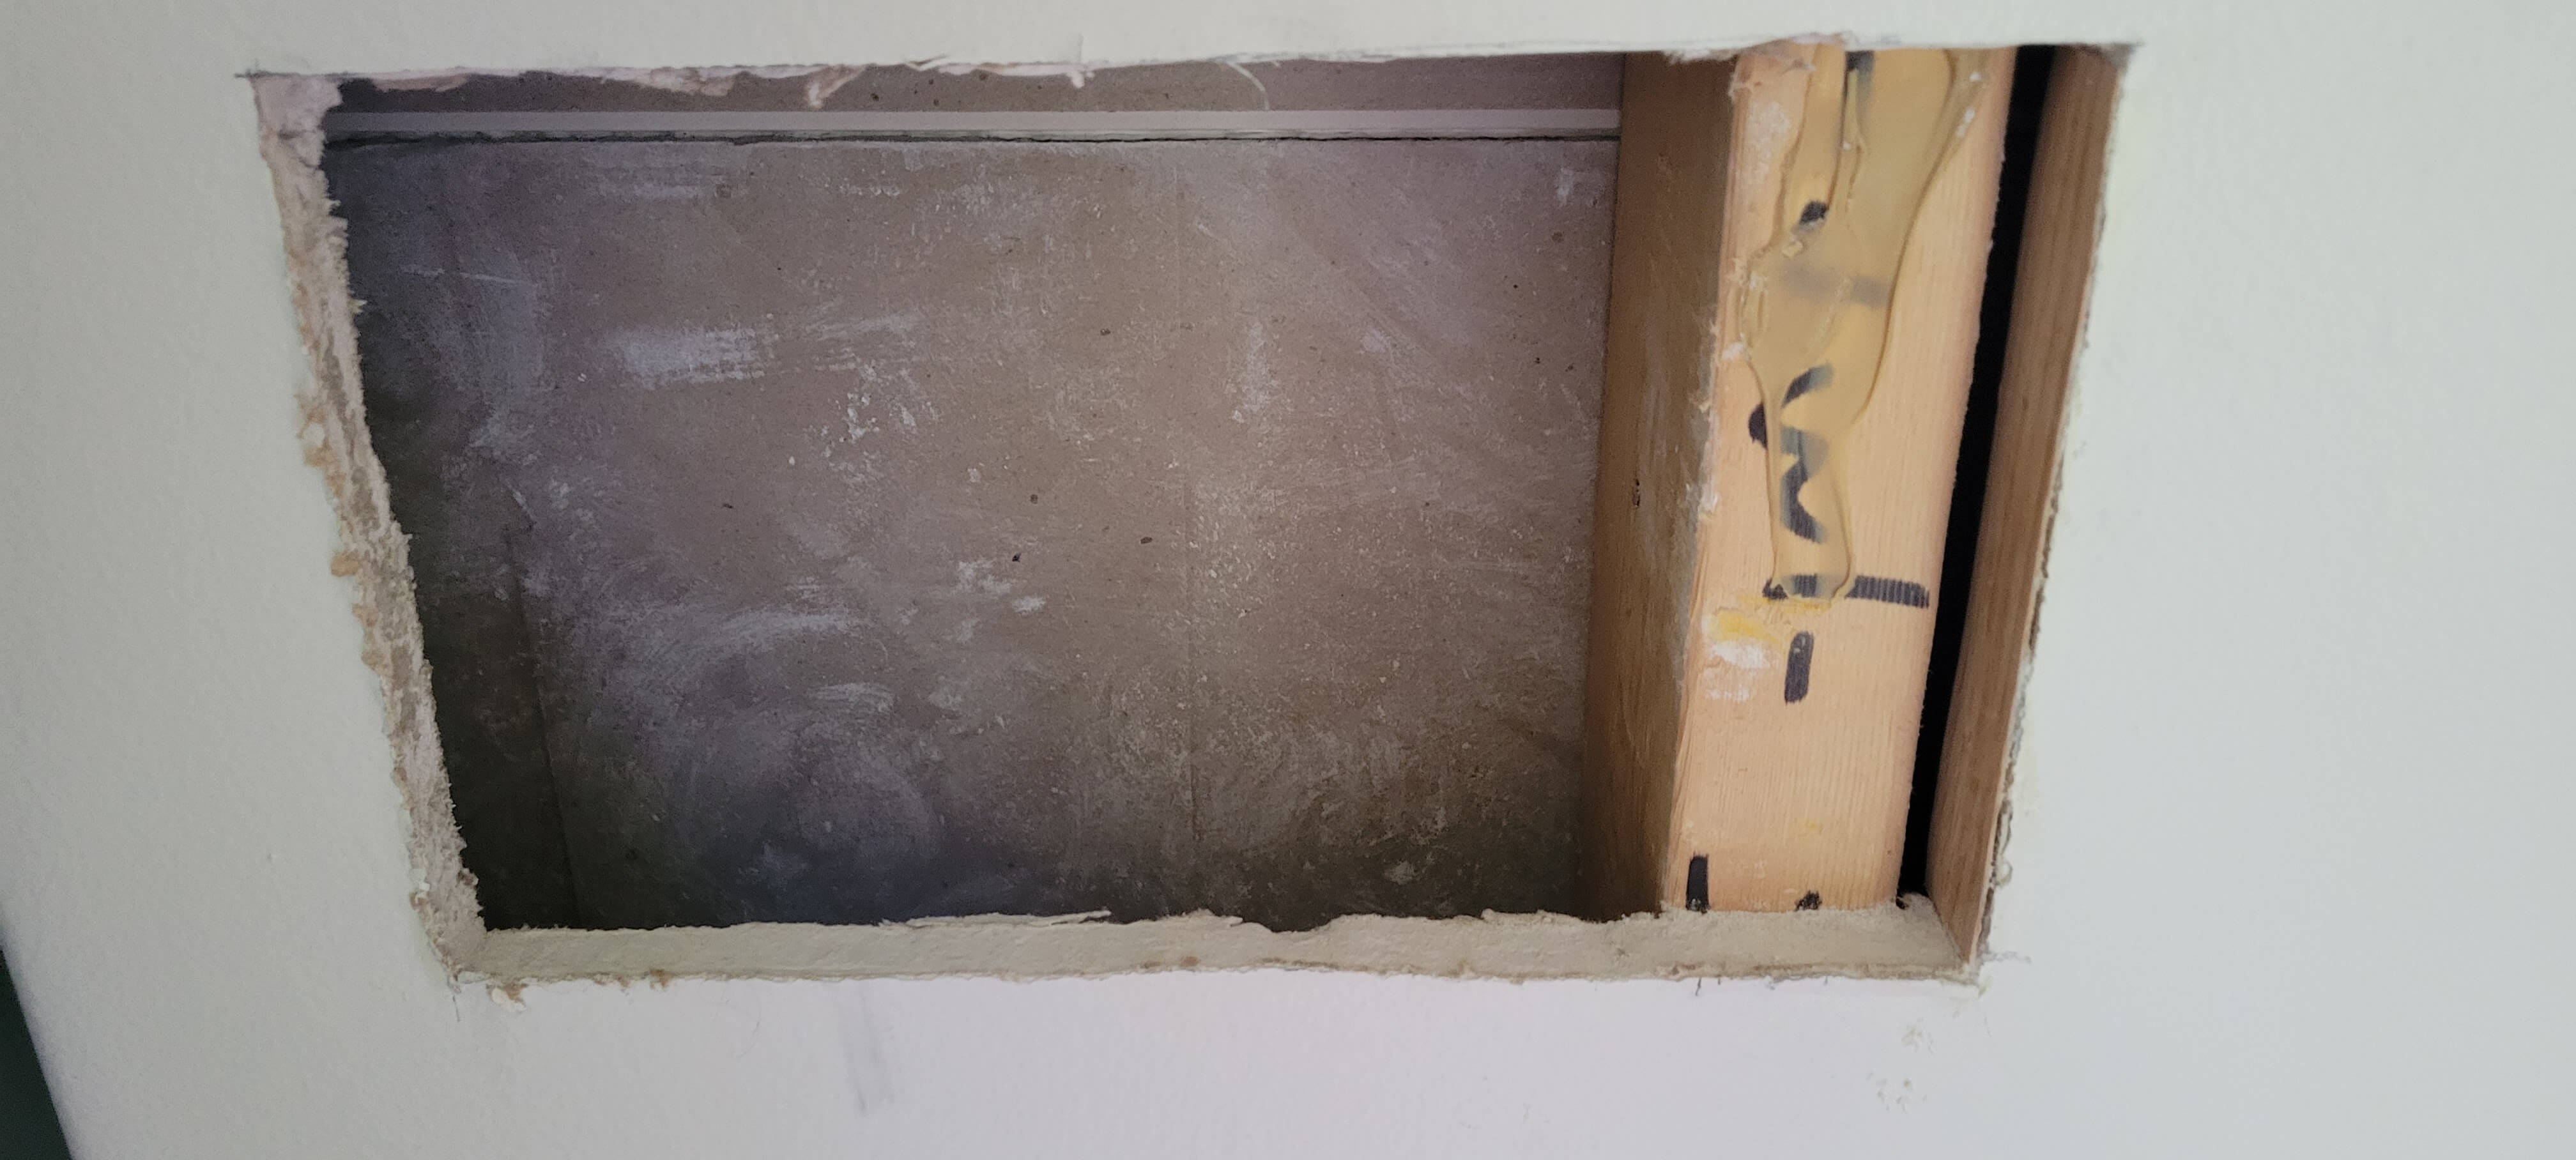
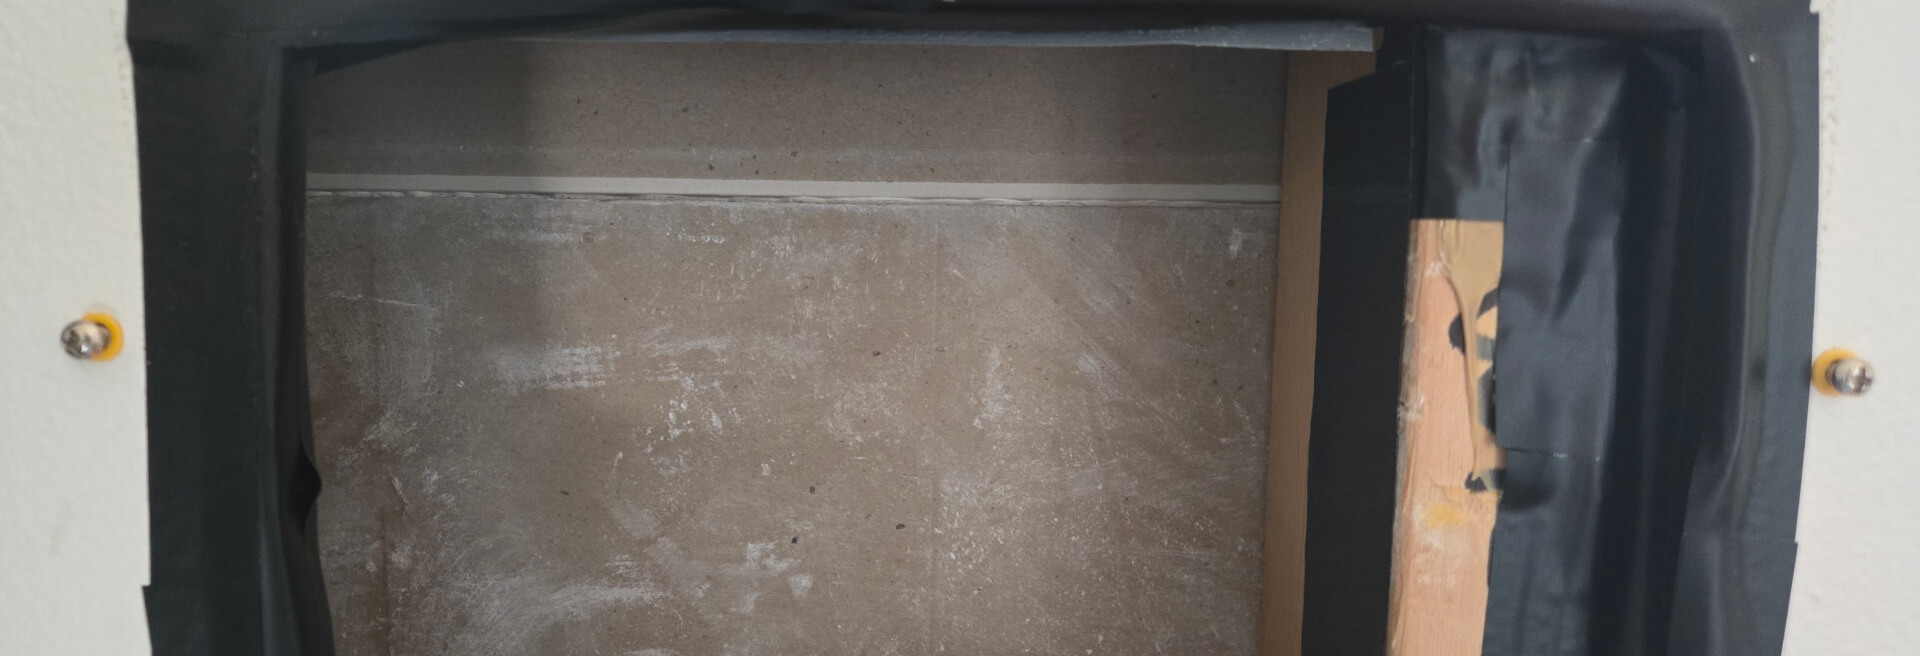
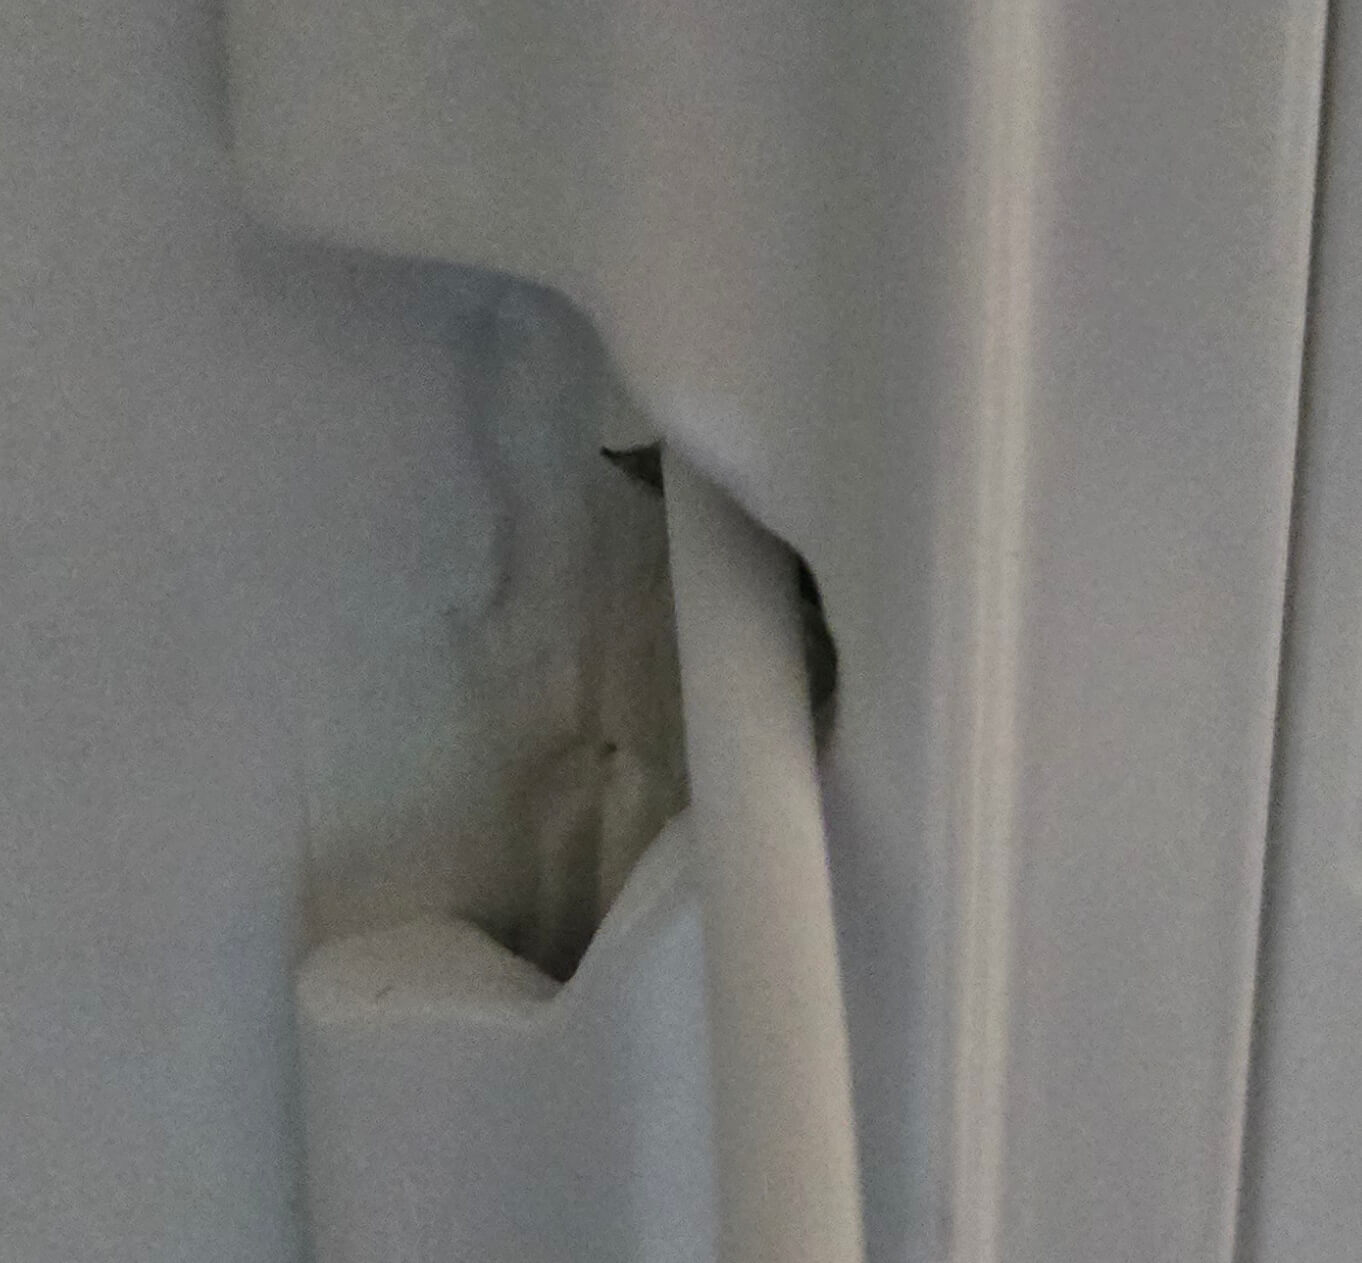
The back of the touchscreen has a few parts extending out from it, and the Banana Pi will add to that. Ideally, you'll want the panel wood frame to be nearly flush against the wall. I ended up cutting a hole roughly 9 and 3/8 inches wide by 5 and 11/16 inches tall, to match the inner dimensions of the wood frame. Cut a hole into the drywall with similar dimensions. After you cut, it should look similar to the following:
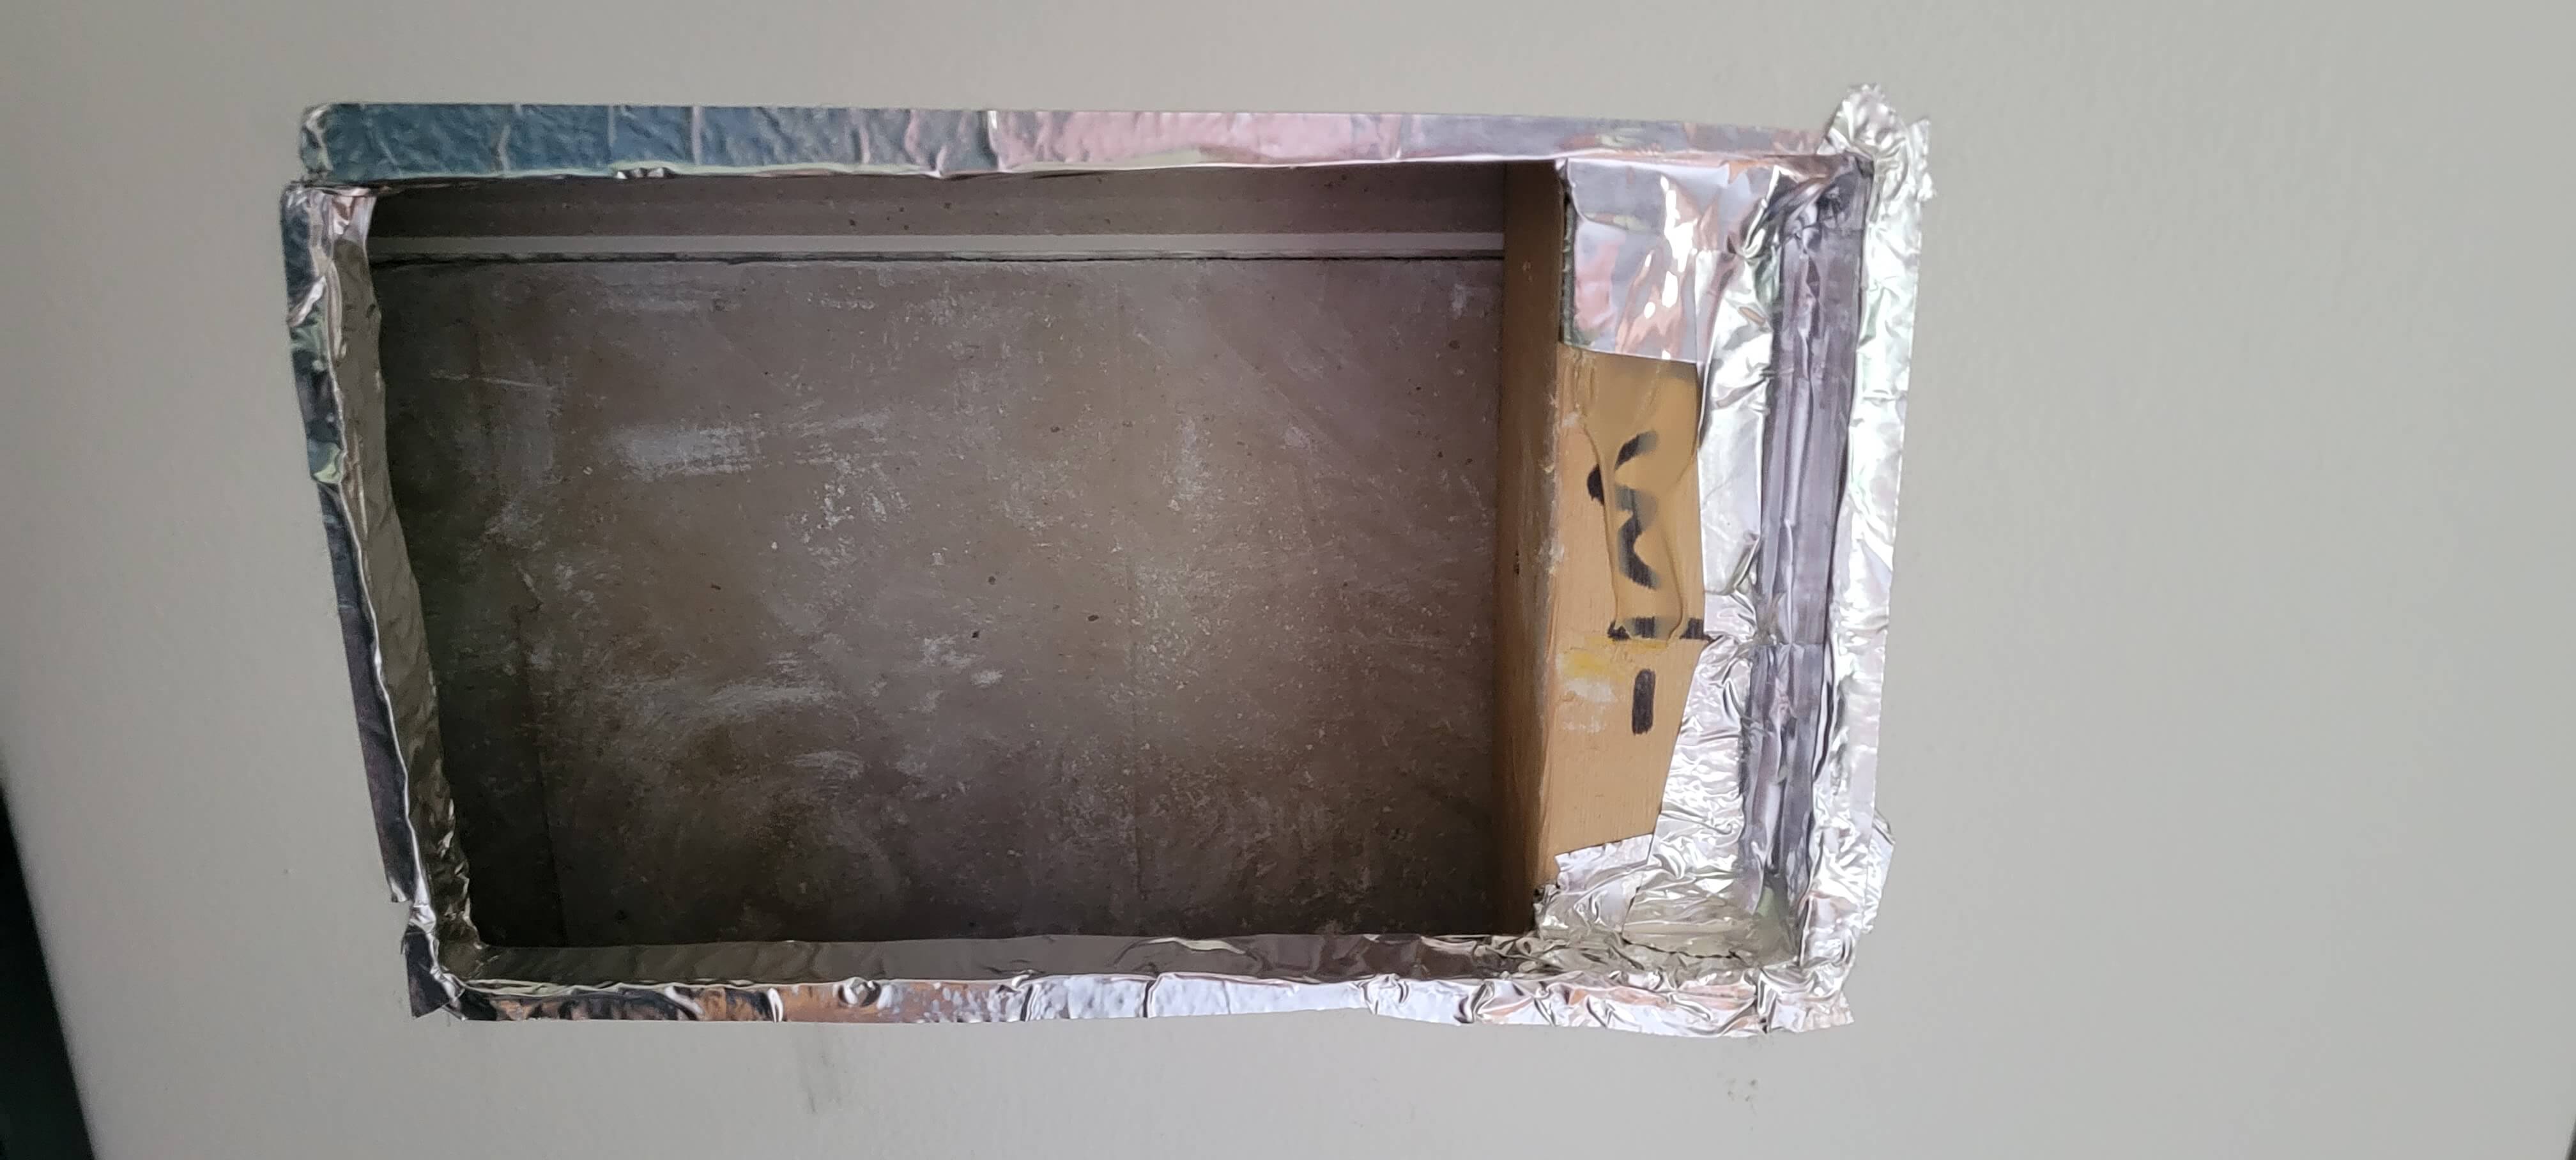
To keep drywall dust from being a problem, you can apply the foil tape around the edges.
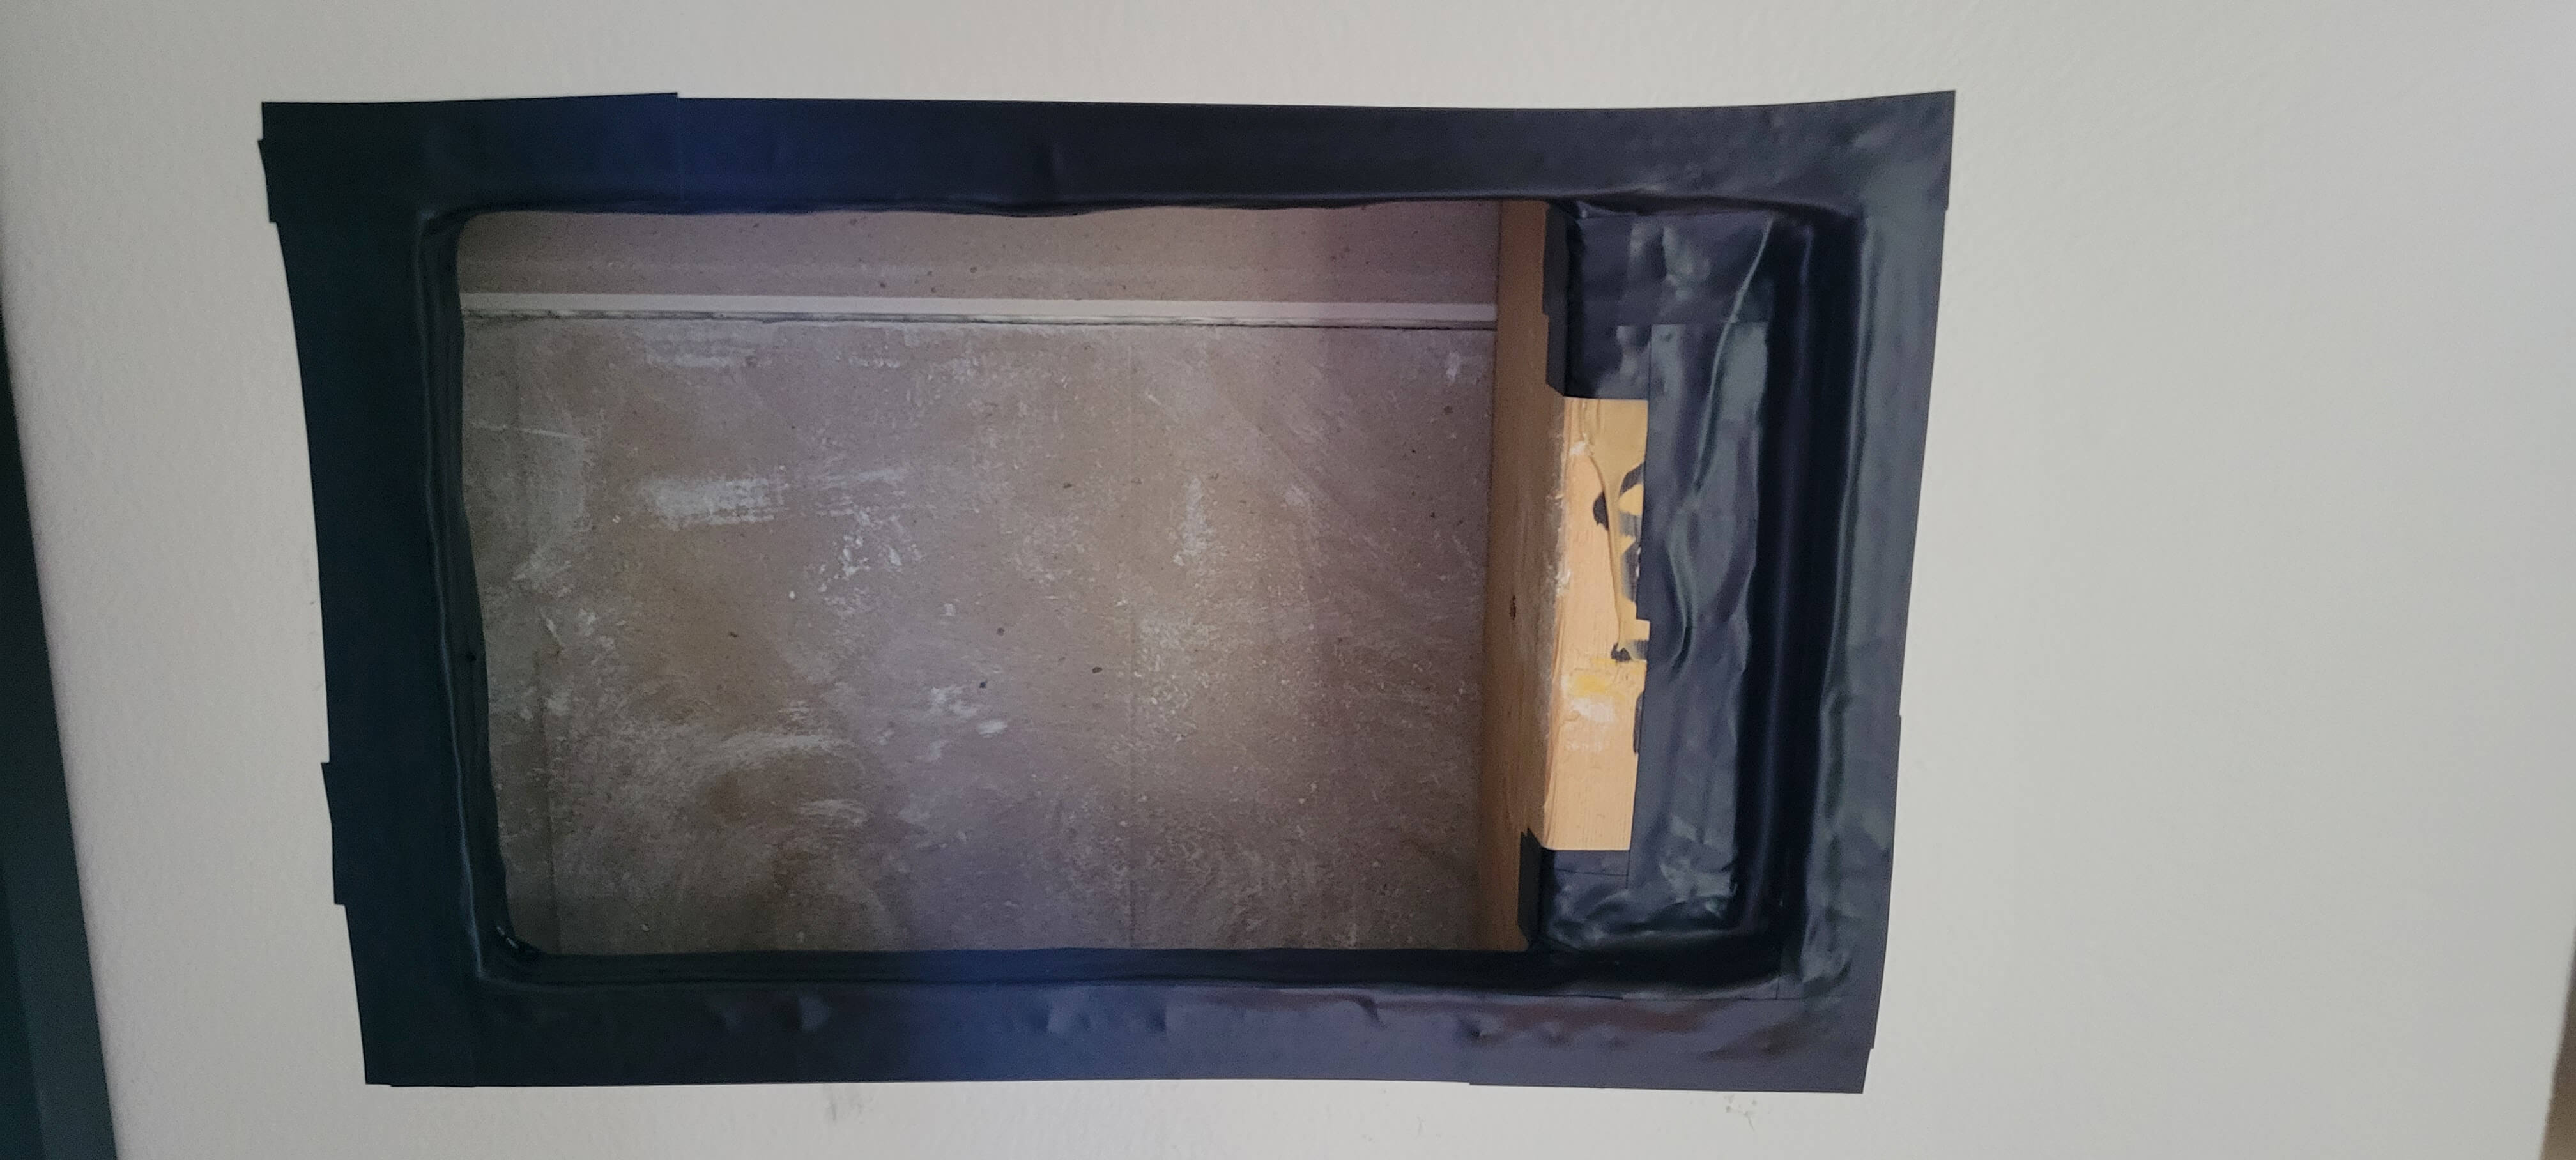
Then add the electrical tape around the foil tape to create an insulator.
Section 7: Installing the Banana Pi on the Touchscreen
1. Shutdown the pi and disconnect the HDMI and USB-C connections.2. With the touchscreen facing down and the speakers oriented up (see image below), mount the Banana Pi to the back of the touchscreen using the touchscreen's provided mounting screws. If you use the cables from the supplies list, you'll want to attach the pi to the two upper stand-offs. This will allow room for the short cables.
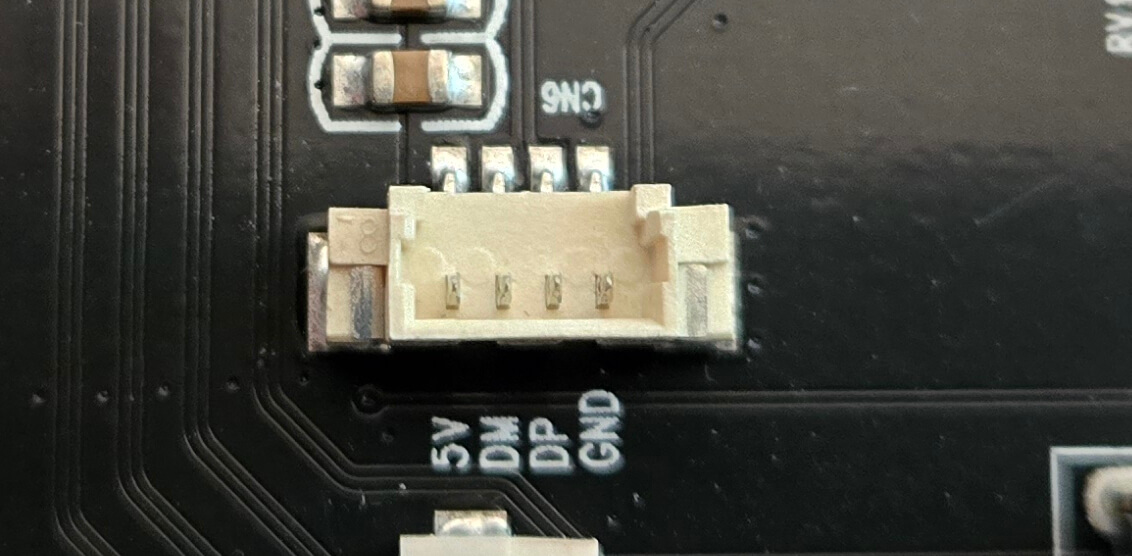
3. The touchscreen comes with the following USB cable:
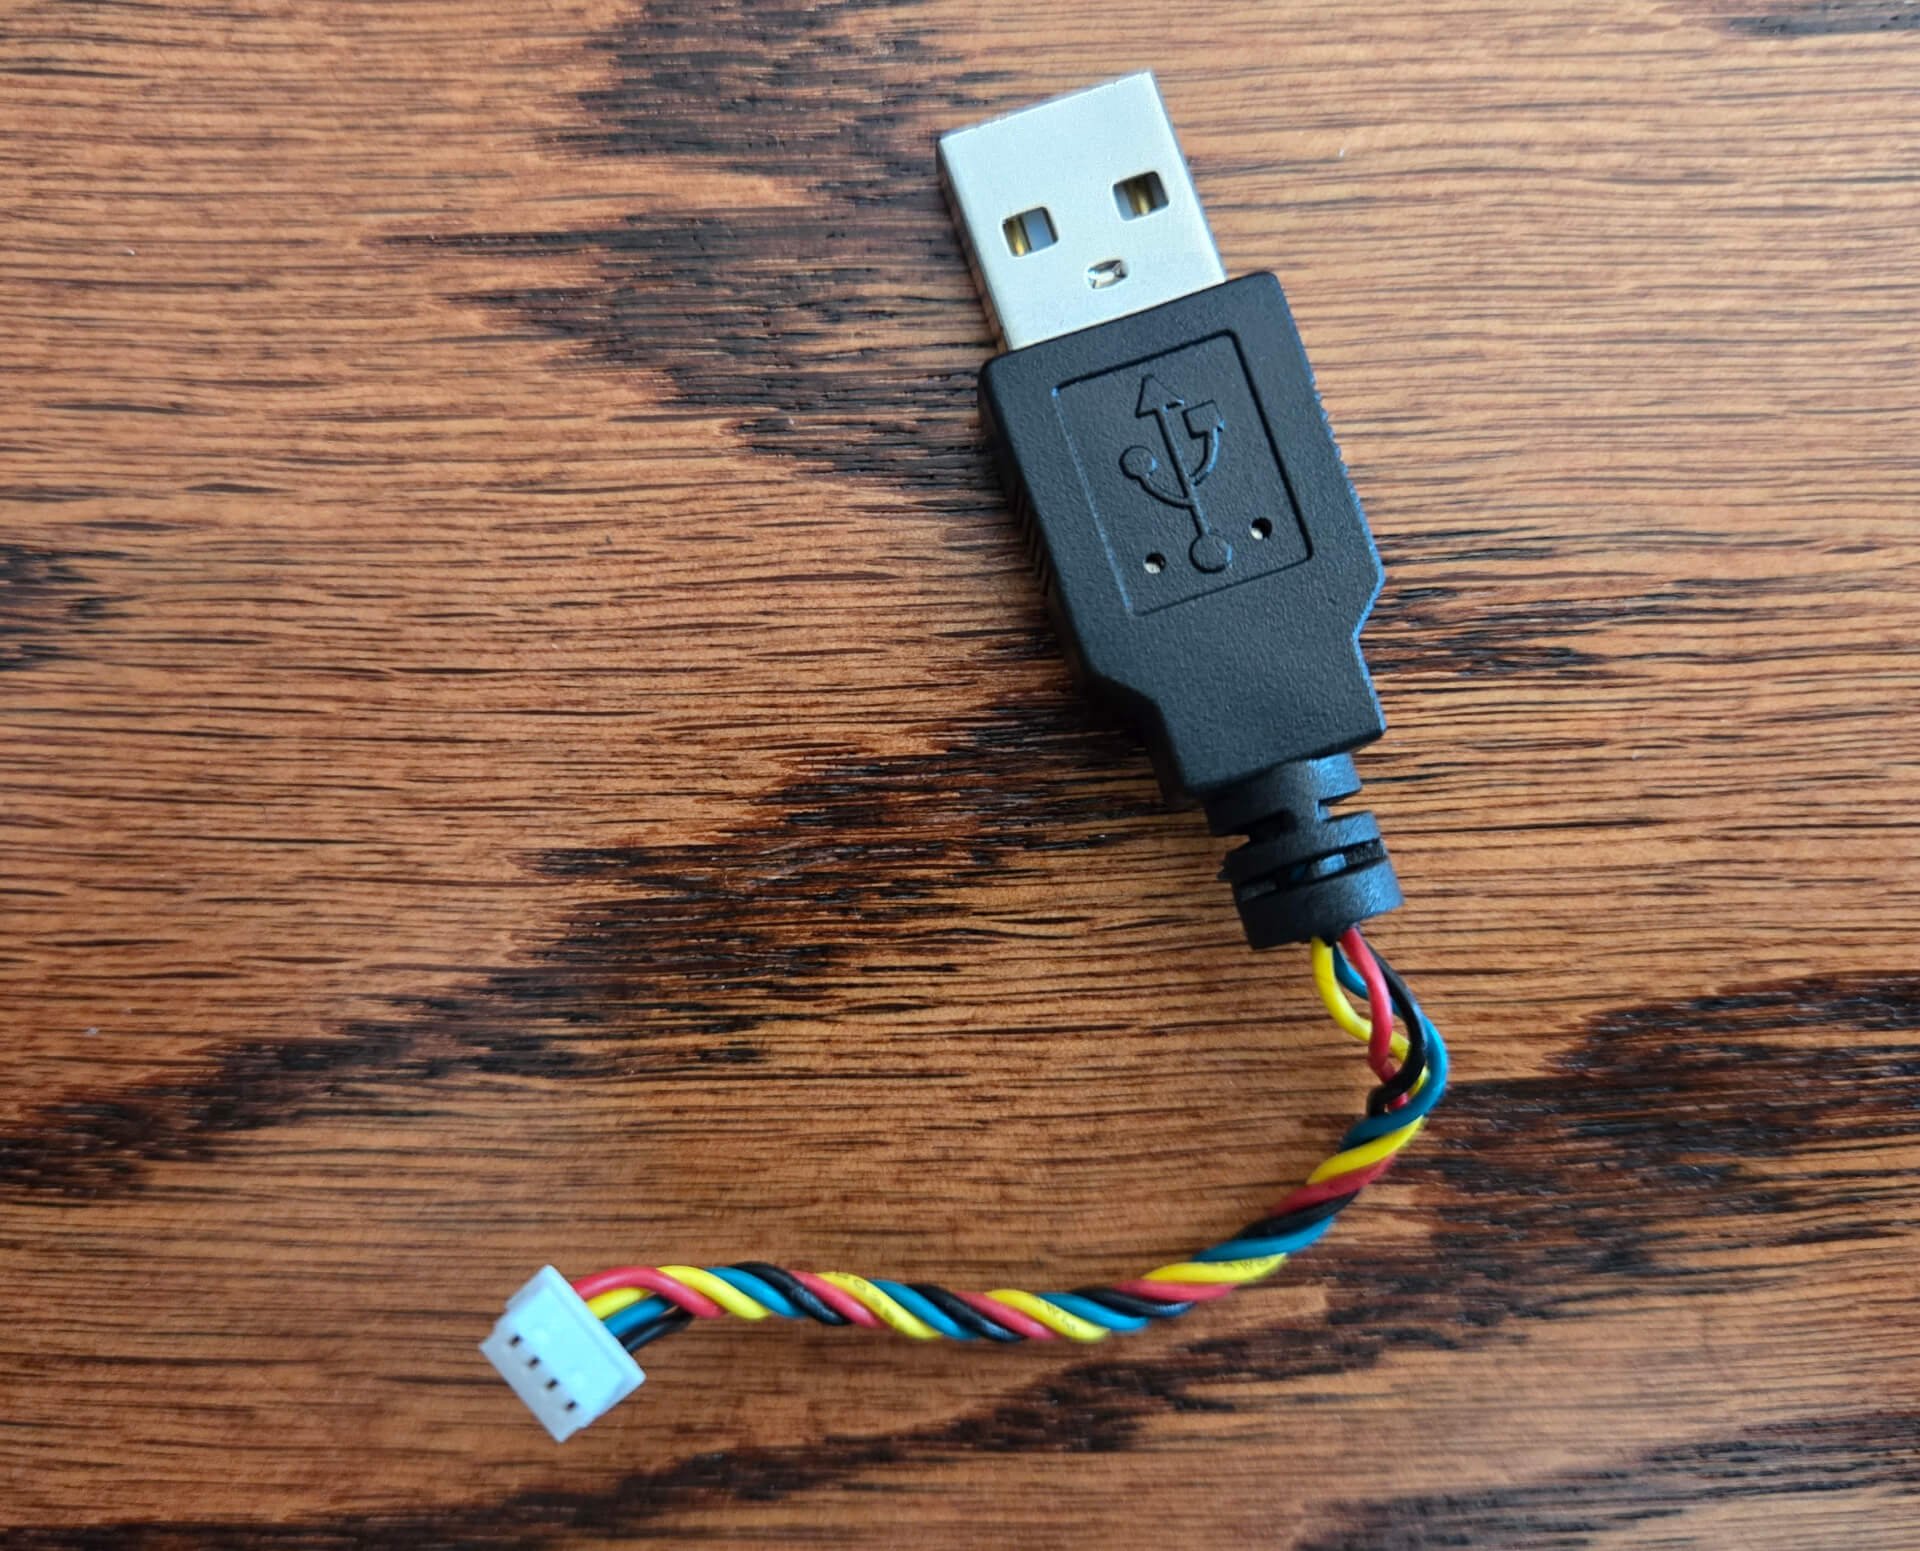
Attach it to this port on the touchscreen:
4. Connect the other end of the USB cable to the Male USB C to Female USB cable. Then connect the USB-C end to the USB 2.0 port on the Banana Pi. This connection provides power through the Banana Pi to the touchscreen.
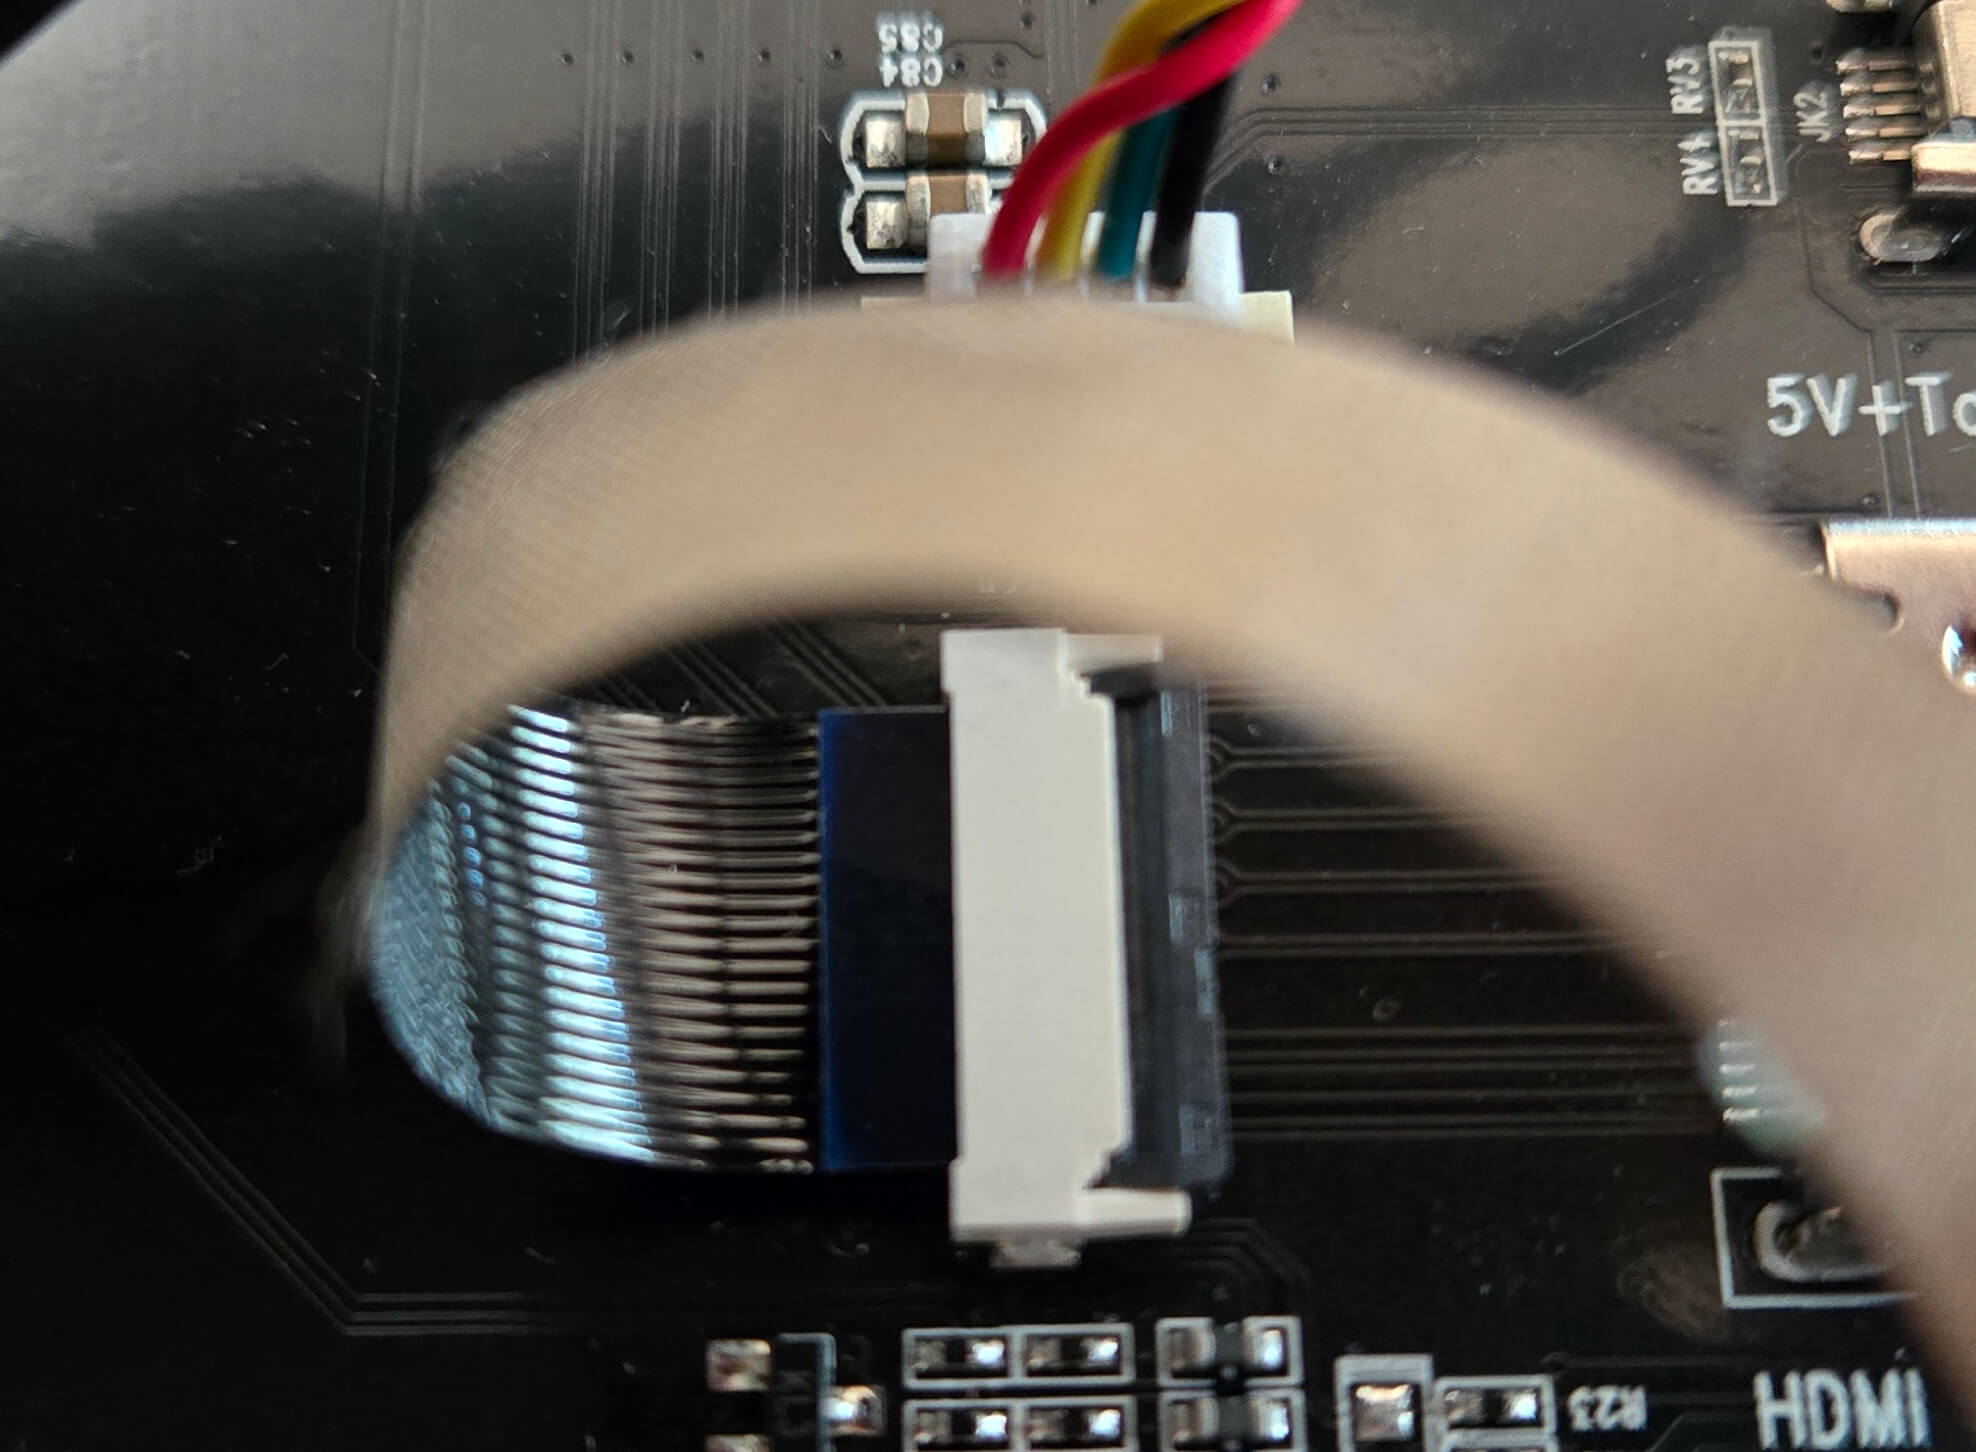
5. The touchscreen also comes with an HDMI to FPC ribbon cable. Connect the ribbon cable to the FPC port on the touchscreen, being careful to install it in the correct orientation.
6. Connect the other end of the HDMI FPC cable to the Mini HDMI Male to HDMI Female cable. Then connect the Mini HDMI end to the HDMI port on the Banana Pi.
With these connections, the back of the wall panel should resemble:

You'll want to fold the cabling a bit so that they fit in the hole you created in Section 6.
Section 8: Mounting The Panel and Supplying Power
You may want to hire an electrician for this step. If you do this yourself like I did, make sure you take the necessary safety measures to avoid coming in contact with deadly voltage! I can't say this enough. With the wall and wall control panel ready to go, turn off the circuit breaker for the receptable you'll be using to supply power. Use a voltmeter to measure and confirm that there is no power being supplied to the receptable, before touching it!You'll need to install the Dual USB 30W and 15A Outlet in the receptacle.
As mentioned, I had a switch near my wall panel. My setup is unique in that this switch was only used to control power to a nearby outlet. I replaced the switch with the dual USB and outlet (and rewired the nearby outlet to be nonswitched).
If you're installing near a switch that controls overhead lights, you may want to use a switch + USB-C combo. Just make sure the USB port outputs 30 watts (the Banana Pi and touchscreen require just under 30w to operate).
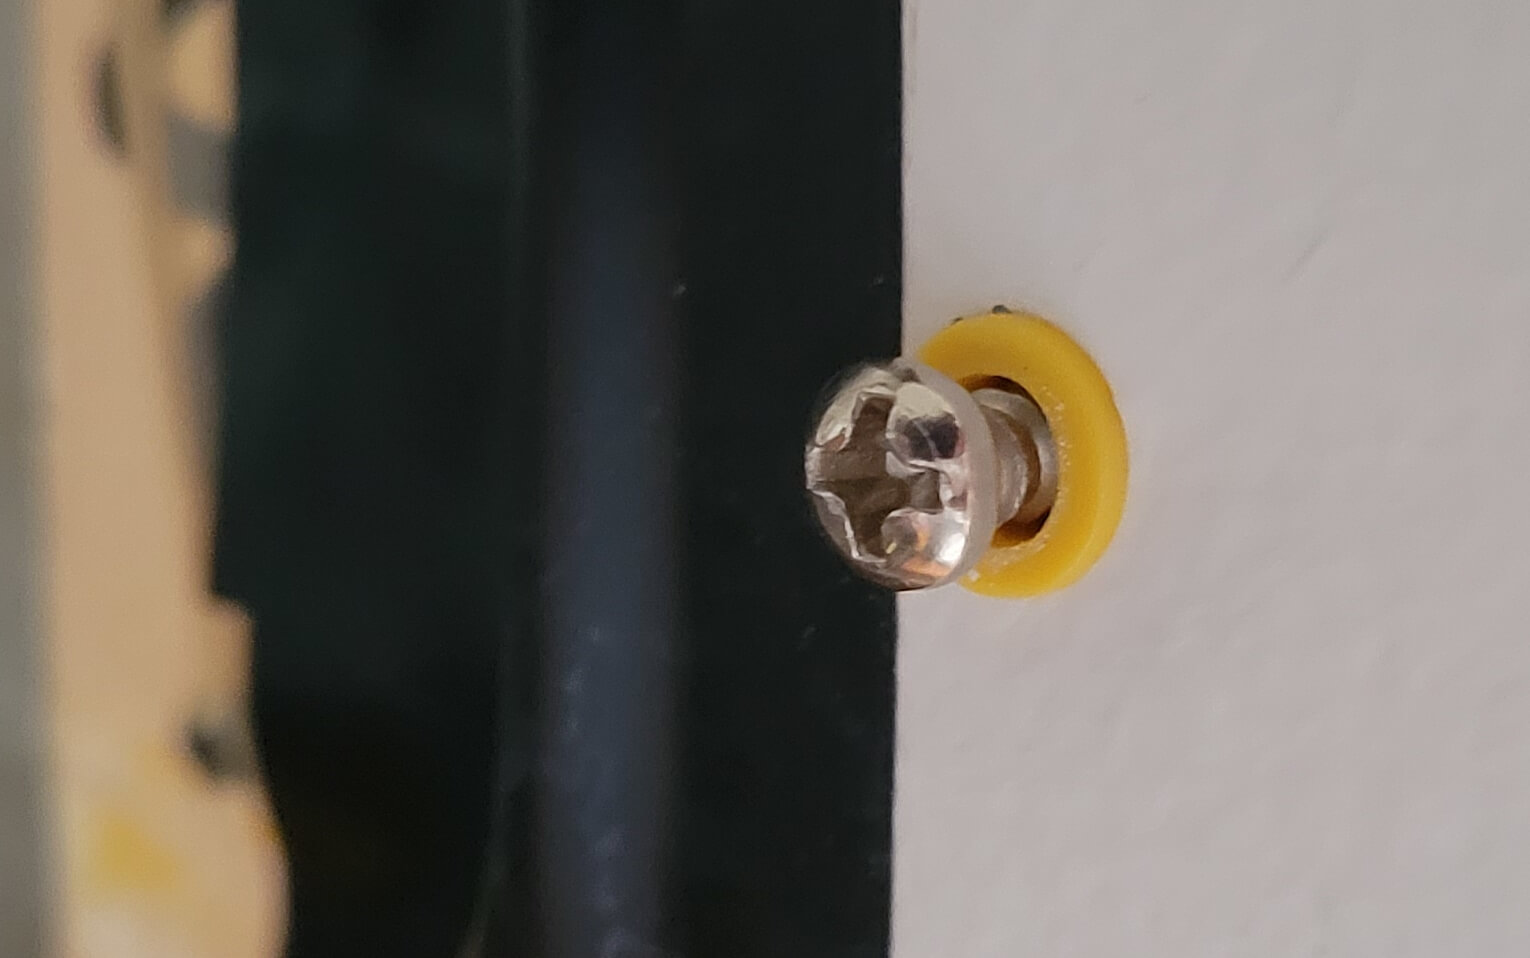
Install drywall screws and anchors into the wall to the right and left of the hole you cut, leaving at least one thread exposed. These should align with the d-rings on the wall panel, so the peak/top of the rings hang off the screws, behind the screw heads. This will keep the wall panel securely in place. Measure the distance from the top center of one d-ring to the top center of the other. This is how far apart your screws should be.
To supply power, you need to run the USB-C Power Cable through the wall and into the USB-C port on your Dual USB 30W and 15A Outlet (or similar device).
Cut or drill a 1/2 inch diameter hole near the receptable and feed the cable through. Be careful not to feed it all the way through and end up dropping it in the wall. (I promise I didn't make this mistake, but I almost did.)
Discreet cable connections are my personal goal, so I drilled a hole right next the exterior wall of the receptable. I also cut a small notch in the outlet cover so that it covers the hole, with the cable sticking out.
Connect the end of the USB-C Power Cable hanging behind the wall into the USB OTG port on the Banana Pi.
This is the last part of the project! Connect the other end of the USB-C Power Cable to the port on your Dual USB 30W and 15A Outlet (or similar device). Then, move the loose cabling behind the wall (you might want to spool extra cabling with zip ties to keep it neat), and finally hang your new control panel on the wall.
Section 9: Enjoy
If you made it this far, congratulations on your new Star Trek themed control panel! Some readers may note that there are potentially easier ways to set this up with an old tablet. I agree, however the Banana Pi M4 zero is a cheap option that can be easily replaced later if you want to upgrade. At least at the time of writing, the pi, touchscreen and cables are only ~$139.00.I hope you had fun and learned something while doing this project. May you and your wall control panel live long and prosper!
We'll have other maker centric posts coming your way, so come back often to check out more.