By: Josiah Huckins - 3/5/2024
minute read
This is the first in a series on self-hosted alternatives to Google Photos or iCloud Photos. This post will detail the setup of Photoprism and NAS storage. It's a lengthy one, but a good one!
Disclaimer, the setup below has been tested and proven to work without data loss to the source files. However, as with anything involving file syncs and shares, I highly advise you to backup your photos to a separate location (at least temporarily) before proceeding with the steps below. With that out of the way, let's get to it!What we're setting up.
Photoprism is an "AI powered photos app" that also works with videos. It's feature rich and offers image tagging and geocoding. It has a web app, usable on any device.Photoprism is a work in progress. We'll explore an alternative to it in part 2 of this series. There are steps in this post that we'll re-use in part 2 as well.
Overall Architecture
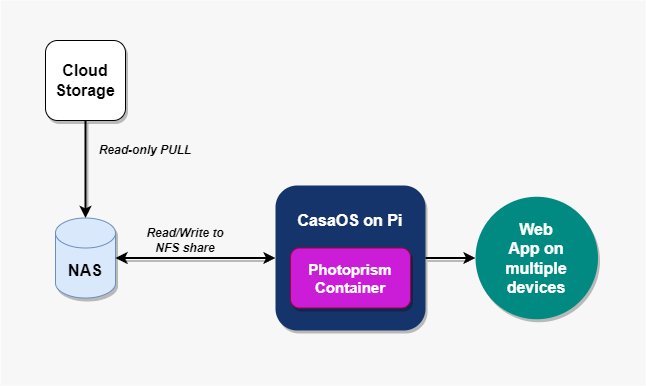
This solution requires cloud storage for your original files. The primary purpose of this is as a dependable backup, not for processing files or viewing on devices. It also requires 2 machines, one to process photos and one providing a NAS (network attached storage). You could set this up with cloud storage and a single machine, however its a good practice to isolate your storage hardware from the photo/video service. This makes it easier to change things later, and prevents having a single point of failure. There are many other uses for a NAS in a personal cloud.
We'll be setting up photoprism on a Raspberry Pi using CasaOS. As for the NAS, we'll use TrueNAS.
TrueNAS is a free NAS management operating system you can install on any hardware.
NAS Hardware
If costs are a concern, you could pick up a cheap desktop from https://www.pcliquidations.com/. There are some quality deals there.One thing to note though is that the cheap option may limit your ability to setup redundancy. If you plan to use the NAS for lots of media, over several years, it would be wise to invest in dedicated hardware and storage arrays.
There are plenty of dedicated NAS machines available on Amazon or Newegg. However, I wanted more flexibility in available memory and GPU power for transcoding. I'll admit, the following NAS build is clearly overkill for photo sharing, but offers a lot in terms of an all encompassing solution.
https://pcpartpicker.com/list/q76JPF
The case and motherboard support my requirements for a RAID 5 storage array of at least 3 disks.
In RAID 5, a third of the total storage capacity is dedicated to parity. For this reason, be sure the capacity of the drives you select account for your required total NAS pool storage capacity. For example, if you need 16TB of storage available for your content, you need three 8TB drives for a RAID 5 setup. I also added a lower capacity M.2 SSD, to serve as the TrueNAS OS drive. The memory I chose is definitely overkill. TrueNAS can operate with 8GB of RAM. As for the GPU, its a decent option for 4k to 1080p transcoding tasks.
If you don't need to do video transcoding, you might consider this cheaper build option: https://pcpartpicker.com/list/GVNLKX
I did some comparison shopping (you should too) before deciding to build my own machine. Prices vary widely for a 4 bay NAS system. A dedicated NAS with the same CPU power as my build costs ~$600.00. Adding drives with the same capacity as my build, you end up near $1,300.00 in total costs. Depending on what you go with, you'll have to balance cost against flexibility.
A special note on purchasing hard drives:
Hardware has a maximum life expectancy. It's not a question of if it will fail, it's when. One factor in hardware failure is inconsistency in manufacturing. Most of the time, drives produced by your favorite vendor are fine but sometimes a dud is produced. To minimize the chances of this being an issue, it's advised to space your hard drive purchases apart by at least a few days. If you can afford it, you might also have one spare drive ready to replace a dead one in the array.Step 1: TrueNAS Setup
You can obtain TrueNAS from here. I installed the community core edition on my NAS machine. You'll want to burn the image onto a USB drive and then follow the instructions here.Note your selected boot device (the M.2 SSD in the case of my hardware build) can only be used for the OS, it cannot have partitions for the OS and storage. TrueNAS itself only requires a few gigabytes, so I would use the lowest capacity drive you have in your build (an M.2 SSD is highly preferred). Make note of the password you configure during this setup, you need to use it to log into the root account for administration of your NAS.
Once installation is complete, you can access your new NAS from a browser at truenas.local. Log in using root as the username and the password you configured during installation. (Once authenticated, you can configure non-root users for accessing the management portal if preferred.) Note, you should not have to access your NAS directly unless there's a problem. Everything is normally managed via that web interface.
Step 2: Setup a storage pool.
1. In TrueNAS, go to Storage and then to Pools.2. Select one or more available drives to add to the pool.
3. Select ADD to create a new pool. (I advise naming the pool as Images-Pool or similar.)
Step 3: Setup cloud storage integration.
I'm using Dropbox for this setup, you'll want to adjust the app creation and token retrieval steps for whatever cloud storage service you use.1. In Dropbox, create a folder called photoprism within the directory where you store your photos and videos. This will be needed later for storing Photoprism data (note, this data will only be stored on the NAS, not Dropbox, but the folder needs to exist).
2. Go to the Dropbox App Console.
From this page, you can setup a dropbox developer app.
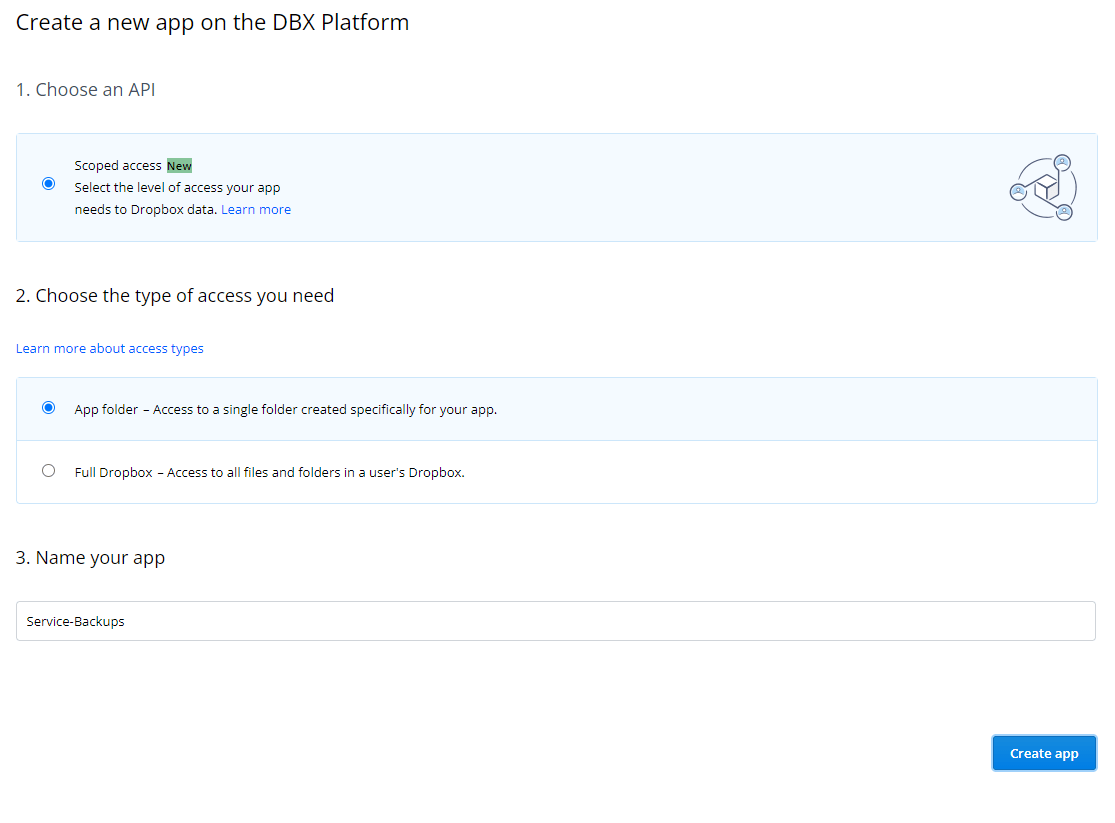
3. Configure the app for scoped access, and type "full dropbox".
You could specify an app folder instead of giving full dropbox access, however you then would need to move all your source image and video files into this folder. Giving full dropbox access is fine as we're setting read-only permissions.
4. Give your app a name.
5. Click/Tap "Create app".
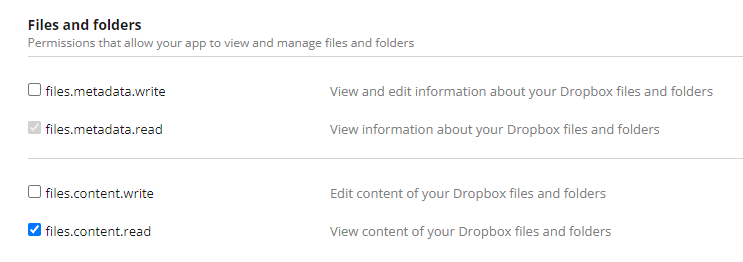
6. You should be directed to the management page for your new app. Go to the Permissions tab and ensure only read permissions are enabled, namely "files.metadata.read" and "files.content.read".
7. On the Settings tab, make a note of the App key, App secret and the option to generate an access token. You'll need these 3 values in the next step.
Step 4: Add Dropbox Cloud Credentials in TrueNAS.
1. In TrueNAS, go to Cloud Credentials under System.2. Select ADD, then select Dropbox in the Provider dropdown.
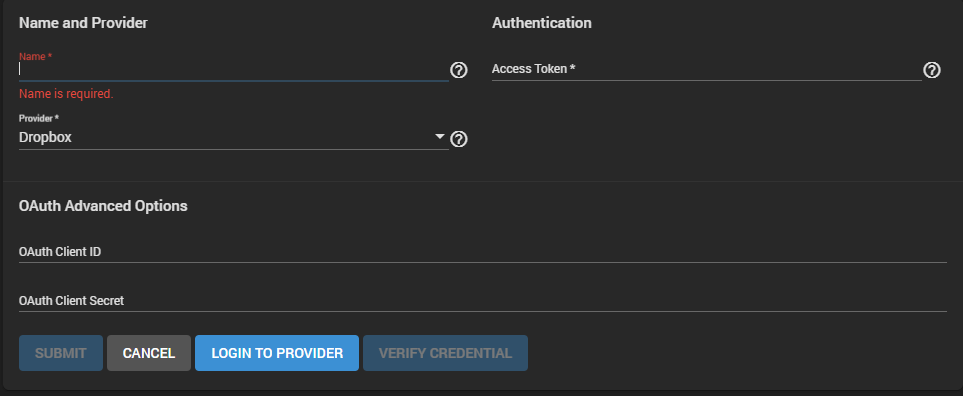
3. Provide a name, and input the access token, oauth client ID and oauth client secret (Generating a token and retrieving oauth values are available in the Dropbox app Settings tab, from the previous step).
4. Click/Tap "LOGIN TO PROVIDER" and complete the sign-in process.
5. Click/Tap "SUBMIT".
Step 5: Setup Cloud Sync task in TrueNAS.
1. In TrueNAS, go to Cloud Sync Tasks under Tasks.2. Select ADD, then fill out the form.
To ensure TrueNAS is only attempting to read from Dropbox, the direction field should be set to PULL and the transfer mode set to SYNC. Note, this mode will copy files to TrueNAS and delete them from TrueNAS if they are deleted from Dropbox. The source files in Dropbox will not be changed or removed there.
Select the storage pool you created earlier as the destination under /mnt.
I configured an hourly sync schedule, you may want to set this or a less frequent sync.
In the Remote section, select the cloud credentials you created in step 4. Then (very important), select the specific Dropbox folder containing your photos and videos.
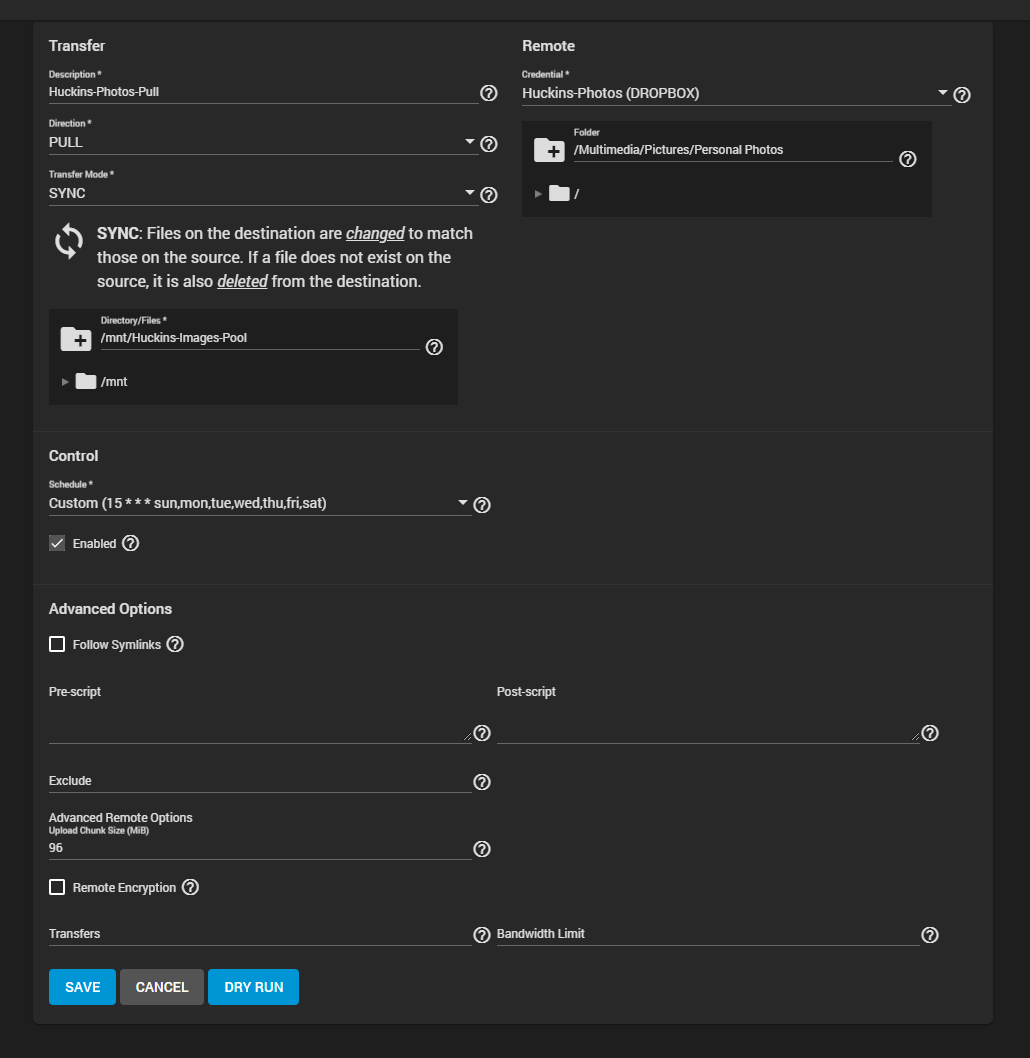
Once everything is configured, I advise you do a dry run before saving, just to make sure it works as expected.
Step 6: Enable NFS
NFS supports Unix based clients without the need to install Samba. Its an ideal choice for file sharing with the Raspberry Pi.You may note that TrueNAS does have a PhotoPrism plugin. However, I still suggest isolating your personal cloud services from NAS storage, again to reduce single points of failure. Also, you have to dedicate a storage pool to plugins. With storage space at a premium, I don't need to run apps on my NAS.
1.To setup the NFS, go to Services and ensure the NFS service is enabled and set to start automatically.

2.In TrueNAS, go to Sharing and create an NFS share under the Unix Shares (NFS) option. The path should be the storage pool you created in step 2. Be sure to enable "All dirs", to give the client access to subfolders of the parent images and videos folder.
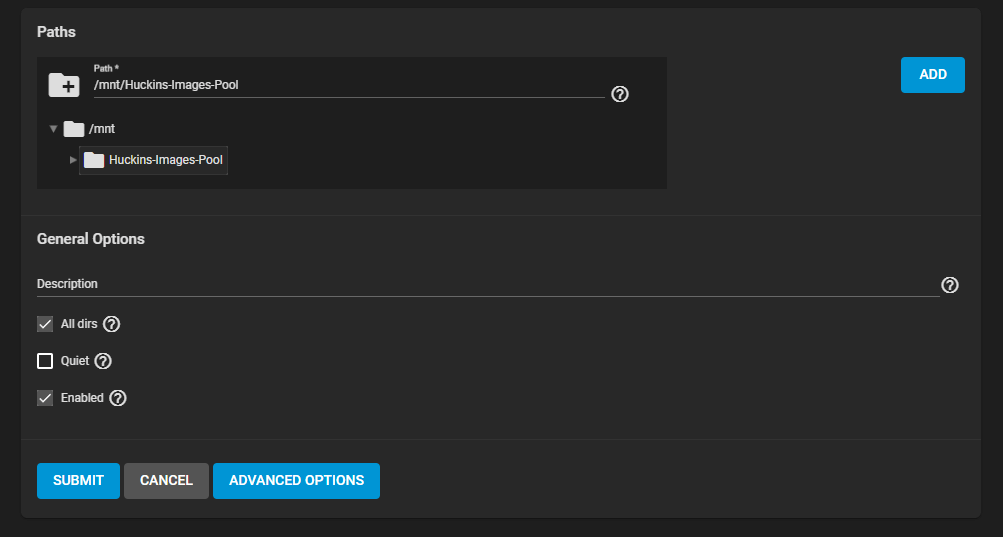
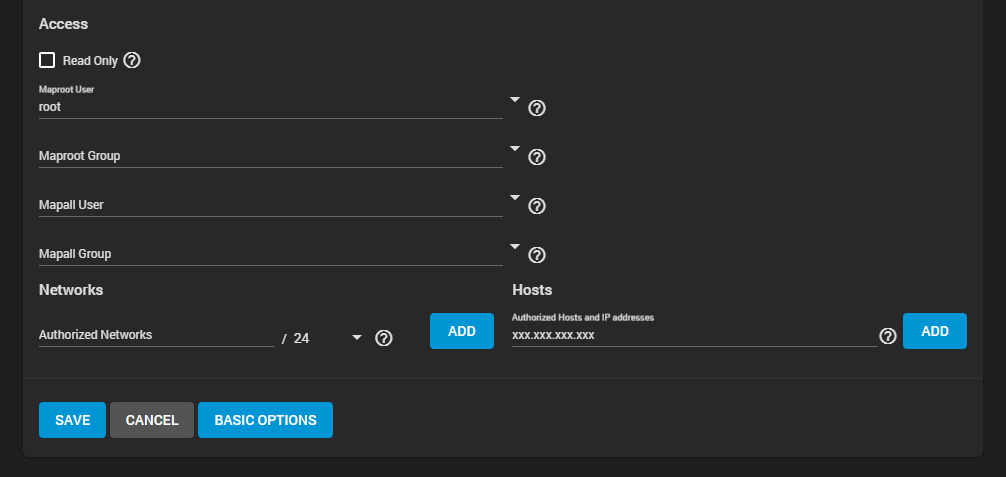
3. Click/Tap "ADVANCED OPTIONS" and under maproot user, enter root or select it in the dropdown. This is needed as the photoprism client will mount the NFS drive as root, limiting access to that user on the client. Be sure "Read Only" is unchecked.
4. Optionally, you can limit access to the NFS share by providing a list of authorized subnets or IP addresses. Since I wanted to have Photoprism be the only client accessing this, I added it's IP address. (Note, I've configured my network's DHCP server to statically allocate an IP to the Raspberry Pi hosting CasaOS + Photoprism, you may want to do the same for your instance.)
At this point you should have a working NAS, sync of photos and videos from cloud storage to your NAS, and an NFS share.
Setting up CasaOS and Photoprism
As mentioned, we'll be setting this up on a Raspberry Pi. For best results I advise using a pi 4 or 5. You also need an SD card, preferably with at least 64GB of capacity.For my setup, I also added an Ice Tower Cooler. With this installed, I overclocked a pi 4 to 2.1GHz and upped the Videocore GPU clock by 250MHz. The temperatures measure near 40 degrees Celcius when under load. It's not a major increase in performance but has made a noticeable difference. At the time of writing, the cooler is $18, well worth it in my opinion.
Step 7: Initial setup of the Raspberry Pi
1.You can use the Raspberry Pi Imager tool to write the Raspbian OS to an SD card. I recommend using the CLI only variant of Raspbian. CasaOS uses a web UI, so there's no real need for a GUI and its resource consumption in Raspbian. Note also, the imager tool allows you to preconfigure a hostname, user credentials, WiFi credentials and even an SSH key.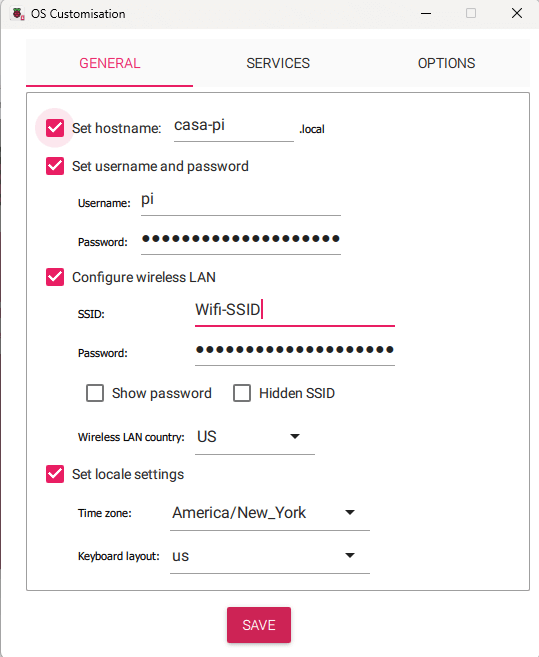
2. Once the SD card is setup, install it in your pi, boot it up and login.
Step 8: Setting up the NFS mount on the Pi
1. Run these commands on the pi to install nfs-common:sudo apt update
sudo apt install nfs-common
2. Create a directory (ideally in the pi user's home directory) for mounting the NFS share, via this command:
mkdir /home/pi/nas-nfs-share
3. The NFS share we enabled in step 6 can be automatically mounted at boot. To do this, open the /etc/fstab file for editing via command:
sudo nano /etc/fstab, and add this entry:
xxx.xxx.xxx.xxx:/mnt/path-of-NFS /home/pi/nas-nfs-share nfs auto,nofail,noatime,nolock,intr,tcp,actimeo=1800 0 0
That xxx.xxx.xxx.xxx should be the IP address of your NAS host, and the path after the colon should match the path of your NFS share from step 6. The /home/pi/nas-nfs-share matches the path to the directory you created.
4. Save the file via CTRL + x.
5. Reboot the pi.
Step 9: Installing CasaOS
1. Download and install the CasaOS image by running the cURL command from here.2. The CasaOS setup will prompt you for a username and password. Once the setup completes, go to a browser and navigate to the IP address of your Raspberry Pi. You should see a CasaOS login screen.
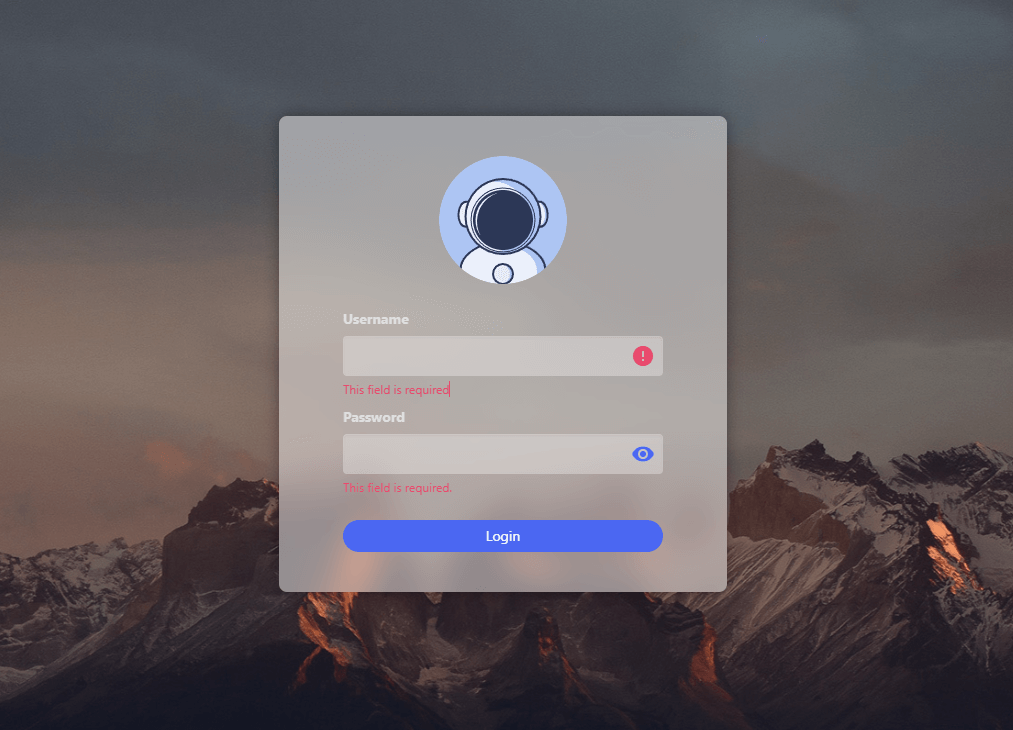
3. Once you login (using the credentials you created when installing CasaOS), go to the App Store and search for "Photoprism", then select and install it.
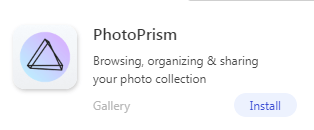
Do note, it will give you the photoprism admin credentials during the installation. You should save these. They can be changed (more on this below).
Photoprism will build an index of your image and video files, add tags and other metadata. It will normally store this information in the local filesystem. For this setup, we don't want to do this as the capacity of the pi's SD card is likely much less than that of the NAS. We don't want to store our data on our private cloud service hosts, the NAS should store it. To do this, we need to adjust the Photoprism container's volume mappings to point to the NFS share we set to automount from step 8.
4. Access the Photoprism container settings by hovering over the upper right corner of the Photoprism icon in the CasaOS dashboard. You'll see a vertical ellipsis. Click/Tap on this then select settings from the menu that appears.
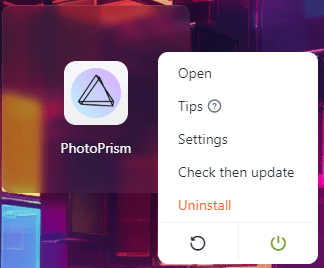
5. If desired, you can change the admin password by adjusting the value of the PHOTOPRISM_ADMIN_PASSWORD environment variable.
6. In the Volumes section, change the mappings from the following defaults to new values that point to the the directory you created in step 8.
Default mappings:

Adjusted mappings:

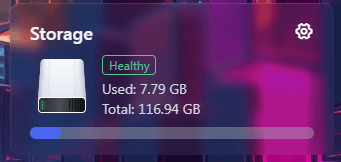
You'll want to change only the Host fields. This will cause Photoprism to retrieve originals and store its index in the NFS share, and therefore use and store data on the NAS. If this is working, you should not see an increase in consumption of the pi's disk as Photoprism does its thing. I have hundreds of gigabytes worth of photos, videos and the index, but storage consumption has been kept at ~8GB on my pi:
Using Photoprism
You can click on the photoprism icon in CasaOS to open the app. I advise bookmarking this. Once in the app, you can manually invoke the indexing, but it should do this automatically when new files are detected.At the time of writing, Photoprism is continuing to mature and has some strengths as well as some weaknesses. You'll notice the ai's accuracy in properly tagging content is hit and miss. Like any ai model, it needs time to be trained to properly understand context.
Photoprism does have a lot of good features, including searchable card views of your content, filtering based on folders, places and labels (tags), encoding from RAW and video transcoding. I encourage you to explore all the settings it has to offer.
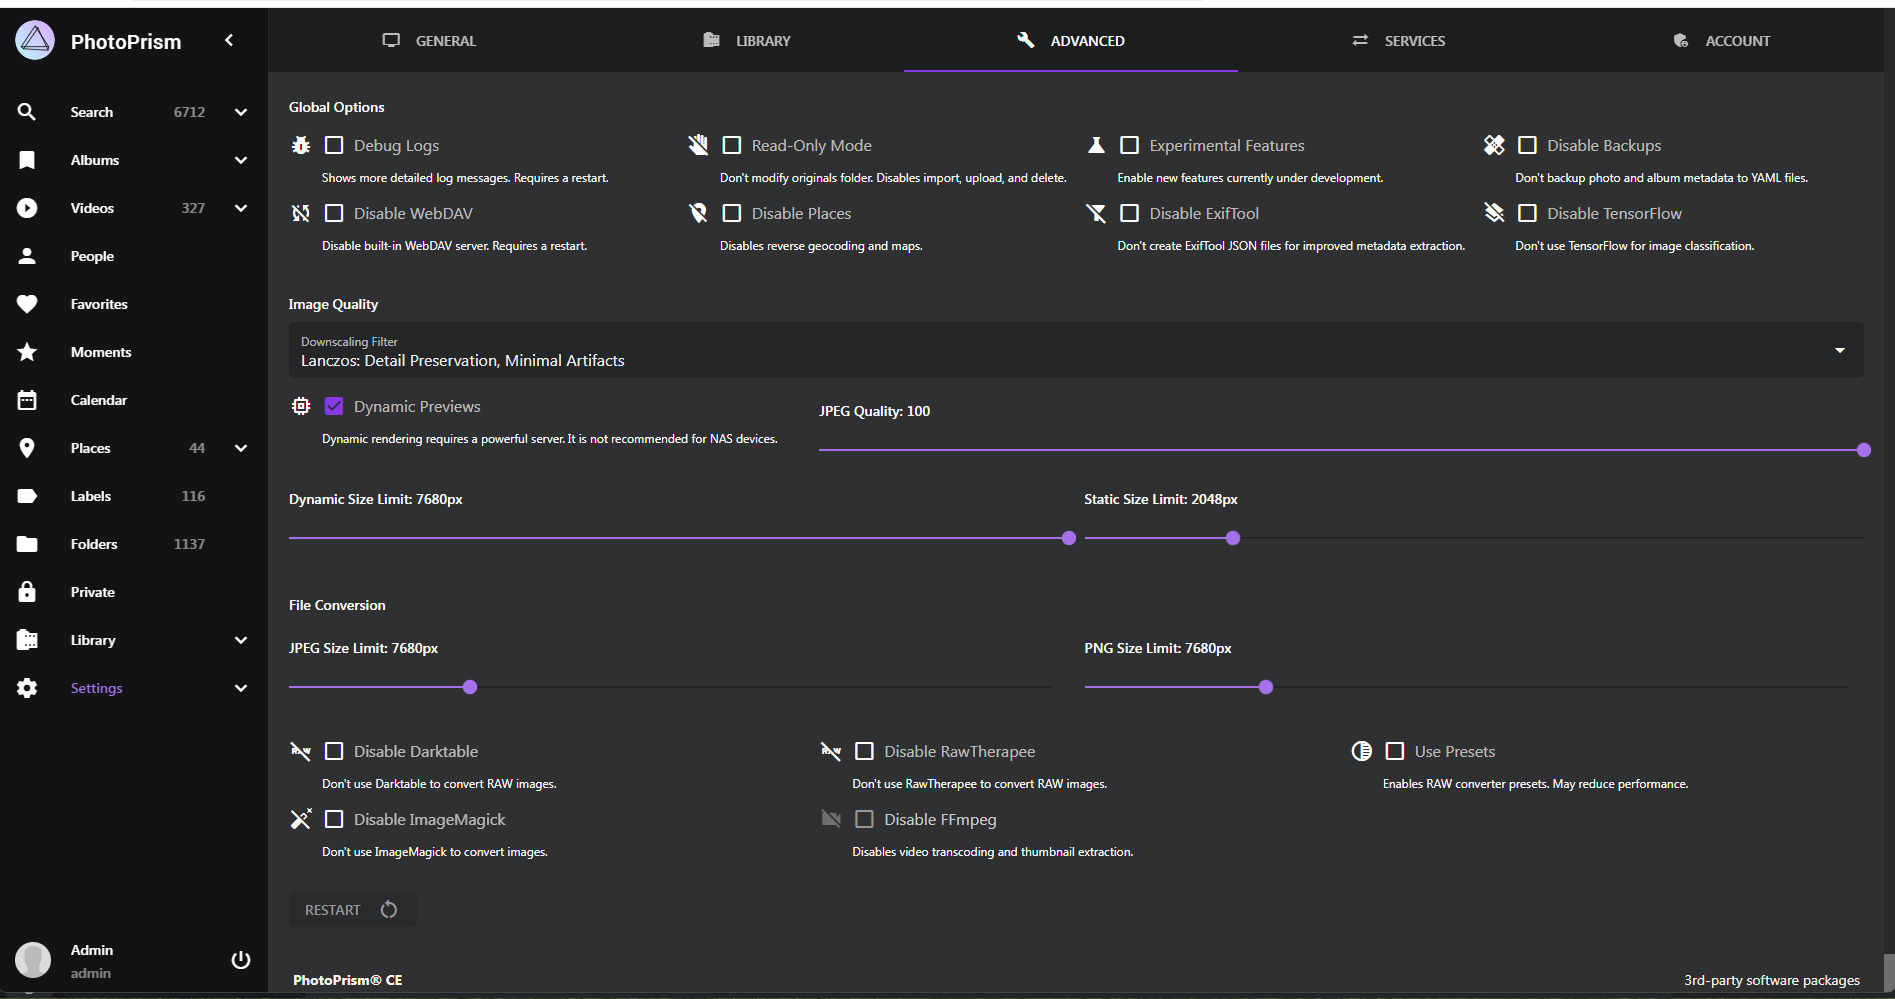
I'm all about responsive web apps and Photoprism offers a solid experience on my Desktop and phone. There are mobile apps available for interacting with it as well, though for my use case I'll be setting up an icon on one of my phone's homescreens, that points to the web app.
Keep in mind, this service is meant to enhance the organization of your media and offer automation in tagging, filtering and encoding for use across your devices. That being said, there are alternatives and as mentioned at the beginning of this post, we'll explore one in part 2.
I hope you had a chance to learn something and enhance your library of personal cloud services!
