By: Josiah Huckins - 1/17/2025
minute read
In this post, we'll build portable, collapsible and easy to setup soccer goals!
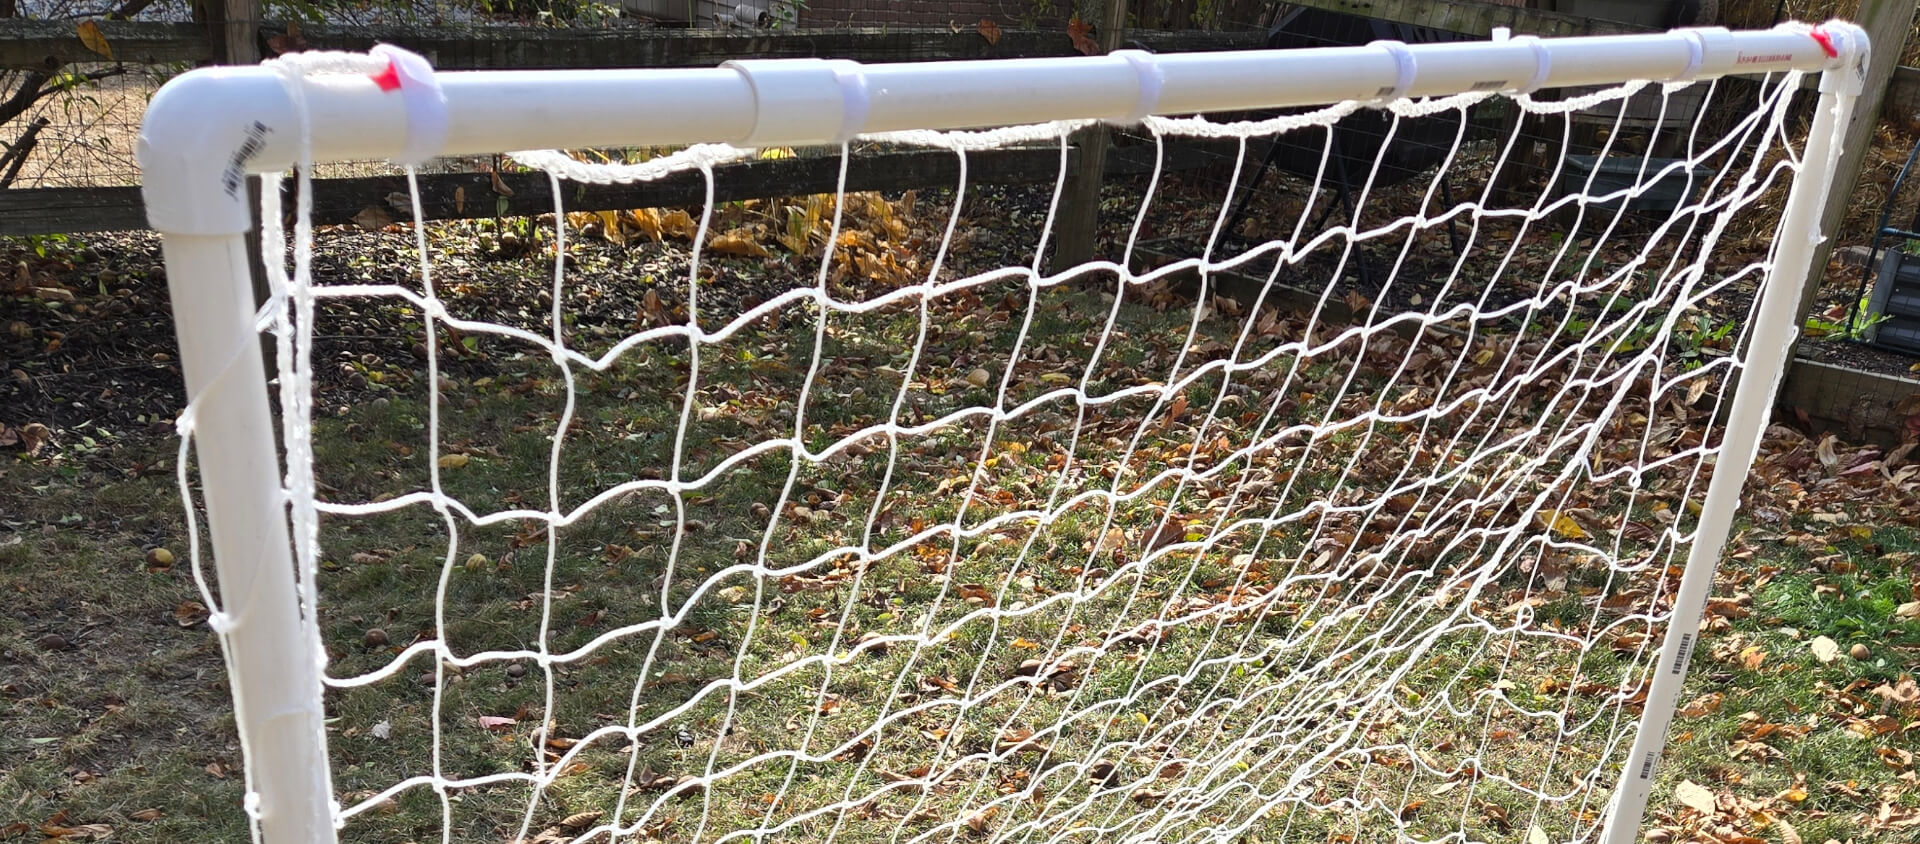
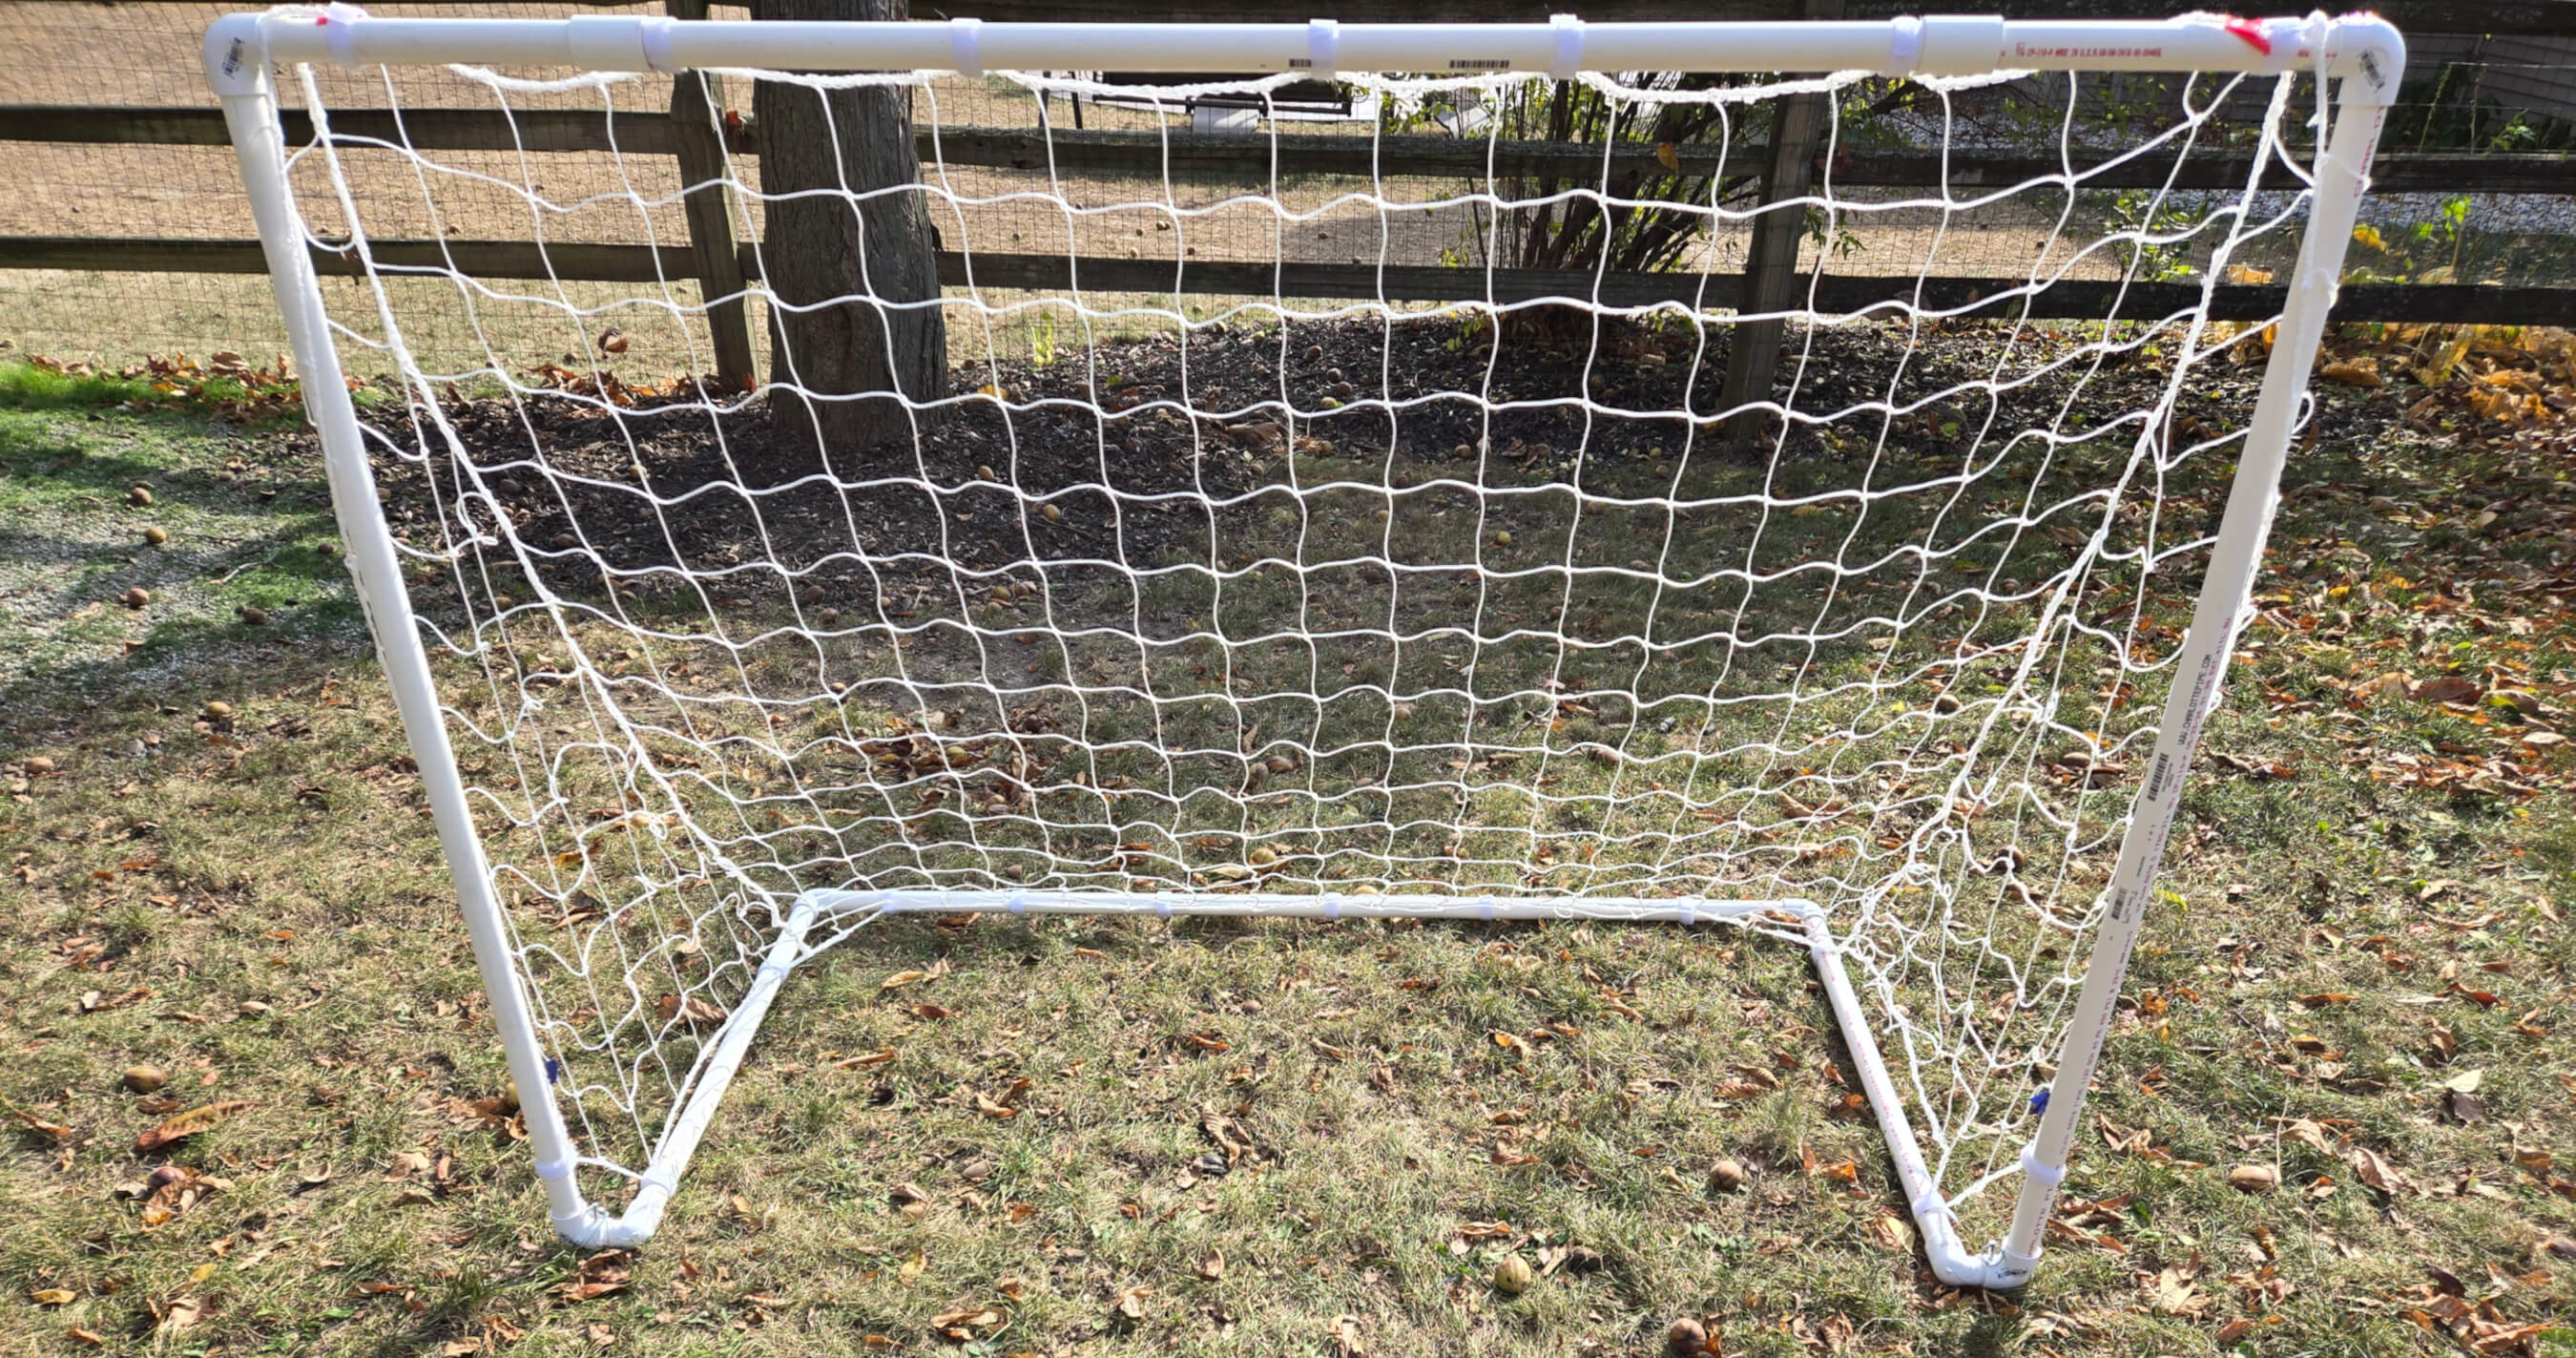
My kids and I love to kick a soccer ball around in the backyard. It's become a frequent activity during warmer seasons, even my wife and our neighbors get into it. We bought some portable soccer nets, but after only 1 season the framing rusted and the net was ripped in several places. We needed new ones that were better but also still portable. With that in mind, I came up with this design:

As you can see its just some PVC and a soccer net, but its a strong, corrosion resistant design. Here's how you can make a pair for yourself.
Supplies Needed
You're going to need the following items to build this:
Item
Amount Needed
Where to Buy
1" diameter PVC pipe (5' long)
10
Menards
1" diameter PVC coupling
4
Amazon
1" diameter PVC - 90 degree elbow
12
Menards
1" diameter PVC - 90 degree street elbow
4
Menards
PVC Glue
1
Amazon
1/4" x 1 and 3/4" cotterless hitch pins
4
Menards
Ceiling Hooks
1
Amazon
17/64" Drill bit
1
Amazon
Garage Storage Hooks (optional)
1
Amazon
This project assumes you already have a miter saw configured with a blade for cutting PVC or a PVC saw, and a pair of rubber gloves. We'll be making several cuts into 1" PVC to build this.
Section 1: PVC Prep
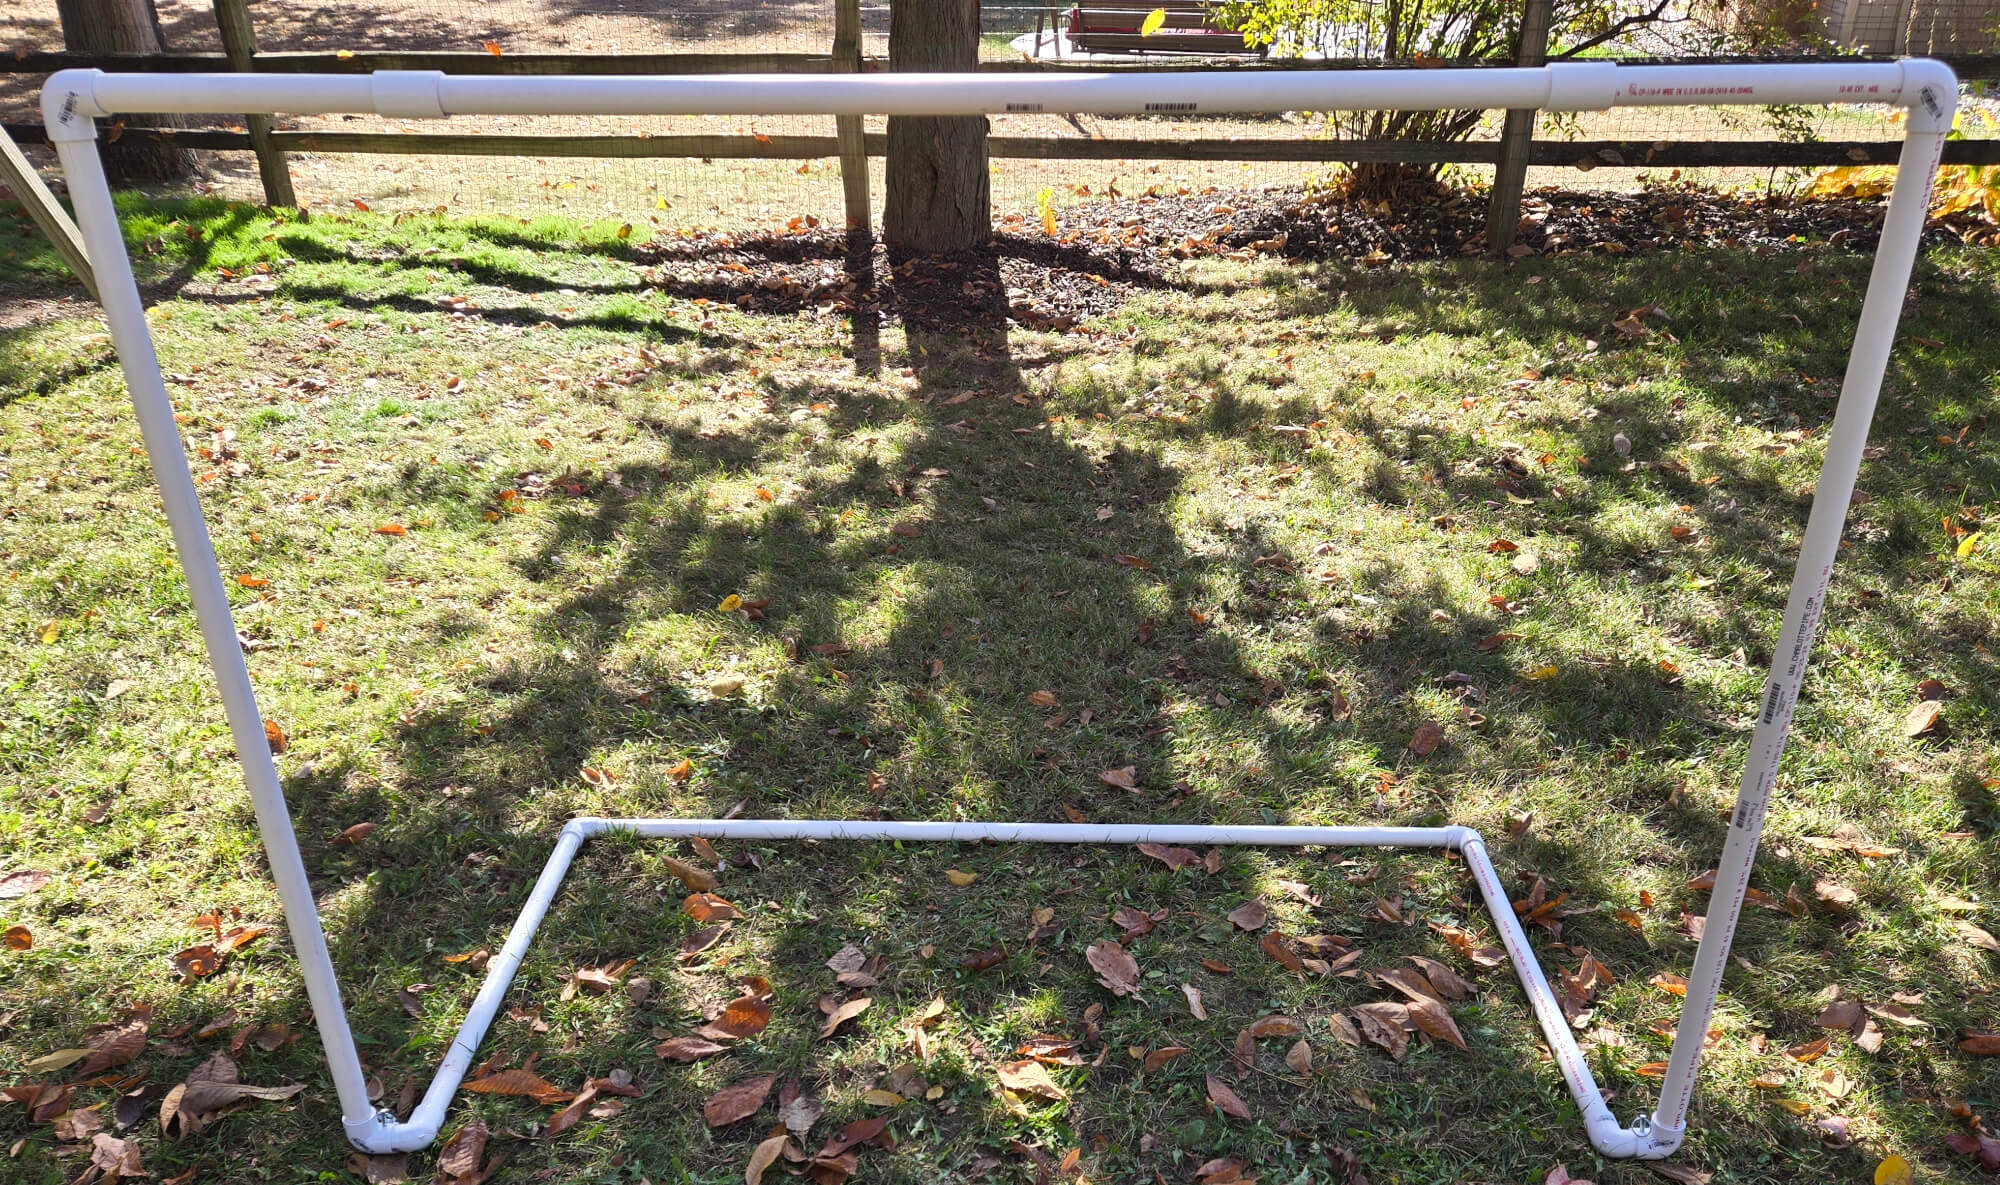
Before we make cuts and assemble, note that we are trying to build the following goal frame:

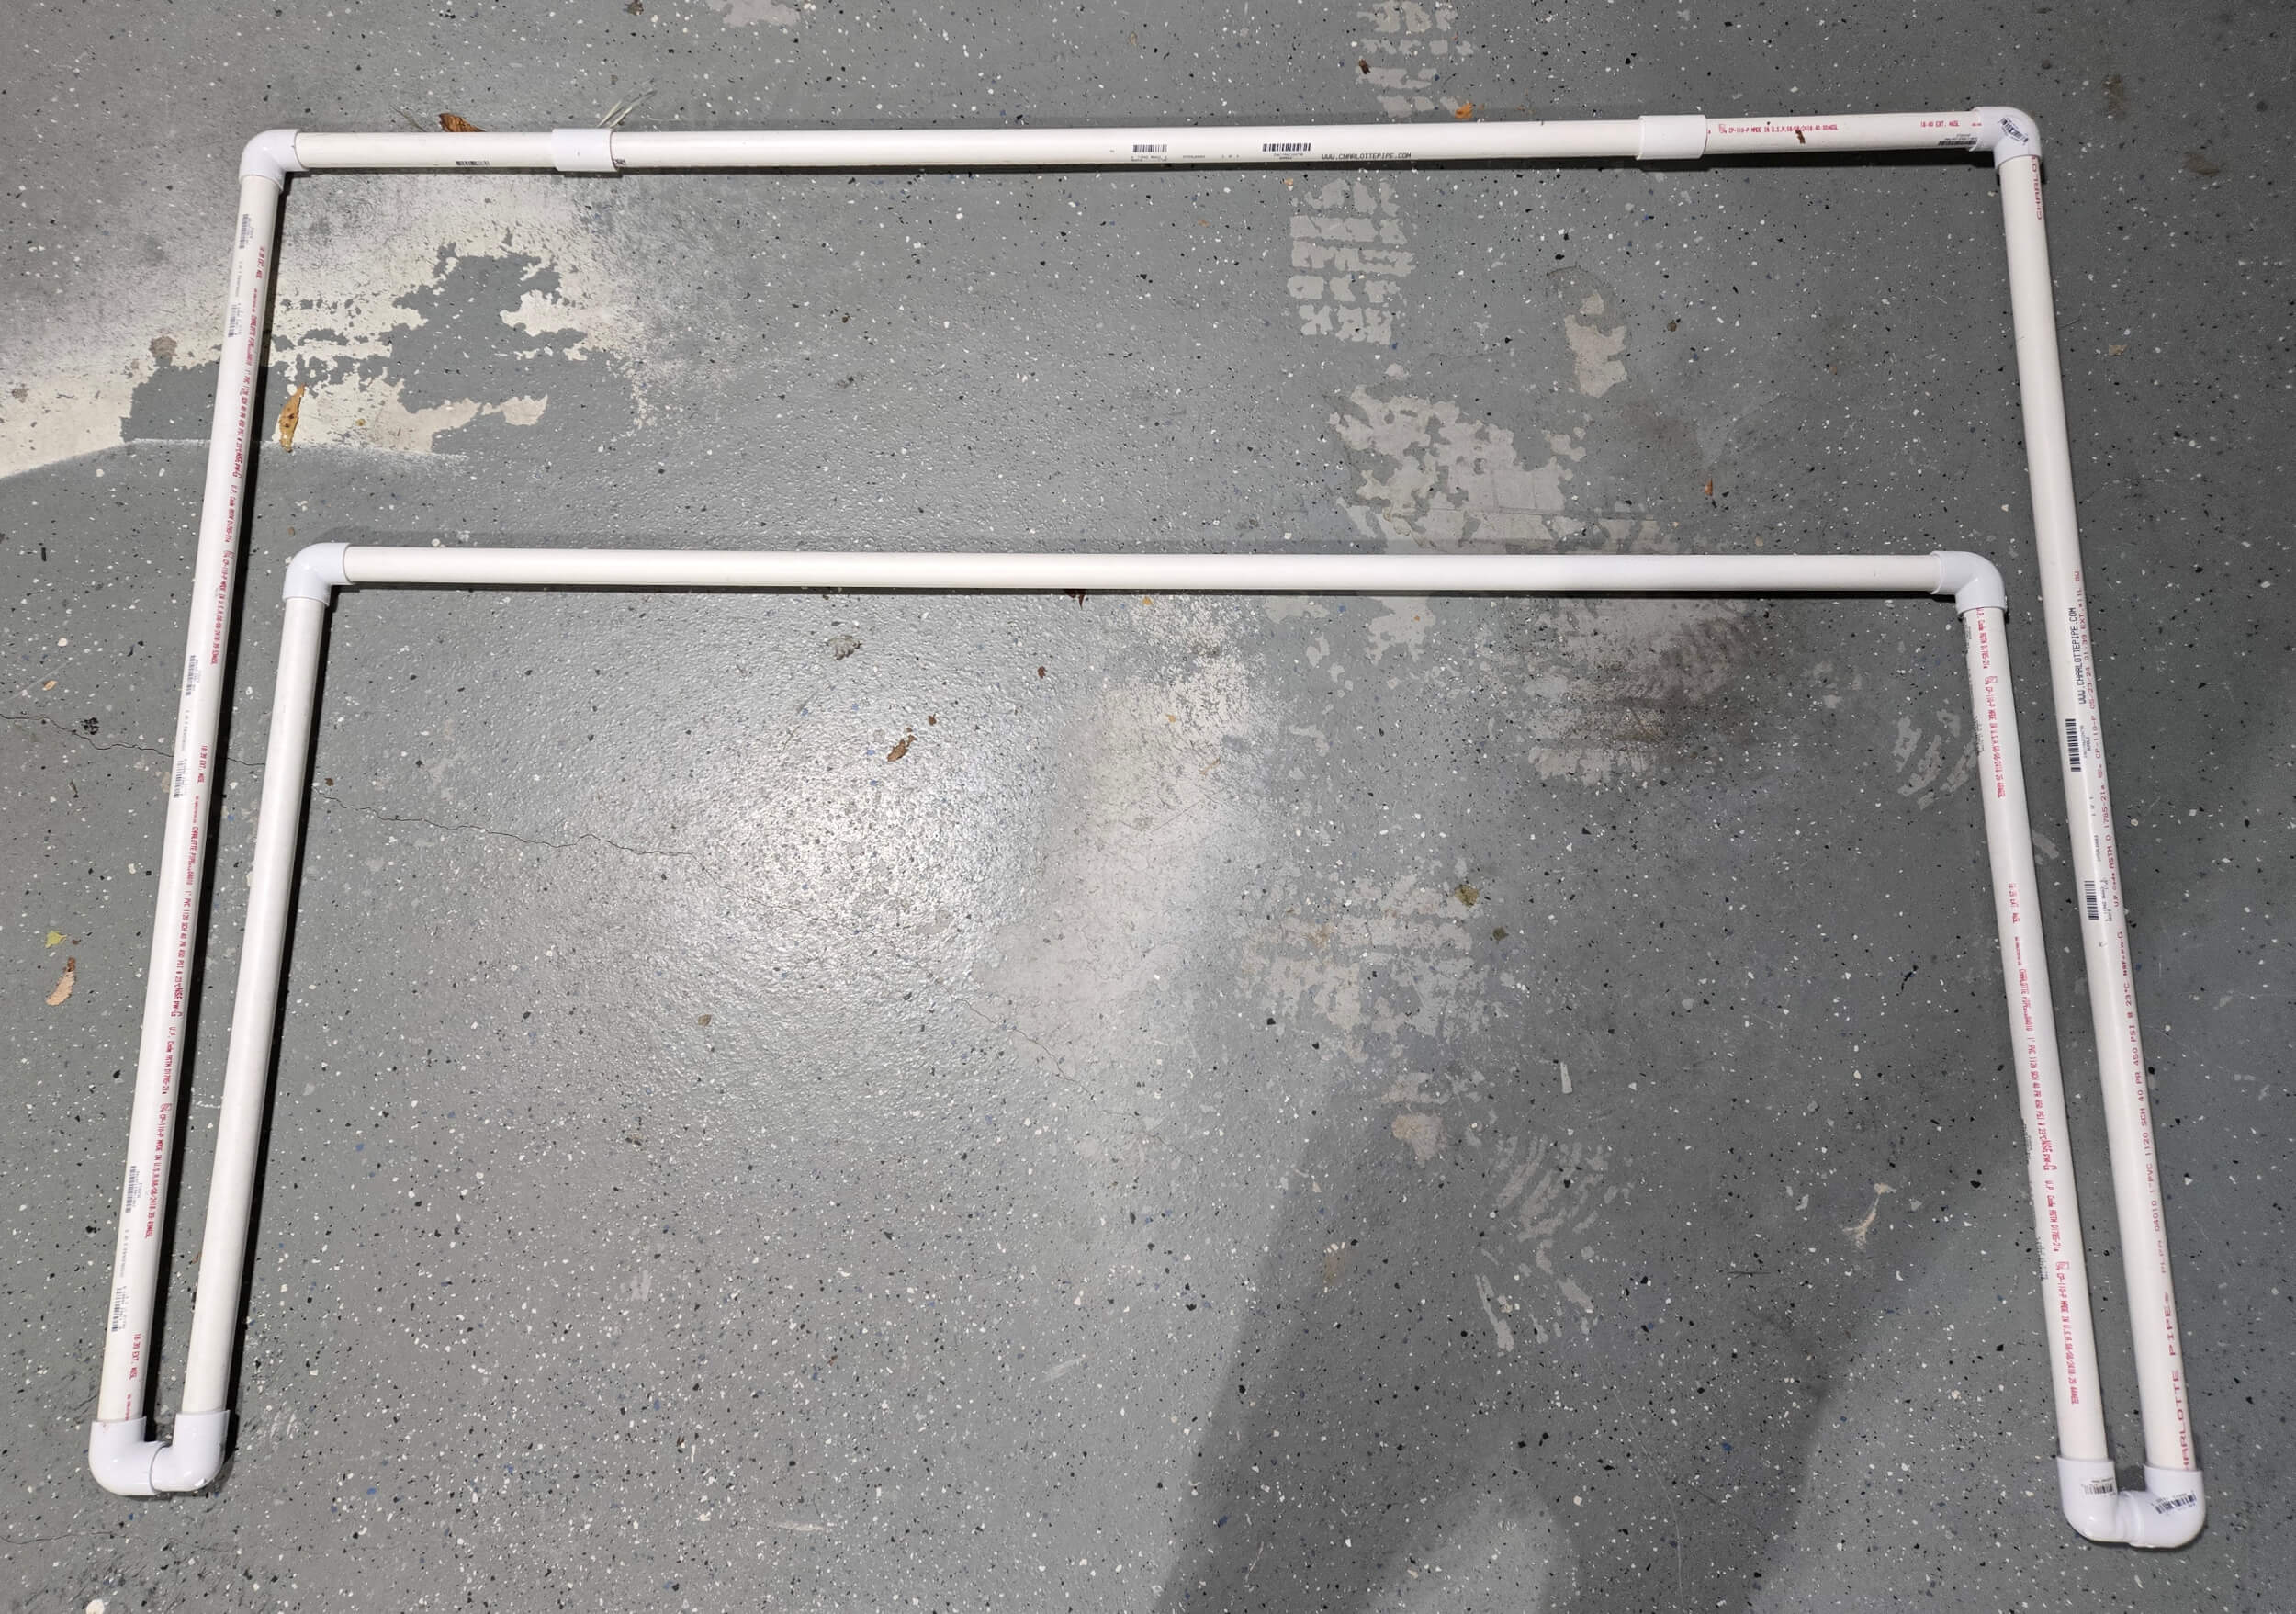
Notice in the image above how the smaller n-shaped section fits in the larger one. This small n-shaped section will act as the goal's base.
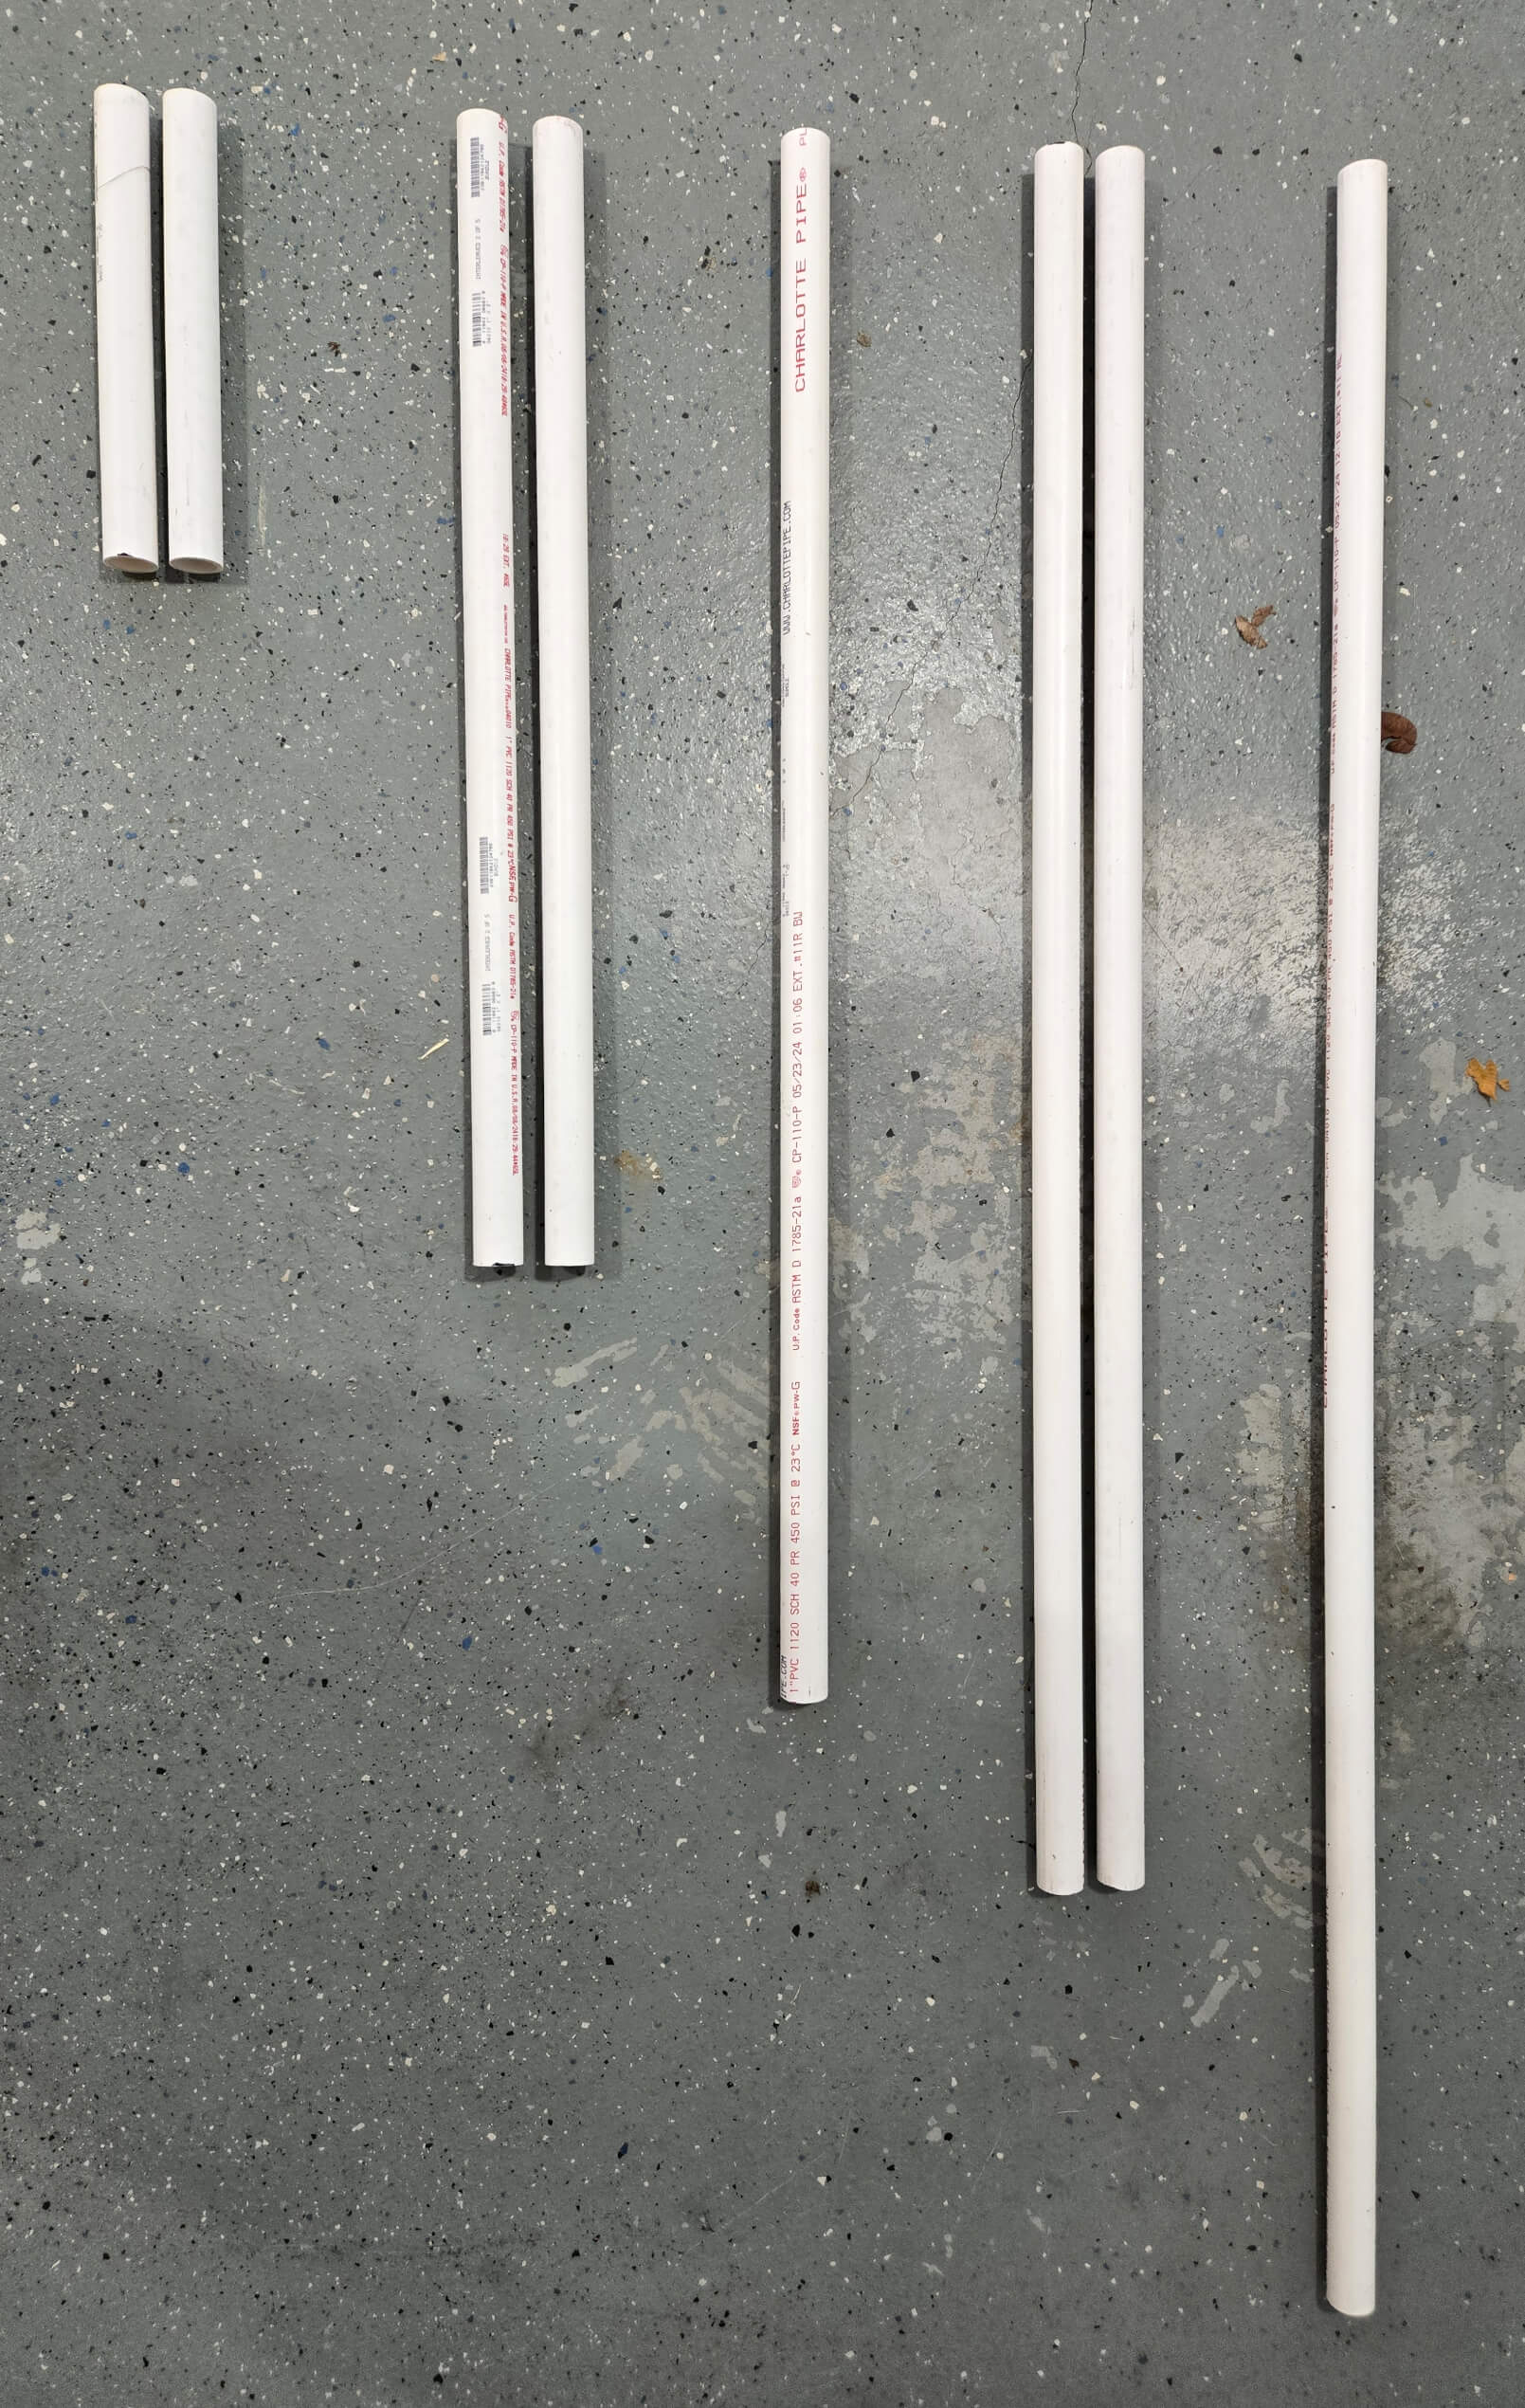
Now to the cuts. This project is an opportunity to think ahead and plan out your cuts to maximize usage of material (and avoid having to buy more than called for in the Supplies Needed section above). Inevitably, we will have some scrap material leftover (namely two 1.5' long pieces of PVC pipe). I recommend reading through this section once before making any cuts.
1. Cut two of the 5' PVC pipes in half, resulting in four 2.5' long pipes.
2. Cut 1' from four of the 5' PVC pipes, resulting in four 4' long pipes and four 1' long pipes.
3. Cut 1.5' from two of the 5' PVC pipes, resulting in two 3.5' long pipes and two 1.5' long pipes.
Those should be the only cuts you need to make.
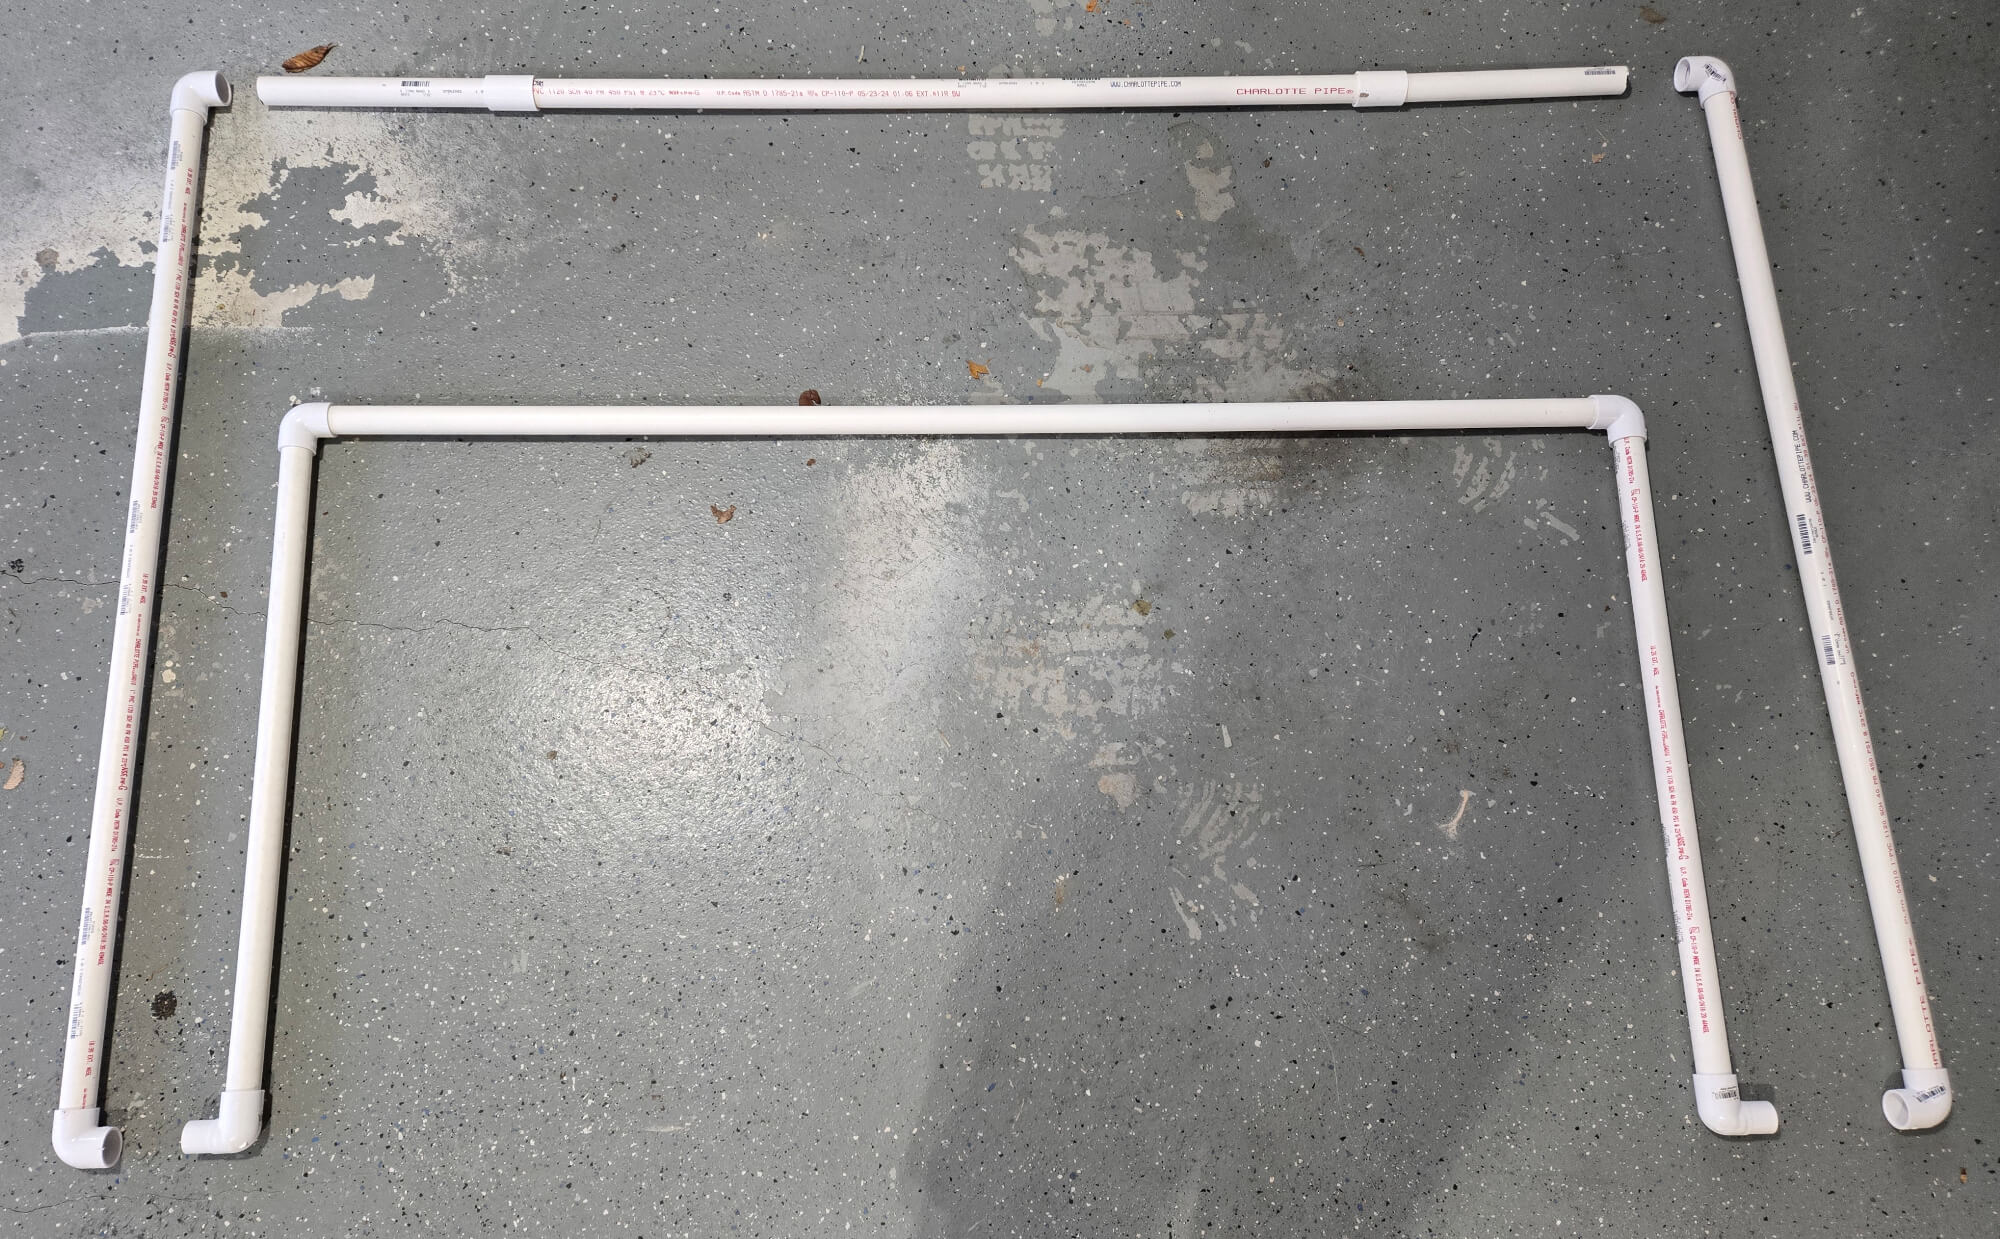
With that, you should have two sets of the following PVC piping:

Section 2: Goal Assembly
We'll be using the PVC glue to attach pipes to elbows. I highly advise only using PVC pipe glue as other adhesives will not provide a strong bonding between PVC plastic surfaces (believe me I tried using others). PVC glue dries quickly, keep that in mind when assembling. Wear gloves. Avoid touching the glue with your skin, hair or eyes.
Before we assemble, note that this is what a goal should look like when finished with steps 1 through 5 below:

1. Let's start with the inner n shaped section. Take a 5' long PVC pipe (you should have two of these) and glue a 1" - 90 degree elbow to each end. Be careful to make sure the elbows are pointing in the same direction and oriented flush with each other, such that the end of each elbow can simultaneously lay against the ground.
2. Glue a 2.5' long PVC pipe to the other end of each elbow from the previous step. This should result in the following:

3. Glue a 1" - 90 degree street elbow to the opposite end of each 2.5' pipe. In this case the elbows should point in the opposite direction to the elbows attached at the other end. The entire assembly should also be flush with the ground. Refer to the image at the top of this section above.
4. Now let's assemble the pieces of the outer n shaped section. Take a 4' long PVC pipe and glue a 1" - 90 degree elbow to each end. Be careful to make sure the elbows are pointing in the same direction and oriented flush with each other, such that the end of each elbow can simultaneously lay against the ground. Repeat this with the other 4' long pipe and two 1" - 90 degree elbows.
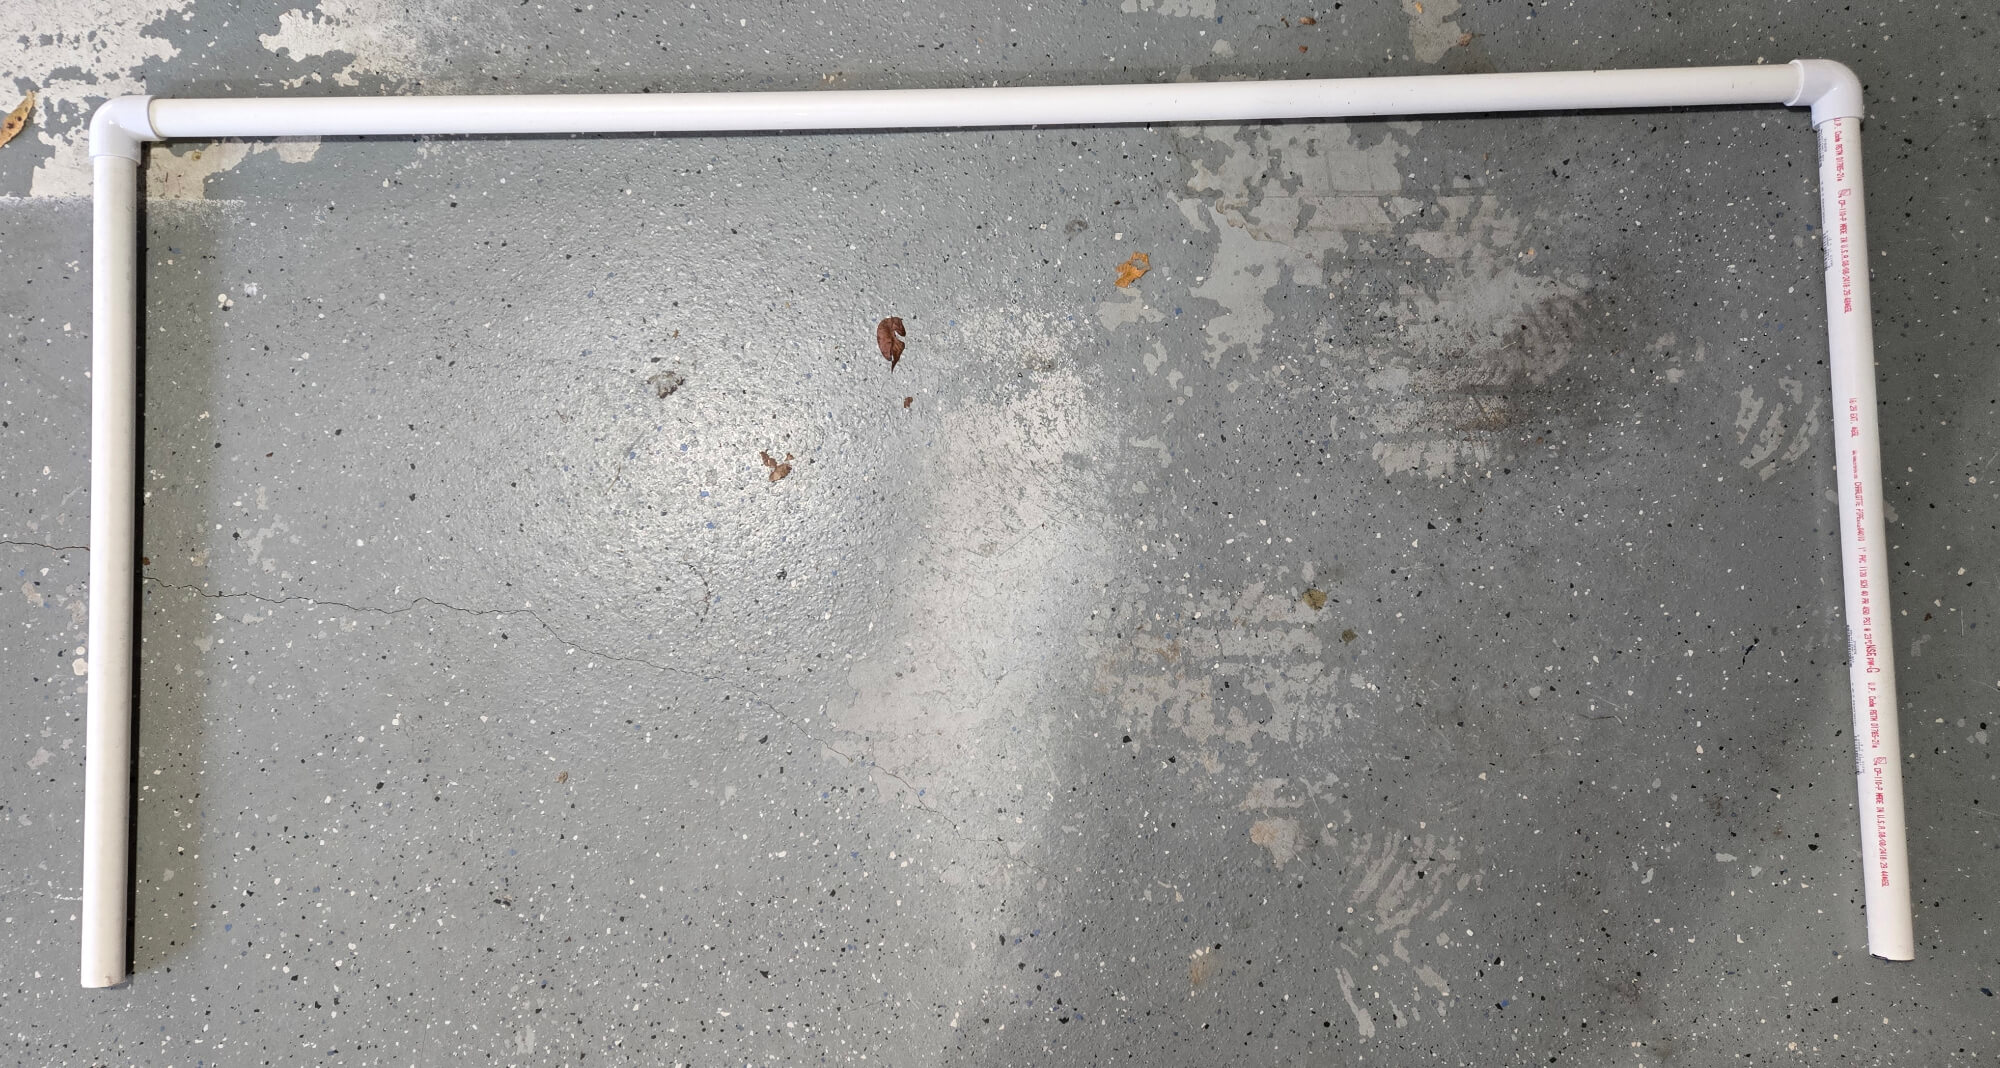
5. We need to build the long horizontal bar that makes the top of the goal. Glue a 1" diameter PVC coupling to each end of a 3.5' long PVC pipe. Then glue a 1' long PVC pipe to the other end of each coupling. This essentially extends the 3.5' pipe by 1' on each side. (You might be thinking, why not use a longer 8' pipe and just cut it to size. That is an option, though with the couplings in place you still have a strong build with the bonus that they provide an anti-sliding mechanism if hanging these on a wall.)
6. With all that done, we are ready to connect the outer n-shaped vertical pieces to the horizontal piece. Lay the horizontal piece you created in step 5 on the ground, then lay each vertical piece you created in step 4 down on each side of the horizontal piece. The vertical pieces' elbows should be pointing toward the horizontal piece. Once laid out this way, glue the vertical pieces to each end of the horizontal piece.
7. You should now have an outer n shape and an inner n shape. Do not glue them together, just attach the outer n shape elbows to each 90 degree street elbow of the inner n shape. The outer n shape elbows should fit over the inner n shape elbows similar to how the couplings fit over the pipe in step 5. This should result in the inner n shape and outer n shape being able to rotate freely about the axis of each other's elbows. Refer to the following images.
Goal n shapes rotated perpendicular to each other:

Goal n shapes rotated parallel to each other:

Repeat the steps in this section for the second goal. If you followed Section 1 carefully, you should already have the PVC cut pipes ready to go for this.
Section 3: Locking
As you rotate the goal pieces, you may notice that the outer n doesn't always stay up or that the pieces detach too easily. To prevent this from being an issue while playing games, you should add locking pins.
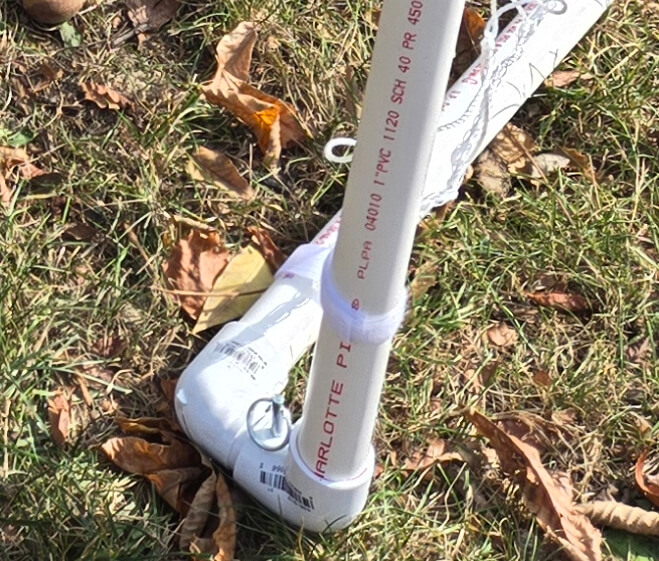
1. You may want a second person to help with this part. With the n shaped pieces attached and the outer piece oriented perpendicular to the inner piece (as they would be when playing), where the pieces attach, drill a 17/64" diameter hole through the top of the outer n's elbow, into the inner n's elbow and out the opposite end of the outer n's elbow. The idea here is to bore a hole for the cotterless hitch pins to slide in place and lock the goal pieces together. Refer to the following image:

2. With the holes bored, slide the cotterless hitch pins into each to lock the goal assembly in place!
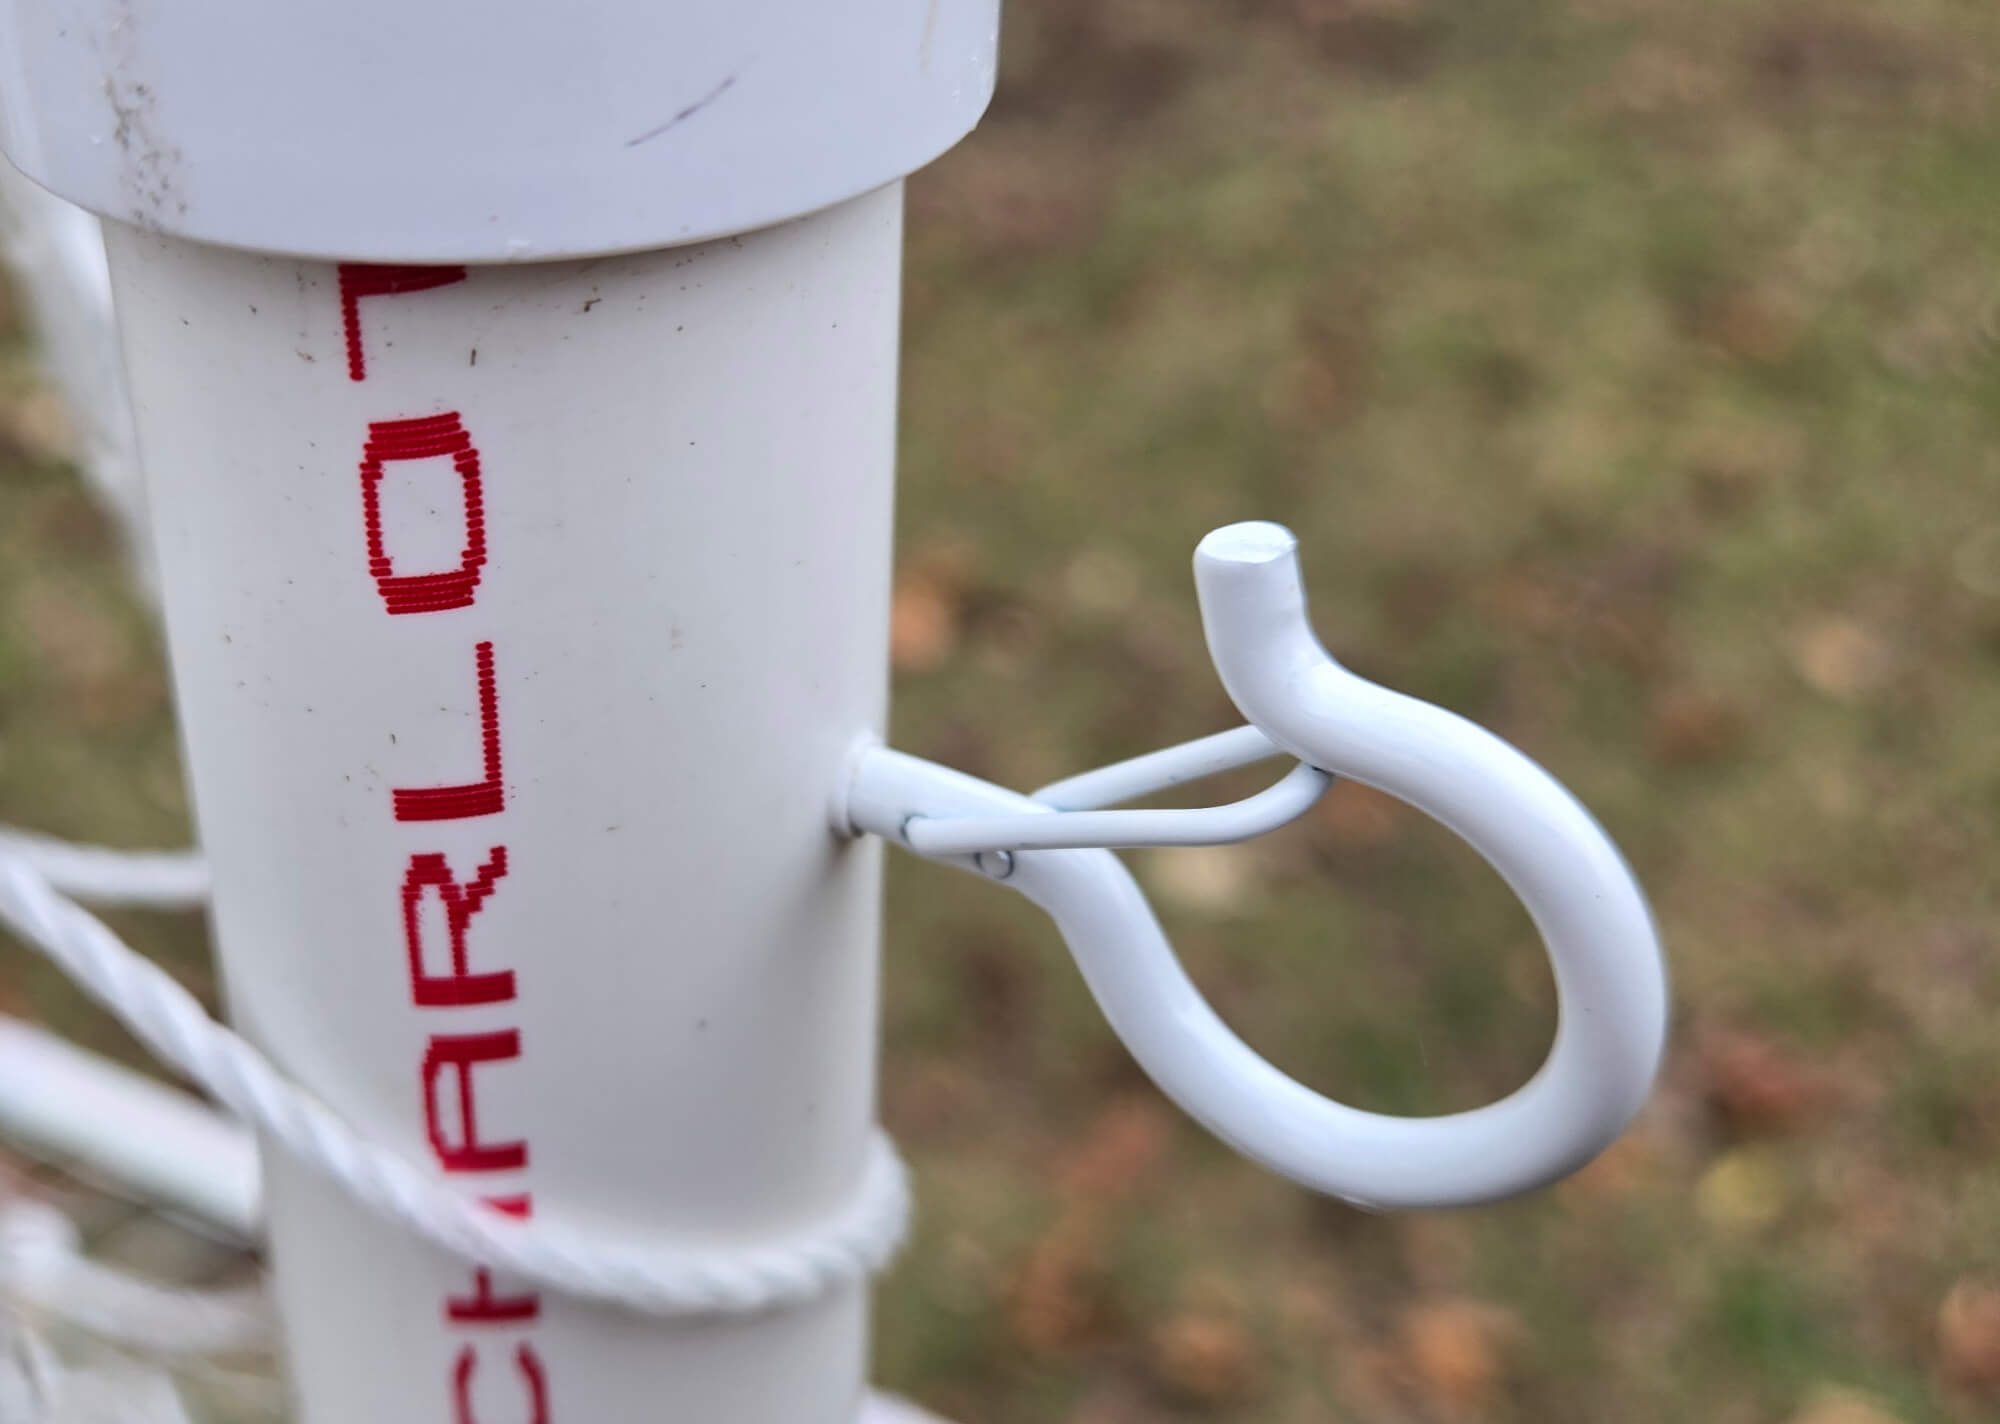
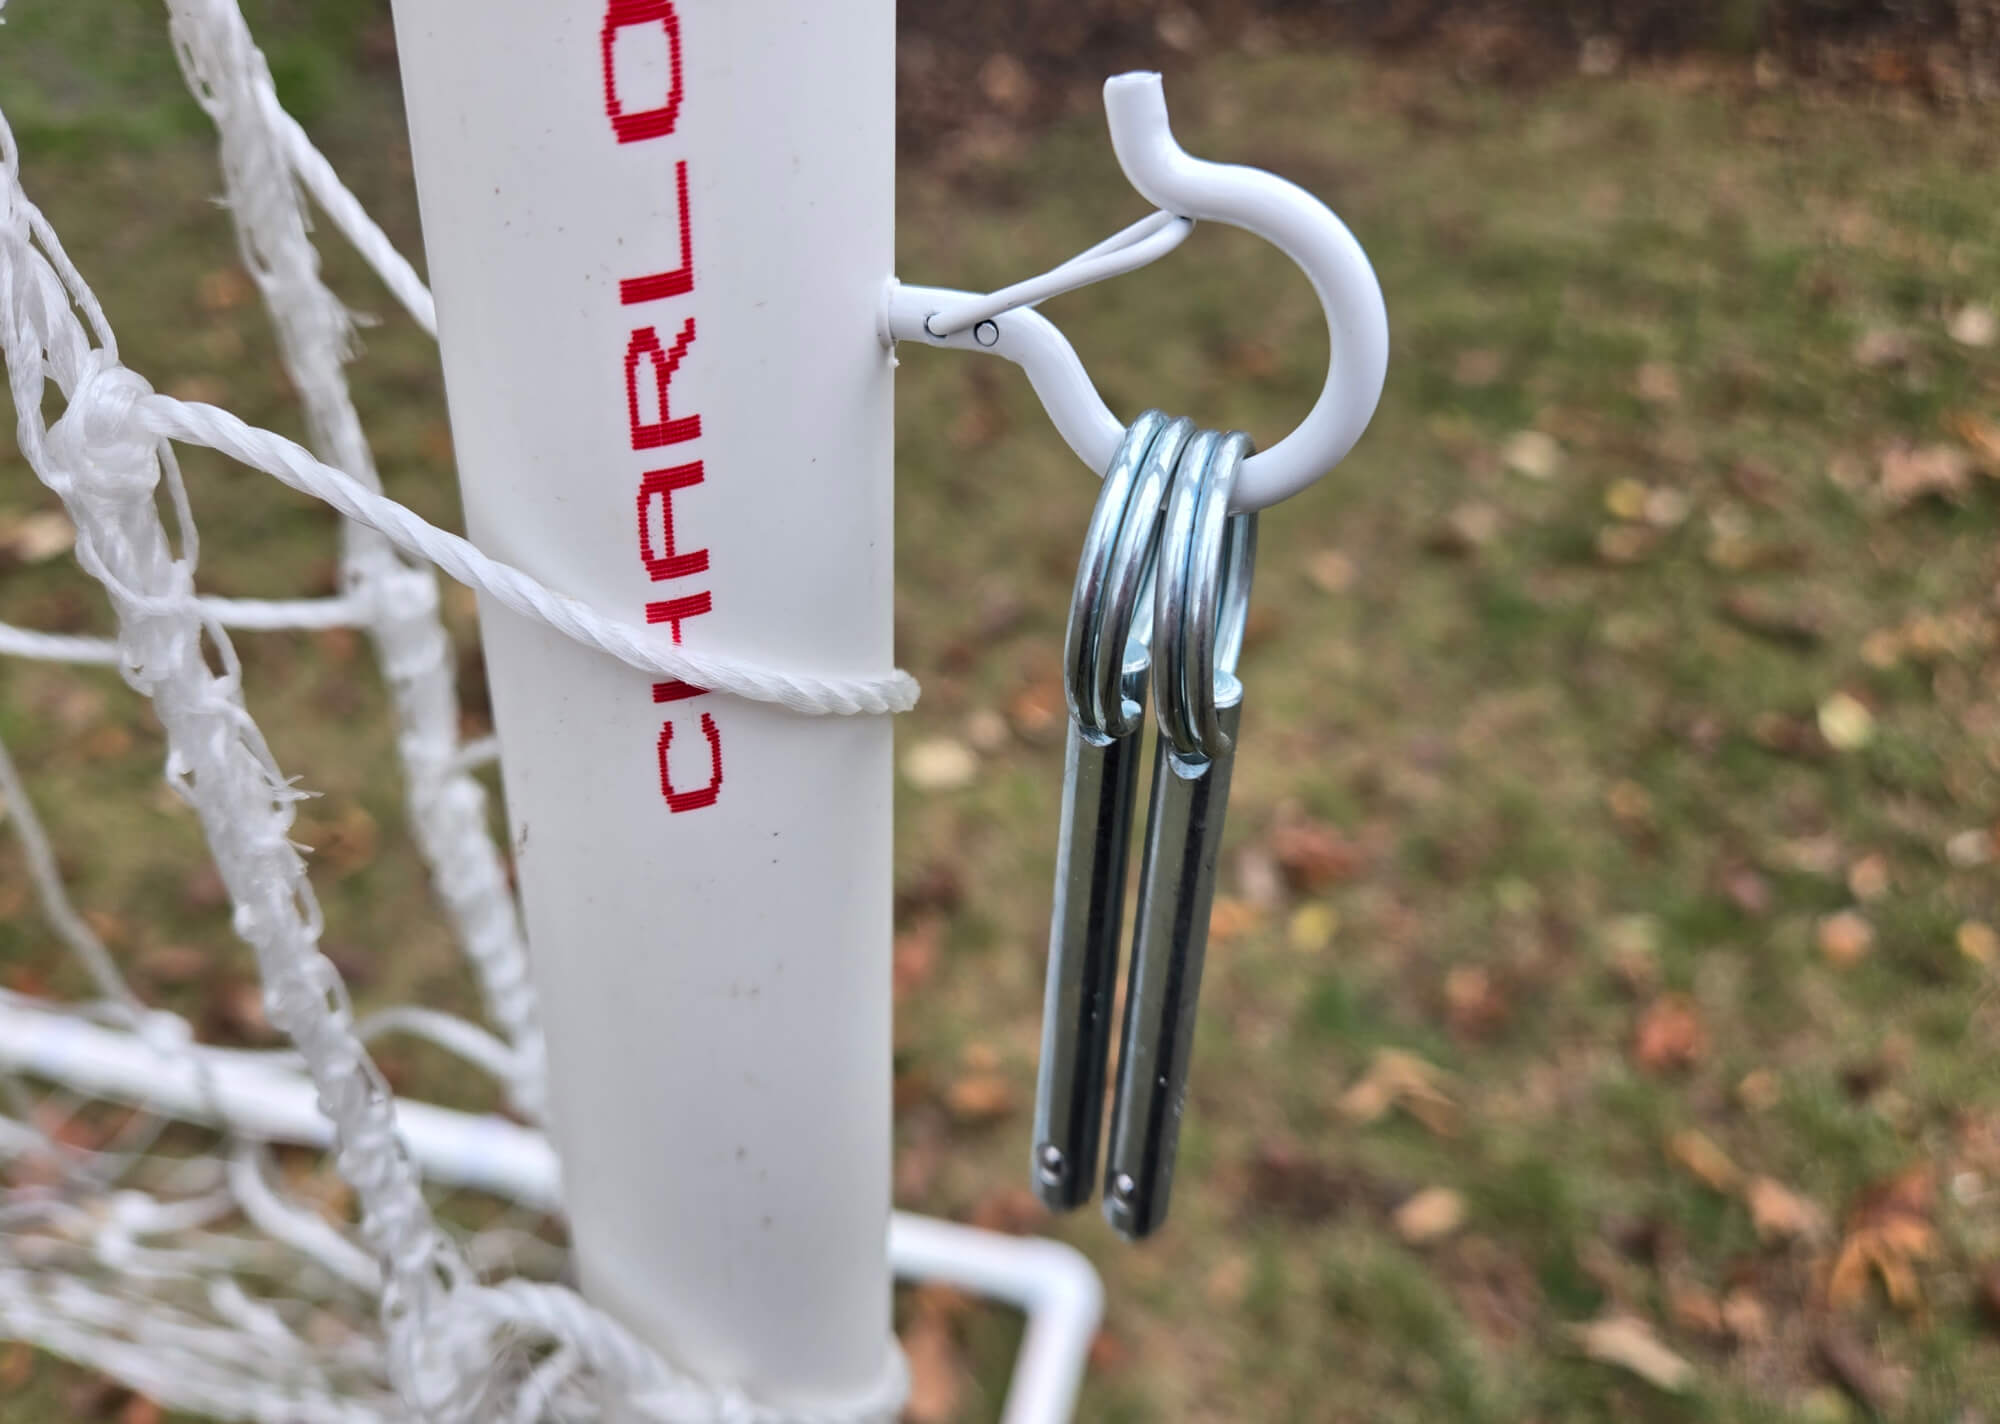
3. One last thing, to keep from misplacing the hitch pins when storing the goal, you can attach a ceiling hook to the side of the goal, and put the pins inside it. Drill ~1/8" hole in the side of the goal and then screw in the hook. Refer to the following images:


Repeat this section for your second goal.
Section 4: Installing the net
With the goal assembled and locked in place from the previous section, you can start attaching the netting. If you are using the net from the Supplies Needed section above, it should easily attach to the pipe via the provided velcro straps. The net will stretch a bit when attached, this is normal. When attaching, I recommend applying a velcro strap at every third square of netting to make sure there are no gaps for a ball to fly through.
Repeat net installation for your second goal.
Section 5: Storage
This section is optional but recommended. To store your new collapsible soccer goals, you can hang them from the garage storage hooks.
You now have your own custom made soccer goals (which could also be used for hockey). Now go play a game with your kids, friends or neighbors and thanks for reading!
| Item | Amount Needed | Where to Buy |
|---|---|---|
| 1" diameter PVC pipe (5' long) | 10 | Menards |
| 1" diameter PVC coupling | 4 | Amazon |
| 1" diameter PVC - 90 degree elbow | 12 | Menards |
| 1" diameter PVC - 90 degree street elbow | 4 | Menards |
| PVC Glue | 1 | Amazon |
| 1/4" x 1 and 3/4" cotterless hitch pins | 4 | Menards |
| Ceiling Hooks | 1 | Amazon |
| 17/64" Drill bit | 1 | Amazon |
| Garage Storage Hooks (optional) | 1 | Amazon |
